The history of the Linux operating system naturally began with the creation of the Unix operating system. At the end of the 60s, the Multics project was completed, on which employees of General Electrics, AT & T Bell Laboratories and the Massachusetts Institute worked. The result of this project was the eponymous operating system. The Multics operating system was multitasking, highly efficient at the time file system, and also provided users with a relatively user-friendly interface.
In 1969, Ken Thompson developed the Unix operating system, which was based on the principles followed by the developers of the Multics operating system. The new operating system, unlike Multics, could run on a minicomputer. However, from the very beginning new system was multi-tasking and multi-user.
The Unix operating system soon became so popular that Ken Thompson and Dennis Ritchie decided to rewrite the system's code in C. Prior to that, the operating system had been written in assembler. This provided great portability of the operating system - the Unix operating system could be ported to almost any platform without reprogramming. It was only necessary to modify a small part of the kernel, written in assembler.
Over time, the Unix operating system became a standard software product distributed by many companies, including IBM and Novell.
In 1972, the mass sale of licenses for this operating system to various users began. Since then, the Unix operating system has unofficially become a commercial software product.
UC Berkeley has also purchased a Unix license. The specialists of this university made many changes, which soon became standard. In 1975, the University of California released their version of Unix - Berkeley Software Distribution(BSD). This operating system became the main competitor of the operating system developed by AT&T.
Gradually, other companies, following the example of the University of California, began to release their own versions of Unix. For example, in 1980, Microsoft released the Xenix OS. True, this operating system could not compete with Unix, since it did not support multi-user mode, but was intended for a single user.
In 1982, AT&T released Unix System3, the first official commercial version of Unix. The next version was Unix System V. In addition to various innovations, this version was distinguished by serious technical support.
The BSD Unix developers did not sit idly by either, and in 1983 the University of California released Unix BSD 4.2. This operating system contained quite powerful tools for managing memory, files, printing, and it also implemented the TCP / IP protocol, which is now used in full on the Internet. Many manufacturers have chosen Unix BSD 4.2.
The widespread use of various versions of Unix led to the need to create a standard for this operating system. In the mid-1980s, two major standards emerged - Unix System V and BSD Unix. AT&T Labs licensed development of Unix System V to Unix System Labs. In 1991, this company introduced the System V 4 operating system, which implemented almost all the features of the System V 3, BSD 4.2, and Xenix operating systems.
Four companies, including IBM and Hewlett-Packard, created the Open Software Foundation (OSF). The purpose of this foundation was to create their own version of Unix. As a result, another standard appeared - OSF Unix.
In 1993, AT&T sold its Unix rights to Novell. Following this, versions of Novell's Unix were released that were based on System V 4. The new operating system was named UnixWare.
In parallel with the development of operating systems, graphical interfaces have evolved. Until the early 90s, two main graphical user interfaces emerged: Motiff and OpenLook. Subsequently, these two interfaces were defined into one, called the Common Desktop Environment (CDE).
The Unix operating system from the very beginning was demanding on the hardware resources of the computer. For normal operation, a fairly powerful workstation was needed. Some versions were designed only for certain platforms. For example, SunOS was for Sun workstations only, AIX for IBM workstations, and AUX for Macintosh computers.
Linux is based on the Minix operating system developed by Andrew Tannebaum. Minix OS was a small UNIX system, which was not even intended for real use, but to demonstrate the capabilities of the Unix system. Inspired by the idea of creating his own Minix, Linus Torvalds began work on the Linux operating system. The Linux OS was first discussed at the USENET comp.os.minix conference.
On October 5th, 1991, Linus Torvalds announced the release of the first "official" version of Linux 0.02. Then only the bash interpreter (Bourne Again Shell) and gcc (GNU C compiler) worked on this operating system. The main attention was paid to the creation of the core. No issues of user support, replication and documentation were not even discussed.
Gradually, thousands of other developers from all over the world joined the development of the kernel and other software. To date, Linux is considered the only example of such a large-scale collaboration of programmers. Linux today is a full-fledged operating system of the UNIX family that supports a wide range of hardware, the TCP / IP protocol, a graphical user interface, which allows it to be used not only as a server, but also as a highly productive workstation.
From the beginning, Linux has been designed to personal computers on the Intel platform. Over time, some companies began to develop versions of Linux for their platform, such as Sun Microsystems. Many companies, including domestic ones, have developed their own versions of Linux.
After reading a lot of books on Linux, I noticed that almost all of them, especially in the books of foreign authors, have a section "Where to get Linux?". There will be no such section in this book thanks to the Linux operating system itself.
The ubiquity of this operating system has led to the fact that a Linux distribution can be bought at almost any store that sells CDs, and even plastic bags with a picture of a penguin and the inscription "Linux" appeared on the market.
1.3. Why Linux?
Each operating system has its own “calling”. The Windows NT Server operating system is the preferred operating system for Microsoft Networks workgroups. Novell Netware looks better as a file server and print server. The UNIX OS was originally developed as an Internet server. Tools for working with the Network are built directly into the kernel of this operating system, and everything you need software for organizing a server is included in the distribution kit. A UNIX system handles all network protocols (especially TCP/IP) better than any other operating system for the Intel platform. All the qualities listed above also apply to the Linux OS.
By installing Linux, you also get many other benefits. First, the kernel sources become available to you and you can modify the system as you need. This can not be found in every operating system, especially in the Microsoft OS family. Have you seen the source code anywhere? Windows Notepad? For example, I really miss the text replacement function in this editor. To solve this problem, I wrote my own editor, in which I implemented this function. What if I need to make a small change in the kernel? I'm not going to completely rewrite Windows? Or expect new version a "monster" that devours system resources, in which there is only one function I need?
Secondly, Linux OS is absolutely free. Of course, there are commercial versions of Linux, but in this case, you pay for some additional features and technical support. Once you buy a Linux CD, you can install this operating system on an unlimited number of computers. You don't have to pay anything extra, you don't have to pay for each additional processor - Linux supports SMP and it's also free. In addition, since Linux is a UNIX-like system, its distribution includes all the software needed to set up a server.
Recently, there has been a trend to release multi-disc distributions or distributions containing software separately for the workstation and separately for the server. In this case, you only need to buy the first and possibly the second CD. If distributions are divided into "server" and "workstation" categories, as the developers of ASP Linux did, buy the server version, of course.
In any case, the cost of all software will be several dollars. I will not compare the cost of building a Linux server with the cost of a similar server on the Microsoft platform. You can do it yourself on the Microsoft website. Also, if you need a Windows NT(2000) Server, you can easily replace it with a Linux-based SMB server. By the way, chapter 9 of this book is devoted to the solution of this issue.
Thirdly, Linux OS is easy to learn and maintain. To facilitate the transition from Windows NT(2000) Server, where you mainly use a graphical interface to configure services, many graphical configurators have been created. These configurators greatly simplify the system setup process. For better understanding, I tried to present the material in the book without resorting to the help of configurators. Knowing the location and format system files, you can configure almost any distribution kit that does not have graphical configurators or they are not available. As for the configurators themselves, working with them is intuitive and, if you understand the essence of the matter, should not cause difficulties.
Fourth, the Linux operating system is not as demanding on system resources as other operating systems. For example, to organize an Internet server, an old computer with an Intel 80486DX processor and 32 megabytes of RAM is enough for you. Of course, system requirements depend on the kernel version and the distribution you choose. You can set up a server on the above machine using Red Hat Linux version 5.2. It may not meet all safety requirements, but with correct setting this distribution will suit you. Indeed, you are not going to build an electronic payment system based on Intel processor 80486.
Linux OS, like most software for this operating system, is distributed under the GPL license. In a nutshell, GPL means that you are free to use and distribute GPL-licensed software, and use it to create other free software.
1.4. Scope of Linux servers
The Linux operating system is becoming more and more popular. Currently, Linux is increasingly seen installed on the computers of home users. This is facilitated by a friendly interface, reliability and speed of Linux OS. Of course, Microsoft's licensing policy also played a certain role - it is cheaper for a home user to buy Linux than to buy new computer for $400 and Windows 98 for $60.
In this chapter, we will not discuss the advantages of Linux as a desktop system, but will talk about Linux servers. Microsoft Windows NT Server (and Windows 2000 Server), in my opinion, is more suitable as a server for a small working group. By their own Windows settings NT(2000) Server is quite reliable and fast, but still lacks scalability despite Microsoft's claims about its servers.
To understand why it is advisable to use Linux as an Internet server, let's look at a little history. Let's first turn to those distant 80s of the last century, when there were "calculators" running DOS in the offices: an unpleasant interface, single-tasking, lack of multimedia support, and the term "network" meant connecting two computers via a serial or parallel port using Norton Commander. In the early 90s (namely, in 1993), the situation changed somewhat: Microsoft released a working version of the Windows OS - Windows 3.1. What was new in Windows 3.1? Firstly, it is multitasking, and secondly, support for virtual memory, and, of course, a relatively convenient graphical interface. In the operating shell (it is difficult to call it a system) Windows 3.1 did not implement network functions. Network support appeared in the next edition of Windows - Windows for Workgroups.
In 1995, an operating room appeared system Windows 95, presented by Microsoft, is perhaps the most advanced system. However, this operating system was also not networked, but only with support network functions. The fundamental difference from Windows 3.1 was the 32-bit nature of this system. Microsoft is releasing a true network operating system next year, Windows NT 4 Server. In this system, the TCP / IP protocol was implemented (and functioned normally), which is the Internet standard, but it was not the default protocol, but was installed optionally, that is, at the request of the administrator.
In 2000, we witnessed the emergence of a new network server operating system from Microsoft - Windows 2000 Server. Among other advantages of Windows 2000 compared to Windows NT 4 Server, it is worth noting the Active Directory directory management service, support for the TCP / IP protocol by default, as well as tools for quota (limiting disk space).
Everything seems just fine, however, if you look in more detail, then in 2000 Microsoft achieved what already existed in Unix back in the 80s. I'll try to explain everything now. Since its inception (since 1979), the Unix operating system has been:
1. 32-bit.
2. Multitasking.
3. Multiplayer, which means network.
Engineering achievements that we only learned about in 1993 - multitasking and virtual memory support - were implemented in Unix back in 1979. In addition, the TCP / IP protocol is included in the system kernel by default, and this says a lot. At least about the fact that thanks to the support of the TCP / IP protocol by the kernel, high performance of programs using this protocol is achieved. There is even an expression: "Unix is built for the web, like a bird is for flight."
Quoting, which appeared in Windows quite recently, is also not surprising for real Unixoids. And the Active Directory service can be replaced with Network Information Service.
Maybe this is not a full-fledged replacement, but given that this service has already entered its second decade ...
It should not be thought that Unix has always been an unbearable monster with a DOS-like interface. The X Window graphics system has been around for a long time and there are many Linux applications that use the GUI. And thanks to graphical environments such as KDE and Gnome, Linux has become even friendlier. But in our case, the graphical interface is not so essential - we will configure the server with you. For example, Novell initially abandoned the use of a graphical interface in its operating system in order not to use additional system resources. And since Linux is a direct descendant of Unix, it has all the qualities described above. In addition, the Linux operating system is completely free - I already mentioned this a little earlier. If you consider yourself a serious administrator, then the choice between the reliability, performance of Linux and the friendly interface of Windows NT (2000) Server is, I think, an obvious one.
Another important aspect is the documentation of the system. Without exception, all Unix-like systems are very well documented, and therefore all the necessary information for setting up a server is essentially already on your computer. My task here is to teach you how to use this documentation, as well as to consider its application in practice.
So, what does it mean that we, using software from Microsoft, were twenty years behind in development, used, to put it mildly, not entirely reliable software and still paid money for it? The guys from Microsoft's marketing department should be given a monument for their professional qualities.
Where are Linux servers used? First of all, these are Internet servers. You may ask why Linux (Unix)? Why not some other operating system like Windows NT (2000)? Let's think together. In the early 60s, by order of the US Department of Defense, the Arpanet network was created, which later served as a prototype for creating the Internet. How can you use an NT server as an Internet server if it was released in 1996? The Internet has been around since the 70s. And it existed precisely thanks to Unix systems. So why not use your native operating system to provide Internet services? In fact, you won’t buy parts from Hond for your BMW? In the case of the Internet, this is an equivalent comparison: Linux (Unix) for the Internet is an absolutely native system. The use of other systems is permissible and may seem more convenient to someone, but only at that level, as if you would really insert a part from a car of another good brand into a car of one good brand.Both brands of cars are good, but the parts of one of them are not intended for the other.For reference: the website of the President of Russia was opened relatively recently So this site, which is subject to increased requirements for reliability, security and performance, is based precisely on the basis of Red Hat Linux.
Many government and financial organizations around the world, such as the German Ministry of Foreign Affairs, use Linux (SuSE Linux), and the German Dresdner Bank, together with the American company CollabNet, announced a new banking information system built on Linux based. And here, as you can see, it's not about money - to pay or not to pay for Linux, but about organizations taking care of their information security and the reliability of their servers. How to explain to the client that his account "will be closed" because "the program performed an illegal operation"? Even the created error log will not help here.
The second branch of application of Linux servers is the creation of clusters for parallel computing. By definition, a cluster is a number of computers connected together to work together to solve a single task. Combining computers is usually done using a high-speed network. To date, special software has been created that allows you to assemble a cluster even at home, for example, PVM (Parallel Virtual Machine). We will not dwell on this issue in more detail, since parallel computing and computer modelling is a topic for another book.
In addition to all of the above, there are many more areas where Linux servers are used: Web servers, PTP servers, mailers, gateways, X servers, you can even emulate an NT domain using the Samba package. All of these questions will be addressed in this book.
1.5. How this book is organized
“Moscow was not built right away,” therefore, we will configure our server from a small one, and then we will gradually increase it. It is necessary to make a reservation right away that, perhaps, when setting up your server, you will not need to read all the chapters. For example, if you want to set up a mailer, then you do not need to deal with setting up a server for remote access. Although it is still worth reading the whole book - for general development.
In second chapter The installation of the Linux operating system is considered in sufficient detail using the Linux Mandrake and Linux Red Hat distributions as an example. This chapter also covers the post-installation setup of the desktop version of Linux so far.
AT third and fourth chapters discusses the general principles of working with the Linux operating system. The third chapter discusses Accounts, and in the fourth - work with the Linux file system. I strongly advise you to deal with the access rights to files and directories. Setting up SCSI disks and RAID arrays is of great importance for server organization. Pay special attention to creating backups, unless you're setting up a "serious" Linux server, of course.
AT fifth chapter covers the basics of process management in Linux. This chapter is more theoretical than practical, but what is practice without theory?
sixth chapter is devoted to the Russification of the distribution. Since modern distributions have practically no problems with Russification, you can read this chapter “diagonally” without much remorse.
AT seventh chapter considered basic setup networks - installation of a network card, setting up the TCP / IP protocol, connecting to the Internet via modem and leased lines. Particular attention is paid to setting up an ADSL connection, which is now becoming more widespread.
AT eighth chapter discusses the direct configuration of the server. Superservers inetd and xinetd are considered. The former was used in older distributions, but you may still see it, and xinetd is the standard for modern Linux servers. Getting and giving "secure" remote access with ssh, configuring Dynamic Host Configuration Protocol - DHCP, NFS, routing, traffic counting, ht:/Dig search server - you can read about all of this in Chapter Eight. And that's not all: the last paragraphs in the eighth chapter describe the settings for the Socks5 proxy server, as well as the LIDS intrusion detection and protection system. Of particular interest is the MRTG traffic count program, also described in this chapter.
Ninth chapter is dedicated to setting up the popular samba package, which is used to access Windows network resources. With this package, you will also be able to set up your Linux server to provide resources to users Windows networks, which will not even notice that instead of a Windows server you have a Linux server installed.
AT tenth chapter consider setting up a domain name service - DNS. To set up almost any Internet server, you will have to configure this service. I paid a little attention to the security features that the DNS server provides, such as transferring the zone only to certain hosts. The configuration of the primary and secondary DNS servers, updating configuration files, and creating a caching DNS server are described in detail.
The popular file transfer service - FTP - is covered in eleventh chapter. This chapter discusses the wu-ftpd and ProFTPD servers, as well as the organization of virtual ftp nodes.
The Apache web server, which has almost become the standard on the Internet, is discussed in chapter twelfth. Considered: basic setup, user directories, setup virtual servers, installing and configuring SSL, and at the end of the chapter is a complete listing of the configuration file.
Thirteenth chapter is devoted to setting up POP and SMTP services, as well as SMTP authentication. For the uninitiated: SMTP is the protocol for sending messages, while POP is for receiving them. In addition, a description is given of creating your own mailing service. At the end of the chapter it explains how to set up popular clients Email The Bat!, Netscape Messenger, Outlook Express.
Security when working on the Internet - that's the main topic fourteenth chapter"Bastions", which deals with packet filtering. It describes how to prevent unwanted guests from accessing your internal network, and how to prevent users from accessing unwanted network resources.
AT fifteenth chapter the setup of the SQUID proxy server, channel separation, traffic accounting programs are considered in detail. Do you want to achieve a significant increase in your web experience or are you tired of wasting your precious time and money on downloading banner ads? Then this chapter is for you.
small sixteenth chapter is dedicated to setting up a small, but with great capabilities, database server MySQL data. First, the server setup is described, and then the MySQL client. The last paragraph of the chapter describes the settings for the Apache+PHP+MySQL bundle.
It is of great importance for the whole book seventeenth chapter- "Practical examples". It discusses setting up an Internet access gateway and a dial-up server, and provides an example of how to set up a "call back". This chapter is like the culmination of the whole book. Throughout the previous chapters, we accumulate knowledge, and then set up two real servers(or two in one), plus setting up useful technology. Examples of configuration files given in Chap. 17 are fully operational. If something does not work for you, especially when setting up a remote access server, then your modems are simply not configured correctly. Please read your modem manual for proper setup. Configurations for some modems are given in the same chapter.
Optimizing the operation of the Linux operating system kernel and compiling it is discussed in eighteenth chapter. Sometimes it is useful to remove redundant code from the kernel to improve the performance of the entire system. And the core at the same time becomes more compact.
AT nineteenth chapter Here are some useful commands for working with the Linux operating system. These commands are more useful to the user than to the administrator, but the administrator needs to know what the user can do.
Chapter Twenty dedicated to installing, configuring and using the X Window graphics system, as well as the KDE and GNOME windowing environments.
To date, computer clubs have become very widespread and popular. However, it is not a big secret for anyone that the vast majority of them use unlicensed software, including Microsoft products. How to transfer a computer club to a free Linux operating system is dedicated to chapter Under the number twenty one. This chapter also discusses the administration of a computer club (user management, security issues, logging, tracking uptime, etc.), as well as a listing of a simple control module (Louncher "a). Experimenting with it, you can achieve a wide variety of results.A lot of attention in the twenty-first chapter is devoted to describing the settings of Windows games under Linux and the use of a Windows emulator.With the information that you glean in this chapter, you can easily play Quake 2 and 3, Counter Strike, Unreal Tournament , Diablo 2 and many others.
chapter twenty two entirely devoted to anti-virus protection. The setup and use of the best antiviruses under Linux: DrWeb and AVP are considered in detail. Separately, it is written about checking incoming and outgoing mail for viruses.
AT twenty third chapter provides a description of issues that are not so significant as to allocate a separate chapter for each of them, but which are very useful: SATAN port scanner, spam protection, restriction system resources.
The applications show the purpose and location of the system Linux files (Appendix A) and general settings for programs designed to work with the X Window System (Appendix B). It may be very helpful to review my compact Linux kernel in appendix B. In addition to the listing itself, recommendations are given on how to work with it and how to use it. AT annex D Here is a list of the most interesting and useful links (URLs) where you can find a wide variety of information related to the Linux OS. A description of the included CD can be found in the last appendix.
1.6. What servers are there and what are they for?
To complete the picture, consider several different types of servers:
1. Server local network.
3. Remote access server.
You can set up a server of any type with the help of this book.
1.6.1. LAN Server
The LAN server (Fig. 1.1) is a server that provides services to Intranet users. Don't confuse "Intranet" with "Internet". An Intranet is an internal corporate network, usually without access to the Internet.
Imagine a small office network. If you are imaginative, you can even imagine a large local area network located in a multi-story building. In such a network, the server can perform a variety of functions, such as being a print server or a file server. Normally, on internal networks, servers perform only these functions. Depending on the type of activity of the organization in which the server is installed, it is quite often used as a database server.
For the database server and the file server, it is generally desirable to allocate one computer each, because if the load on the database server is quite large, and this is the case in most cases, then this will reduce the performance of the file server, and vice versa. If server performance is low, then, as always, the user suffers. In turn, the "suffering" of users will be reflected in no one else but you - the administrator.
Rice. 1.1. LAN Server
On fig. 1.1 shows a small local network without Internet access. All workstations and the server itself are connected to the central device of the network - the hub. Instead of a hub, you can use (and preferably use) a switch (switch). Unlike a switch, a hub does not know which port a particular computer is connected to, and when one of the computers transmits a data packet, the hub repeats it to all its ports. Each computer on the network receives this packet and checks for the presence of its IP address in its header. If the destination IP address does not match the IP address of the computer that received the packet, then the packet is simply ignored. The switch, on the other hand, forwards the packet only to the port to which the destination is connected. Due to this, in addition to improving security, the load on the network is reduced. This is how data packets are delivered from source to destination.
In addition to a hub or switch, in most cases you do not need any other network equipment, with the exception of network cards. In the case of a long network, repeaters are used, which, passing the signal through themselves, amplify it. At its core, a repeater is a simple hub. The hub, minus some service functions, is a multiport repeater.
About choice network adapter and other "iron" for the server is written in paragraph 7.6 "A few words before setting up the server." Here you need to say a few words about the choice of the switch. Previously, the main stumbling block for the use of switches was their high cost. Now you can buy quite productive switches for relatively little money. For a home or small office, the LUCENT CAJUN P115G switch can be recommended. It has 24 10/100Mbps ports as well as 1 100FX fiber optic port. According to the latest data, its cost is about 230 US dollars.
More expensive and more productive option for 48 ports 10/100 Mbit LUCENT-CAJUN P334T. This switch has an internal 8Gb bus as well as a modular design that allows you to install additional modules. The cost of the R334T model is about $900. Installing additional 100FX fiber optic ports will increase the cost by approximately $150-250 depending on the number of ports.
1.6.2. Gateway - server for Internet access
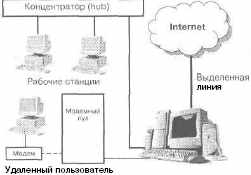
In the event that your internal network needs access to the Internet, it makes sense to install a server to access the World Wide Web (see Figure 1.2). This is the gateway. The gateway can be a separate device, but in local networks with Internet access, a whole server is usually installed to access the Internet. This is much more convenient, because in addition to the gateway, you can also configure a Web, FTP, SMTP/POP server. In this case, you will be able to post information about your company on the Internet and set up your own mail server. For the same purposes, there are hardware pre-configured solutions from various companies, for example, from Intel. But the possibilities of administering such devices are rather limited. You can feel the freedom of action as an administrator only if you have a full-fledged server.
Fig.1.2. Server for Internet access (gateway)
What has changed compared to Fig. 1.1? You are right, there is a highlighted line. Usually, the connection of the server (read: local network) to the Internet occurs via a dedicated line. In the simplest case, to organize a leased line, you need a modem that allows you to work on leased lines. I would recommend using the ZyXEL U336S. This modem supports two-wire and four-wire lines, as well as synchronous and asynchronous data transmission. The maximum transfer rate is 300…480 Kbps. This will already be considered an advertisement for ZyXEL modems, but I will still write that these modems work on almost any (even the noisiest) lines. When organizing a modem pool, which we will talk about a little later, it is also desirable to install ZyXEL modems. In most cases, a transfer rate of 300...480 Kbps will not suit you. In this case, DSL modems can help, providing data transfer at speeds up to 1 Mbps. If your office location permits, you can buy Radio Ethernet equipment.
1.6.3. Remote access server
Now imagine that your company has grown a little and, in addition to several neighboring buildings connected to each other by a fiber optic cable, several more branches have appeared in different parts of the city. It is necessary to provide users of remote branches with the opportunity to work in the company's network. However, you do not need these users to be online all the time. In this situation, a remote access server appears on the scene (see Figure 1.3).
Rice. 1.3. Remote access server
Working with the remote access server is as follows. A remote user calls a specific company modem pool number. The remote access server authenticates the user and grants the user access if the authentication is successful. At the same time, it seems to the remote user that he works directly in the company's network, except for the slow data transmission channel. To other (non-remote) network users it will seem that the remote user is somewhere nearby - in the same building.
However, if you need to provide permanent job remote users on a company network, there are more efficient solutions, such as Radio Ethernet technology.
Please note that a new device has appeared on the network - a modem pool. It's just a collection of modems connected to the server. Usually all modems are installed in special racks, but this is not a mandatory requirement - just for the sake of convenience. You may have a question: how do all these modems connect to the server, if you can connect a maximum of four serial devices (and without installing additional controllers - only two)? For this, a multiport card is used, which provides connection of a large number of modems (and other devices) connected to the computer's serial port. In this case, all modems are connected to the multiport card, and it, in turn, to the computer.
The dotted line in fig. 1.3 indicates a non-permanent (dial-up) user connection.
As I already wrote, for a modem pool, I recommend installing ZyXEL modems. Robotics modems work well too, but ZyXEL is my subjective choice. In the case of a leased line, the likelihood of any interference on the line is much less than when working with ordinary telephone lines. To ensure a reliable user connection, you need to install professional modems and configure them correctly. You can read about how to configure modems in the modem documentation. The best modem in this case is the modem that works best on that line. Now we do not consider the case when you are an Internet provider and you do not have the ability to control which modem the user has installed. Before buying a modem, test its operation on the line - usually the seller allows you to do this. When you find the best option for price and quality - buy.
You need to test the connection directly on the PBX to which the user is connected. Do not repeat the common mistake when the administrator, having configured the remote access server, tries to test the connection by calling from another number of the same PBX. Due to the quality of our telephone lines, test results on different PBXs will vary. It is best to test the connection from the remote user's workplace.
Pay attention to the "career" of our server: we are gradually increasing it by adding new features. At first it was a member server of the local network, then it began to provide users with access to the Internet, and then we built a remote access server.
1.7. What is a server? (or Young Administrator Course)
This chapter is intended for novice system administrators who generally have difficulty understanding what a server is and what it is eaten with. As a matter of principle, I will not call such readers "dummies", since I myself once was one. In this chapter, I will try to briefly explain some of the terms that are associated with the network (I mean the computer network!), as well as with the TCP/IP protocol. This chapter can be regarded as a kind of course for a young fighter (administrator). It should be noted right away that we will not go into technical details - there is a lot of other literature for this, for example, “Computer networks. Principles, technologies, protocols” V.G. Olifer.
1.7.1. Network architecture: peer-to-peer and client/server
Let's start with the most important thing - network architecture. There are two main network architectures: peer-to-peer and client/server (client/server), with the latter almost replacing the former. In a peer-to-peer network, all computers are equal - they have the same rank. Any computer can act both as a server, that is, to provide its resources (files, printers) to another computer, and as a client, in other words, to use the resources provided to it. Peer-to-peer networks are predominantly common in home networks or small offices. In the simplest case, to organize such a network, you only need a couple of computers equipped with network cards and a coaxial cable (you need a couple more terminators (plugs), but I promised not to go deep).
Once the network has been physically created (computers are connected via coaxial cable), the network must be configured programmatically. This requires that the computers have network operating systems installed (Linux, FreeBSD, Windows NT, Windows 98) or network systems that support network functions (Windows 95, Windows for Workgroups).
Computers in a peer-to-peer network are combined into workgroups. Each working group has its own identifier - the name of the working group. If you are currently running Windows 9x, you can find out the workgroup name by running the Network applet from the Control Panel (see Figure 1.4).
Rice. 1.4. Workgroup ID in Windows 9x
For example, let's say that your peer-to-peer network has three computers A, B, C. The first two are in WG1, and computer C is in WG2 (see Figure 1.5).
Rice. 1.5. Diagram of a peer-to-peer network
Even though the computers are on the same network segment (physically connected to the same cable), computers A and B will not "see" computer C, and computer C will not see computers A and B. If you run the command to find a computer in Windows 9x (Start→Search→Find my computer), the computer will "see" computers A and B, but it will be reported that they are in a different workgroup - WG1.
The only access restriction that is possible in a peer-to-peer network is the use of a password to access a resource. In order to access this resource, such as a printer, you need to know the password. This is called resource-level access control. A client/server network uses a different method of access control - at the user level. In this case, you can restrict access to the resource only to certain users. For example, two users can use your computer A through the network: Ivanov and Petrov. This computer has a printer connected to it that can be used over a network. But you don't want anyone to print to your printer and have set a password to access this resource. If you have a peer-to-peer network, then anyone who knows this password can use your printer. In the case of a client / server network, you can allow only Ivanov or only Petrov to use your printer (both are allowed).
To gain access to a resource in the client/server network, the user must enter his unique identifier - username (login - login) and password (password). The user's login is public information, and rightly so: perhaps if someone wants to send an e-mail message to a user, then all he needs to know is his login (of course, and the name of the e-mail server that "knows" this user).
Using a username and password to access resources is called user authentication(user authentication). There are other types of authentication, such as data origin or peer authentication, but we won't cover those for now. Anyway, authentication - this is authentication.
After considering the architecture of a peer-to-peer network, one can conclude that the only advantage of this architecture is its simplicity and low cost. Client/server networks provide a higher level of performance and security.
Unlike a peer-to-peer network, a client/server network has one or more host computers - servers. All other computers on the network are called clients or workstations. As I wrote above, server - it is a special computer that provides certain services to other computers. There are different types of servers (depending on the services they provide): database servers, file servers, print servers (print servers), mail servers, Web servers, etc.
In table. Table 1.1 lists only a few of the functions performed by the server and the recommended software that is required to implement these functions.
Server features and software Table 1.1
| Function | Software | Distribution | Chapter |
|---|---|---|---|
| Authorization of remote users (dialup) | prr package | Yes | 17 |
| Automatic configuration of hosts | dhcp | Yes | 8 |
| Access (sharing) files | NFS, FTPd (ProFTPD, wu-ftpd) | Yes | 8, 13 |
| Microsoft network access | samba package | Yes | 9 |
| Caching of transmitted information | Package Squid | Yes | 15 |
| Routing | route(d) | Yes | 8, 14 |
| Email messaging | sendmail (or postfix/qmail) and imap packages | Yes (Yes/No), Yes | 13 |
| Network traffic count | Linux kernel, IPChains | Yes | 8, 14 |
| Transfer of classified information | modSSL | Yes (not in all distributions) | 12 |
| Resolving (resolving) a computer name to an IP address | bind package | Yes | 10 |
| Network printing | Lpd, Samba, CUPS | Yes | 6, 9 |
| Web server features | apache package | Yes | 12 |
| Packet filtering | IPChains (IPTables in new Linux versions) | Yes | 14 |
| Database management | MySQL / PostgreSQL / InterBase | Yes / Yes / Not all | 16 |
| IP Masquerading | IPChains | Yes | 14 |
The Distribution column indicates whether the specified software is included in common distributions, and the Chapter column indicates the chapter of the book that describes the setting of the function you are interested in.
To save money, as a rule, one server combines the functions of several servers, for example, a mailer can also be a Web server. The services that a server can provide are limited only by its physical capabilities - the more powerful the server, the more services and with greater quality it can provide, so a fairly powerful computer is chosen as the server. Although this formula (the more powerful the better) is not always justified, for example, if your server is used to provide access to the Internet small network, then in this case the old 486DX / 66 - 32 MB of RAM will perfectly cope with the task. However, if you are an Internet service provider, that is, you provide commercial access to the Internet, this configuration will not be enough.
Although the second chapter is devoted to installing Linux, in which all recommended configurations are described in detail, I will already note that in the case of a Linux server, the volume random access memory more critical than processor frequency. Therefore, if you have the opportunity to install more RAM, install - you will not regret it.
Note. Sometimes it is not practical to increase the amount of memory because the machine will run slower than before the upgrade. This can happen if you're using some older chipsets that don't cache more than 64MB (or 128MB) of RAM, and since the operating system is loaded into high addresses, freeing up low addresses for application programs, overall performance systems will be reduced. Before upgrading, I recommend that you read the documentation on motherboard.
1.7.2. Protocol and interface
Now it's time to move on to protocols, in particular, to the TCP / IP protocol, which underlies the Internet. A protocol is a set of rules that determines the interaction of subscribers of a computer system (in our case, a network) and describes a way to perform a certain class of functions. Another term that we will use often is interface. The interface is the means and rules for the interaction of the system components with each other. To better understand the meaning of these terms, look at Fig. 1.6. This figure shows two systems (computers) - A and B.
From fig. 1.6 it can be seen that the means that ensure the interaction of modules of different levels within one system(for example, B1 and B2) are called an interface, and the means that ensure the interaction of components of the same level different systems(for example, A1 and B1) are called a protocol. The protocol and interface can also be compared in this way: a conversation between two directors of different enterprises can be called a protocol, and a conversation between a director and a subordinate of one enterprise can be considered an interface. As you may have guessed, a conversation between employees of different enterprises will be a protocol.
Rice. 1.6. Protocols and interfaces
Now that we already know what the word "protocol" means, let's move on to the main protocols.
The most important - the shrine of all shrines - is the TCP / IP protocol. TCP/IP (Transmission Control Protocol/Internet Protocol) is the underlying transport network protocol. The entire Internet is based on this protocol.
The next important protocol is RIP (Routing Information Protocol). The RIP protocol is used to route packets in computer networks. Routing also uses OSPF (Open Shortest Path First), which is more efficient than RIP. ICMP (Internet Control Message Protocol) is a protocol for inter-network control messages. There are several types of this protocol that are used for specific purposes (establishing a connection, checking the availability of a host).
FTP (File Transfer Protocol) is a file transfer protocol. Used to exchange files between systems. For example, you need to transfer a file to a server or, conversely, download a file from a server. To do this, you need to connect to a file server (aka FTP server) and perform the operation you need. The connection is made using an FTP client. The simplest FTP client is included in almost any operating system. Usually, to start an FTP client, you need to enter the ftp command.
HTTP (Hyper Text Transfer Protocol) is a protocol for exchanging hypertext information, that is, HTML documents. The HTTP protocol is used by Web servers. HTTP clients are called browsers.
POP (Post Office Protocol) is the protocol of the post office. This protocol is used to receive email from mail servers. SMTP (Simple Mail Transfer Protocol) is used to transfer e-mail.
Since we have touched on the subject of mail protocols, let's look at how mail is read and sent. To receive messages, the user connects to the POP server, informs him of his Username and password, and, if the authentication is successful, receives the messages. Please note that the user is receives messages rather than looking at them. The user can read the message only after downloading it to his computer. Typically, received messages are deleted on the server, but this depends on the settings of the user's mail client. An email client is a program that performs all email operations. The most common email clients are The Bat!, Outlook, Outlook Express, Netscape Messenger, KMail.
To send a message, the user simply connects to the SMTP server and sends the message. There is no authentication involved, although you can configure the server to ask for a username and password before sending a message to the server. Section 13.2 of this book is devoted to setting up SMTP authentication. After the message is sent to the SMTP server, it is queued. After a certain time, this message is transmitted to the desired POP server, which receives the message. Then the message can be received by the user for whom it is intended. If the SMTP server cannot send the message (for example, the desired POP server does not exist or is not available, or the recipient is not registered with this POP server), the message is returned to the sender.
There is another protocol for reading mail - IMAP. Its difference from the POP protocol is that the user reads email messages without downloading them to his computer. All messages are stored on the server. Deleting a message deletes it from the server. SLIP (Serial Line Internet Protocol) is a protocol for connecting to the Internet over a serial line. Used to establish communication with remote hosts via low speed serial interfaces. It has now been superseded by the PPP protocol and is practically not used. PPP (Point-to-Point Protocol) provides configuration management, error detection, and enhanced data transfer security at a higher level than the SLIP protocol. Therefore, when configuring the server, it is recommended to use this protocol. The PPP protocol is covered in RFC 1547 and RFC 1661.
Before moving on to consider the TCP / IP protocol, let's consider a seven-layer model of open systems interaction. An open system is any system built to open specifications. A protocol can also be viewed as a specific agreement adopted by interacting objects, in our case, these are computers operating on a network. The agreement (protocol) does not have to be standard, but in practice they try to use exactly standard protocols.
In the early 80s, the international organization for standardization (ISO - International Organization for Standardization) developed open systems interaction model(OSI - Open System Interconnection). In other literature, you can find other names for this model: abbreviated - OSI model or more complete - OSI seven-layer model of open systems interaction. The means of interaction (see Figure 1.7) in the OSI model are divided into seven levels:
1. Physical.
2. Channel.
3. Network.
4. Transport.
5. Session.
6. Personable.
7. Applied.
Rice. 1.7. OSI Model
Due to this, the task of network interaction is divided into several smaller tasks. This allows, when developing new methods and tools for network interaction, not to develop them entirely anew, but to use ready-made solutions, replacing only some of its parts. Only physical levels interact directly with each other. All other levels directly interact only with the higher and lower levels: they use the services of the lower and provide services to the higher. Such levels contact each other indirectly, through the underlying levels.
Note. In some cases of network interaction, there is no physical layer as such, while its functions are performed by the lowest layer.
From fig. 1.7 it can be seen that as the message passes through the layers of the OSI model, overhead information is added to the transmitted data, indicating that the data has passed through a certain layer.
Let's consider the interaction of two computers in more detail using the example of a file service. Suppose we (computer 1) need to write some information to a file on remote computer 2. A normal message consists of a header and a data field. The header contains various service information. How the title changes can be seen from Fig. 1.7. For example, the header may contain information about our computer (its address), the recipient's computer, and the name and location of the file in which you want to write information. The data field can be empty, but in our case, it obviously contains information that needs to be written to the file.
The application (process 1) generates a standard message that is passed to the application layer. More precisely, process 1 runs at the application layer.
After the message is formed, the application layer passes it on to the presentation layer. At this level, indications for the representative level of the destination computer are added to the header. The message is then passed to the session layer, which adds its information, and so on. The process of nesting one protocol within another is called encapsulation.
When a message arrives at the destination computer, it is received by the physical layer and passed up from layer to layer. Each layer parses the content of its layer's header, executes its instructions, then removes the information pertaining to itself from the header, and passes the message on to the next higher layer. This process is called decapsulation. The following is a description of the levels of interaction.
Physical LayerThe physical layer transmits bits over physical communication channels, such as coaxial cable or twisted pair. At this level, the characteristics of electrical signals that transmit discrete information are determined, for example: coding type, signal transmission rate. This level also includes the characteristics of physical data transmission media: bandwidth, impedance, noise immunity.
The physical layer functions are implemented by the network adapter or serial port. An example of a physical layer protocol is the 100Base-TX specification (Ethernet technology).
Data Link LayerThe data link layer is responsible for transferring data between nodes within the same local area network. A node is any device connected to the network.
This layer performs addressing to physical addresses (MAC addresses) that are “hardwired” into network adapters by the manufacturer. Each network adapter has its own unique MAC address, meaning you won't find two NICs with the same MAC address.
The link layer translates the information received from the upper layer into bits, which will then be transmitted by the physical layer over the network. It breaks the transmitted information into data fragments - frames (frames).
At this level, open systems exchange exactly frames. The forwarding process looks something like this: the link layer sends a frame to the physical layer, which sends the frame to the network. This frame is received by each node on the network and checks if the destination address matches the address of that node. If the addresses match, the link layer receives the frame and passes it up to the higher layers. If the addresses do not match, then it simply ignores the frame.
The link layer protocols used have a certain topology. Topology is a way of organizing physical links and ways of addressing them. The link layer provides data delivery between nodes in a network with a specific topology, that is, for which it is designed. The main topologies (see Figure 1.8) include:
General bus.
Rice. 1.8. Basic topologies of local computer networks
Link layer protocols are used by computers, bridges, routers. Global networks (including the Internet) rarely have a regular topology, so the link layer provides communication only between computers connected by an individual communication line. At the same time, network-level tools (point-to-point protocols) are used to deliver data across the entire global network. Examples of point-to-point protocols are PPP, LAP-B.
Network LayerThis level serves to form a unified transport system, which combines several networks. In other words, the network layer provides interconnection.
Link-layer protocols transfer frames between nodes only within a network with the appropriate topology. In other words, within the same network.
You cannot send a link-layer frame to a node that is on another network. This restriction does not allow building networks with a developed structure or networks with redundant connections. Build one big network is also impossible due to physical limitations. In addition, even if you build a fairly large network (for example, the 10Base-T specification allows you to use 1024 nodes in one segment), the performance of this network will not please you. We will talk more about the reasons for dividing a network into subnets and the difficulties that arise from this a little later, but for now we will continue to consider the network layer.
On network layer term network should be understood as a set of computers that are connected in accordance with one of the main topologies and use one of the link layer protocols for data transfer.
Networks are connected by special devices - routers. The router collects information about the topology of interconnections and, based on this information, forwards network layer packets to the destination network. To transfer a message from a sending computer to a destination computer located on another network, you need to make a number of transit transmissions between networks. Sometimes they are also called hops (from the English hop - jump). In this case, each time a suitable route is selected.
Messages at the network layer are called packets. Several types of protocols operate at the network layer. First of all - this network protocols, which ensure the movement of packets over the network, including to another network. Therefore, quite often, the routing protocols (routing protocols) - RIP and OSPF are referred to the network layer.
Another type of protocol that operates at the network layer is the Address Resolution Protocol (ARP). Although these protocols are sometimes referred to as link layer.
Classic examples of network layer protocols: IP (TCP/IP stack), IPX (Novell stack).
Transport LayerOn the way from the sender to the recipient, packets can be corrupted or lost. Some applications do their own error handling when transferring data, but most still prefer to deal with a reliable connection, which is exactly what the transport layer is designed to provide. This layer provides the application or upper layer (session or application) with the required packet delivery reliability. The transport layer defines five classes of service:
1. Urgency.
2. Restoring an interrupted connection.
3. Availability of means of multiplexing several connections.
4. Error detection.
5. Bug fixes.
Typically, the layers of the OSI model, starting with the transport layer and above, are implemented at the software level by the corresponding components of operating systems.
Examples of transport layer protocols: TCP and UDP (TCP/IP stack), SPX (Novell stack).
Session LayerThe session layer establishes and breaks connections between computers, manages the dialogue between them, and also provides synchronization facilities. Synchronization tools allow you to insert certain control information into long transmissions (points), so that in the event of a communication break, you can go back (to the last point) and continue the transfer.
A session is a logical connection between computers. Each session has three phases:
1. Establishing a connection. Here the nodes “negotiate” among themselves about the protocols and communication parameters.
2. Transfer of information.
3. Disconnection.
Do not confuse a network layer session with a communication session. The user can establish a connection to the Internet, but not establish a logical connection with anyone, that is, not receive or transmit data.
Presentation LayerThe representative level changes the form of the transmitted information, but does not change its content. For example, by means of this level information can be converted from one encoding to another. This layer also encrypts and decrypts data.
An example of a presentation layer protocol: SSL (Secure Socket Layer). This protocol provides a secret exchange of data.
Application LayerThis layer is a set of various protocols by which network users access shared resources. The unit of data is called a message.
Protocol examples: HTTP, FTP, TFTP, SMTP, POP, SMB, NFS.
Internet and OSI modelWhen an open system interacts with the Internet, the OSI model is simplified because some Internet protocols include multiple layers of functionality. If one user connects to the Internet, and not the entire network, then the channel and physical layers automatically disappear, because there are no network adapters, which means there are no physical addresses. In this case, the final protocol will be a point-to-point protocol, such as PPP. All other protocols will be nested in this protocol.
1.7.3. TCP/IP protocol
In this section, let's look at how information is transmitted on a TCP/IP network. Any information is transmitted in small portions, which are called packets. If the required amount of information cannot be transmitted in one package, it is divided into parts. The header of each packet contains the IP address of the sender and the IP address of the recipient, as well as the port number.
Every computer on an IP (TCP/IP) network is assigned a unique address called an IP address. An IP address is a 32-bit number that is usually written in decimal or hexadecimal format as four numbers separated by dots, for example:
1. 111.111.213.232
Provided that your network is connected to the Internet, the TCP/IP protocol makes your network program work with any computer in the world as if it were on a local network. The uniqueness of the IP address is achieved quite simply - IP addresses are assigned centrally by the Network information center (nic, Network Information Center).
To understand the rest of the information, it should be noted that there are local (LAN, Local Area Networks) and regional (Wide Area Networks) networks. The Internet network was first regional (Arpanet), and then became global, uniting all the regional networks of the world. If your local (or even regional) network is not connected to the Internet, then you can use any IP addresses within the network without negotiating with the NIC. Typically, local networks use special IP addresses, which we will talk about a little later.
Any network, regardless of type - LAN or WAN, can be divided into subnets. The reasons for dividing the network into subnets lie in the early versions of the IP protocol. Then there were several class A networks containing several million nodes (read about the classes below). Among other things, in such networks, the probability of collisions is very high, that is, the simultaneous access of two or more nodes to the data transmission medium. It is extremely inconvenient to manage such a network, and the network will be overloaded with its own traffic. Therefore, the basic principle of division is "divide and conquer".
Other reasons for separation include the creation of small subnets using different technologies - Ethernet, Token Ring, FDDI, ATM. You cannot mix these technologies on the same network, but they can be interconnected through subnetting.
Subnetting can also be done for security reasons. You can read more about this and other reasons for subnetting a network in the IP Sub-networking-HOWTO on the included CD.
As I already wrote, each computer on the network has its own unique address. But it turns out that the network (subnet) also has its own unique address. A network can be understood as a "pack" of IP addresses in a row, that is, 192.168.1.0 ... 192.168.1.255. The lowest and highest addresses are reserved. The lower one (192.168.1.0) is the network address, and the higher one is the broadcast address of the network. The network address may be required when you need to specify the entire network (subnet), for example, when setting routing for this network.
Imagine that you have two separate networks and you need to combine them into one. Then this one "big" network will be called a network, and two "small" networks will be called subnets. The device that will provide communication between these networks (routing) is called, as noted above, a router. The router can be either hardware (separate device) or software.
Any computer with two (or more) network interfaces, such as two network cards, can act as a software router. Any network operating system that supports IPv4-Forwarding packet forwarding can be installed as the operating system. This operating system can be Linux, FreeBSD, any UNIX system, Windows NT/2000. The router can also be configured based on Windows 98, but I do not recommend doing this, since it is unlikely to work reliably. Traditionally, UNIX systems, which include Linux, are used as a router.
The broadcast address is used to send messages "to everyone - to everyone - to everyone" within the network, that is, when you need to send a message (packet) to all computers on the network at once. Broadcast requests are very often used, for example, to build ARP tables.
Each subnet has its own mask. In fact, the mask is the size of the network, that is, the number of addresses in the network. The mask is usually written in decimal byte form:
| 255.255.255.0 | mask for 256 addresses (0…255); |
| 255.255.255.192 | mask for 64 addresses (192…255); |
| 255.255.0.0 | mask for 65536 addresses (256*256). |
In general, IP networks are divided into five classes: A, B, C, D, and E.
Class A networks are huge networks. Class A netmask: 255.0.0.0. Each network of this class can contain 16777216 addresses. The addresses of such networks are in the range 1.0.0.0…126.0.0.0, and the addresses of hosts (computers) look like 125.*.*.*
Class B networks are medium networks. The mask of such a network is 255.255.0.0. This network contains 65536 addresses. The address range of such networks is 128.0.0.0…191.255.0.0. Host addresses look like 136.12.*.*
Class C network- small networks. Contains 256 addresses (actually only 254 hosts, since numbers 0 and 255 are reserved). Class C network mask - 255.255.255.0. Address range: 192.0.1.0…223.255.255.0. Host addresses look like this: 195.136.12.*
The network class is very easy to determine. To do this, you need to convert the decimal representation of the network address to binary. For example, the network address 128.11.1.0 in binary representation will look like this:
10000000 00001011 00000001 00000000
and networks 192.168.1.0:
11000000 10101000 00000001 00000000
If the address starts with bit sequence 10, then this network belongs to class B, and if from the sequence 110, then - to class C.
If the address begins with the sequence 1110, then the network is a class D network, and the address itself is special - group (multicast). If the packet contains a class D network address, then all hosts assigned this address must receive this packet.
Class E addresses are reserved for future use. In table. 1.2 shows the comparative characteristics of networks of classes A, B, C, D and E.
Characteristics of networks of various classes Table 1.2
| Class | First beats | Address range | Number of nodes |
|---|---|---|---|
| AND | 0 | 1.0.0.0…126.0.0.0 | 16777216 (224) |
| AT | 10 | 128.0.0.0…191.255.0.0 | 65536 (216) |
| With | 110 | 192.0.1.0…223.255.255.0 | 256 (28) |
| D | 1110 | 224.0.0.0...239.255.255.255 | Multicast |
| E | 11110 | 240.0.0.0…247.255.255.255 | Reserved |
Now it's time to say a little about the special addresses that I mentioned a little above. If the entire IP address consists of zeros (0.0.0.0), then it means that it denotes the address of the host that generated this packet.
The address 255.255.255.255 is the broadcast address. A packet with this address will be sent to all nodes that are on the same network as the source of the packet. This phenomenon is called limited broadcast. There is also another distribution called a broadcast message. In this case, instead of the node number, there are all ones in binary representation (255). For example, 192.168.2.255. This means that this packet will be sent to all hosts on the 192.168.2.0 network.
Of particular importance is the IP address 127.0.0.1 - this is the address of the local computer. It is used to test network programs and the interaction of network processes. When you try to send a packet to this address, the data is not transmitted over the network, but is returned to the upper layer protocols as just received. In this case, a “loop” is formed, as it were. This address is called loopback. In an IP network, it is forbidden to use IP addresses that start with 127. Any subnet address 127.0.0.0 refers to the local computer, for example: 127.0.0.1, 127.0.0.5, 127.77.0.6.
There are also special addresses that are reserved for unconnected local area networks - these are networks that use the IP protocol but are not connected to the Internet. Here are the addresses:
10.0.0.0 (class A network, netmask 255.0.0.0).
172.16.0.0…172.31.0.0 (16 class B networks, each network mask 255.255.0.0).
192.168.0.0…192.168.255.0 (256 class C networks, each network mask 255.255.255.0).
In this book, I have tried to use just such addresses so as not to cause intersection with real IP addresses.
1.7.4.DNS
In order to connect to some other computer, such as a Web server, you need to know its IP address. This is not very convenient, because it is much easier for a person to remember the symbolic name of the server than a sequence of numbers. Imagine that instead of http://www.romb.net in a browser window, you would need to enter http://62.244.59.193. Both methods will work, but the first one is much easier to remember. In fact, you only need to remember a four-letter word - romb, and www and net are “of course”. A computer, on the other hand, is easier to process numbers than symbolic information.
The Domain Name System (DNS) is used to convert an IP address to a symbolic name and vice versa. Usually, each server has its own DNS service installed, even if this server does not support a domain. Unlike a peer-to-peer network, an IP network organizes computers into domains rather than into workgroups. In fact, the concept of a domain is much broader than a working group, but for now let's focus on such a definition.
Suppose your department's Web server address is: http://www.department.firma.isp.ru. Consider what happens when the user types this address into the browser window. First, a request is sent to resolve (translate) the name into an IP address to the DNS server, which belongs to the user's provider. If such a name is in the cache of the provider's DNS server (for definiteness, let's call it user-dns), it returns the IP address and the browser establishes a connection with this computer. If there is no such address in the cache of the DNS server, the provider's DNS server refers to the server that contains the top-level domain, that is, to the root of the tree (see Figure 1.9). He refers to the ru domain (let this server be called ru-dns). The ru-dns server, in turn, accesses the server that delegates the isp domain (this is your provider). The isp server addresses the server that delegates (administers) the firma domain, and it already addresses the server responsible for the department domain, which returns the IP address of the computer www.department.firma.isp.ru. Thus, a kind of chain is obtained. It is clear that if this chain breaks at any link, then the user, more precisely, the user-dns DNS server, will be informed that the computer name cannot be resolved to an IP address.
Rice. 1.9. Hierarchical Structure of the Domain Name System
The entire structure of the DNS service is hierarchical. There are domains of the first, second, third, n-th levels. In this example, the first-level domain is ru, isp is the second, firma is the third, and department is the fourth (see Figure 1.9).
The root domain is managed by the InterNIC. Top (first) level domains are assigned for each country (see Table 1.3).
Country designations according to ISO 3166 Table 1.3
| Domain | A country | Domain | A country |
|---|---|---|---|
| en | Russia | ua | Ukraine |
| by | Belarus | It | Lithuania |
| IV | Latvia | her | Estonia |
| md | Moldova | kz | Kazakhstan |
| tr | Turkey | ro | Romania |
| iq | Iraq | ir | Iran |
| il | Israel | tm | Turkmenistan |
| pl | Poland | it | Italy |
| es | Spain | gb | Great Britain |
| fr | France | de | Germany |
| id | Indonesia | vn | Vietnam |
| gr | Greece | va | Vatican |
| at | Austria | co | Colombia |
| hu | Hungary | mx | Mexico |
There is no single domain for the United States and Canada, but the designation us is sometimes used. Country codes follow the international standard ISO 3166. This information can be obtained from ftp:/ftp.ripe.net/iso3166-countrycodes.
For various types of organizations, the following designations can be used:
According to the ISC (Internet Software Consortium), as of January 2002, there were about 150 million registered Internet nodes (see Figure 1.10). This information is published with the permission of the ISC.
Rice. 1.10 Growth dynamics of nodes on the Internet
1.7.5. Layered architecture of the TCP/IP stack
This section of the book is optional: if you think you already have enough knowledge about the TCP/IP protocol, you can skip to the next sections and come back to this later. Here the layered architecture of the TCP/IP protocol will be described - for a better understanding of what is happening.
First, let's look at the history of the creation of the TCP / IP protocol. The TCP / IP protocol was created in the late 60s and early 70s by the DARPA agency of the US Department of Defense (U.S. Department of Defense Advanced Research Projects Agency). The main stages in the development of this protocol are noted in Table. 1.4.
Milestones in TCP/IP Table 1.4
| Year | Event |
|---|---|
| 1970 | Introduced NCP (Network Control Protocol) protocol for Arpanet network nodes |
| 1972 | First Telnet specification released (see RFC 318) |
| 1973 | FTP protocol introduced (RFC 454) |
| 1974 | TCP (Transmission Control Program) |
| 1981 | IP protocol standard published (RFC 791) |
| 1982 | Combining the TCP and IP protocols into one - TCP / IP |
| 1983 | Arpanet network switched to TCP protocol (formerly NCP protocol was used) |
| 1984 | Introduced DNS domain name system |
As you can see, all Internet protocol standards are published in RFC documents. RFCs(Request For Comments) is a request for comments. These documents describe the structure of the Internet.
RFCs are created by the Internet Society (ISOC). Any ISOC member can publish their standard in an RFC document. RFC documents are divided into five types:
All required RFCs can be found on the included CD.
Protocols of the TCP / IP family can be represented as a model consisting of four layers: application, core, internetwork and network (see Fig. 1.11).
| Level 1 | Application layer (application layer, Application Layer) |
| Level 2 | Main (transport) layer (Transport Layer) |
| Level 3 | Internet layer (Internet layer, Internet Layer) |
| Level 4 | Network Interface Layer |
Rice. 1.11. Layers of the TCP/IP protocol stack
Each of these layers performs a specific task for organizing reliable and productive network operation.
Network interface layerThis layer underlies the entire protocol model of the TCP/IP family. The network interface layer is responsible for sending to and receiving from the network frames that contain information. Frames are transmitted over the network as a single unit. Frame(frame) is a unit of data exchanged between computers on an Ethernet network. To designate blocks of data of certain levels, the terms frame (frame), packet (packet), datagram (datagram), segment (segment) are used. All these terms refer to separately transported data units and can be considered synonymous. The name of the transmitted data block changes depending on the level (see Fig. 1.12).
Rice. 1.12. Transferring a block of data in the TCP/IP protocol stack
Internet layer
Internet protocols encapsulate blocks of data into packets (datagrams) and provide the necessary routing. The main Internet protocols are:
| IP (Internet Protocol) | designed to send and route packets. |
| ARP (Address Resolution Protocol) | used to obtain MAC addresses (hardware addresses) of network adapters. |
| ICMP (Internet Control Message Protocol) | designed to send notifications and error messages when transmitting packets. |
| IGMP (Internet Group Management Protocol) | used by hosts to inform routers that support multicasting that they are participating in groups. |
| RIP (Route Internet Protocol) and OSPF (Open Shortest Path First) | routing protocols. |
At this level, the transfer of packets without establishing a connection is implemented - in a datagram way. The internetwork layer ensures that packets move through the network using the most rational route (OSPF protocol). The main function of the internetwork layer is the transmission of packets across the composite network, which is why this layer is also called the Internet layer.
Transport (main) layerThis layer provides communication sessions between computers. There are two transport protocols: TCP (Transmission Control Protocol) and UDP (User Datagram Protocol). The TCP protocol is connection-oriented, that is, before transmitting data, computers "negotiate" among themselves. Typically, this protocol transmits large amounts of data or data that requires acknowledgment. This protocol is used by most network applications, as it provides sufficient reliability for data transfer.
The UDP protocol is not connection oriented and does not guarantee the delivery of packets (datagrams). However, UDP is faster than TCP. Typically, small amounts of data are transmitted over this protocol. The network program is responsible for delivering the data.
Application layerThis layer is the pinnacle of the TCP/IP model. Almost all common utilities and services work at this level: DNS, Telnet, WWW, Gopher, WAIS, SNMP, FTP, TFTP, SMTP, POP, IMAP.
To complete this section, consider the correspondence between the levels of the TCP / IP protocol stack of the seven-layer OSI model (see Table 1.5).
Correspondence of TCP/IP stack levels of the OSI model Table 1.5
| OSI model layer | Protocol | TCP/IP stack layer |
|---|---|---|
| 7, 6 | WWW (HTTP), FTP, TFTP, SMTP, POP, telnet, WAIS, SNMP | 1 |
| 5, 4 | TCP, UDP | 2 |
| 3 | IP, ICMP, RIP, OSPF, ARP | 3 |
| 2, 1 | Ethernet, PPP, SLIP | 4 |
The next paragraph discusses such an important concept of the TCP / IP protocol as a port. In the same paragraph, IP and TCP packet structures will be considered, since it makes no sense to consider this material without introducing a port definition.
1.7.6. Ports and daemons
The rest of the presentation is based on the fact that you already know what a server is and what services you will need to configure. In point How the book is organized(p. 1.5) it was described in detail in which chapters the configuration of a particular service is described. Here, let's look at some basic concepts, which are the concepts of "daemon" and "port".
As already noted, the header of each packet contains the IP address of the sender and the IP address of the recipient, as well as the port number. With the IP address of the sender and recipient, everything is clear, it remains to be said what a port is. The fact is that several applications on the same computer can exchange data over the network at once. At the same time, if only the recipient's IP address is specified as the addressee, then applications running on it will not be able to figure out which of them the sent data is intended for. To solve this problem, the ports mechanism is used. The port number is simply the number of the program that will process the transferred data. Each network program, which is running over TCP/IP, is mapped to its own port number. For example, 80 is the port of the WWW server (usually Apache) and 53 is the port of the Domain Name System.
The term daemon comes from the English word demon (or daemon) and means a program that runs in the background and supplements the operating system with some kind of service. As a rule, the user does not notice the work of the demon: he does not even suspect that this program launched. The daemon program is somewhat similar to the resident programs in the DOS operating system. As you can see, there is nothing to do with the terrible creatures of the other world. Usually, a daemon waits for a certain event, after which it is activated and performs its work. Network daemons wait for a packet with a specific port number and, upon receiving it, process the data contained in it. We will talk about these "creatures" more than once in the book, so now we will not dwell on them in detail.
1.7.7. Structure of IP and TCP packets
Now we can safely proceed to consider the structure of IP and TCP packets. The IP protocol is not connection oriented and therefore does not provide reliable data delivery. Fields, the description of which is given in Table. 1.6 are IP headers and are added to the packet when it is received from the transport layer.
IP Packet Header Structure Table 1.6
| Field | Description |
|---|---|
| Source IP address | (sender IP address) The sender of the packet |
| Destination IP address | (Destination IP address) Destination of the packet |
| protocol | TCP or UDP |
| Checksum (Checksum) | |
| TTL (Time to Live) | Specifies how many seconds a datagram can stay on the network. Prevents packets from wandering endlessly on the network. The TTL value is automatically decremented by one or more seconds as it passes through each router on the network |
| Version The version of the IP protocol is 4 or 6. | The sixth version of the IP protocol is discussed in Chap. 8 (4 bits) |
| Header Length | The minimum header size is 20 bytes (4 bits) |
| Type of Service | The designation for the required quality of service for this packet when delivered through IP network routers. Here the priority, delays, throughput are determined. (8 bits) |
| Total Length | IP datagram length (16 bits) |
| identification | Package ID. If the packet is fragmented (split into parts), then all fragments have the same identifier (16 bits) |
| Fragmentation Flags | 3 bits for fragmentation flags and 2 bits for current usage |
| Fragmentation Offset | Indicates the position of the fragments relative to the beginning of the data field of the IP packet. If there is no fragmentation, the offset is 0x0 (13 bits) |
| Options and Padding | Options |
The TCP protocol, unlike the IP protocol, is connection-oriented and provides reliable data delivery. The structure of the TCP packet is described in Table. 1.7.
TCP packet structure Table 1.7
| Field | Description |
|---|---|
| Source port | Source host TCP port |
| Destination Port | Destination host TCP port |
| Sequence Number | Packet sequence number |
| Acknowledgment Number | The byte sequence number that the local node expects to receive next |
| Data Length | TCP packet length |
| Reserved | Reserved for future use |
| Flags | Description of the contents of the segment |
| Window (Window) | Shows the available space in the TCP protocol window |
| Checksum (Checksum) | Value for checking package integrity |
| Urgent Pointer | When sending urgent data (the Flags field), this field sets the border of the urgent data area |
Congratulations on the successful completion of the young fighter (administrator) course! It remains only to say a few words about the general configuration of the server. Setting up the server from scratch should be carried out in exactly the same sequence as described in the book. After installing the system, you should understand the rights of users, determine who and what will have access. This is where it starts local security server. It makes no sense to configure all services with all security requirements if the user pupkin has access to everything and his password 123! (or set permissions on the root filesystem to allow anyone to modify it).
I recommend using RAID arrays, if your finances allow it, of course. Using RAID arrays will greatly increase the reliability of your server. In addition, using hardware arrays, which are not covered in this book, can significantly improve server performance, especially when using SCSI disks. Although lately the performance of some models of ATA drives (ATA133) is almost as good as the performance of drives with SCSI interface, ATA drives are cheaper than SCSI ones.
After you put things in order at the local level, you can start setting up the network. First, you should configure the server as an ordinary workstation and check the correct operation of the computer on the network. All this is devoted to ch. 7.
In ch. 8 describes the server setup. Regardless of which server you are setting up - a mailer or a database server, you must first set up a superserver - xinetd or inetd.
Chapter 8 explains what a superserver is and how to set it up. Setting up the fundamental server services is described in the same chapter. However, this does not mean that you need to configure everything, for example, you can not use the network file system or the DHCP protocol.
There is a simple rule: if you do not need any service, just disable it, but in no case leave it unconfigured - this is a potential "hole" in your server.
All subsequent chapters of the book are devoted to configuring popular network services that are now ubiquitous. After setting up all the services you need, it is recommended to recompile the kernel, removing unnecessary code from it. This will improve server performance and make the kernel more compact.
1.9. Overview of Linux distributions
Now on the domestic market you can buy almost any Linux distribution, and the newest or some less common one can be ordered through an online store, for example, www.linuxcenter.ru. The most common distributions today are:
1. Red Hat Linux.
2.Linux Mandrake.
3. ALT Junior Linux.
5. Black Cat Linux
7. Astaro Security Linux.
In the book, I examined in detail the distributions of Red Hat Linux and Linux Mandrake, pointed out the differences between them. However, I will not encourage you to use Mandrake or Red Hat, on the contrary, you can use this book to set up any distribution. If something does not work, for example, in SuSE or Slackware, read the documentation supplied with the distribution, there will surely be answers to all your questions. While most of the distributions above are Red Hat compatible, each distribution has some differences, so don't trust CD labels like "100% Red Hat compatible". Each distribution has its own purpose, for example, ALT Junior is more suitable for home computer than for the server.
So, let's start our review with the Red Hat Linux distribution. Undoubtedly, this is one of the most popular and widespread distributions. "Little Red Riding Hood" (that's how the name of the distribution is translated) is a kind of pattern in the world of Linux. It's not in vain that when they compare distributions, they talk about their compatibility with Red Hat.
First of all, it should be noted the ease of installation of this distribution. The Red Hat installer has an intuitive interface and rich functionality. At the same time, as for many modern distributions, installation can be performed both in graphical and text modes. By the way, the first graphical Linux installer, if I'm not mistaken, was offered by Red Hat. I should note that installing the system in text mode is a little faster than in graphical mode.
After installation, you get a practically functioning system: everything in it is configured and working, it remains to configure the system “for yourself”. Of course, there are minor flaws, but the developers couldn't have foreseen all the options?
Today latest versions are versions 7.2 (7.3) and 8.0. Compared to previous versions, the installer has become even simpler, more flexible and more functional. For example, it is possible to save installation settings, which allows you to install exactly the same system configuration on other computers on the network. During installation, the file system is converted ext2 in ext3. Switching to a new file system provides more reliable operation.
Among the innovations are the Gnome 1.4 window environment and the Nautilus file manager, which greatly simplifies the operations of copying, moving and deleting files.
All system parameters are fully configurable. You can even set the level of complexity of the user interface: from beginner to expert. It should also be noted that the line between local and network resources has disappeared.
Device configuration is now much easier with the new system configuration utility. Now all system configurators are collected in one shell, which is called the Control Panel. Expanded device support, including support for USB devices and firewire.
Particular attention is paid to system security: the firewall is now configured during system installation, and a graphical configuration utility greatly simplifies the process of creating chains.
Next in line is the Linux distribution Mandrake. LINUX Mandrake is a powerful operating system for the Intel Pentium, AMD Athlon and PowerPC platforms. This operating system perfectly combines the power of Linux with a simple user interface. Mandrake OS is the best for a novice user, while it can be installed on almost any type of computer - from a home PC to a network server, which cannot be said about other distributions that have a clearer application.
The installer probably surpassed Red Hat in its simplicity. After installation, the system works normally, since drivers for most devices are automatically installed (except for software win-devices). There are not even small flaws on the part of the installer.
As I said, the Linux Mandrake operating system is suitable for both the server and the workstation. The developers have taken care of system administrators by providing the system with a large number of configurators with which you can configure all server services. They did not forget about users either: the distribution kit includes common windowing environments, office suites, graphic editor, browsers, MP3 players.
Version 9.0 has the following changes:
1. Added the possibility of minimal installation. This will require only 64 MB (!) On your hard drive.
2. Improved hardware detection procedures.
3. Supports large amounts of RAM (more than 1 GB) and multiprocessing. If you have only one processor installed and less than 1 GB of RAM, I recommend that you recompile the system kernel to disable these features to improve system performance.
4. Journaled file systems EXTZ, ReiserFS, XFS and JFS are supported.
5. Added support for the following devices: Firewire, USB, USB2, 1830 DRM, ATA133, GeForce3.
6. Redesigned Control Center.
The system is based on kernel version 2.4.19. The distribution includes the following applications:-
1. KDE 3.0.3 environment with integrated office suite K Office.
2. GNOME 2.0.1 plus Evolution 1.0.8 , WindowMaker 0.8, IceWM 1.2, Enlightenment 0.16.5, BlackBox 0.62
3. Office packages StarOffice 6.0 and KOffice 1.2. Both packages support the MS Office format.
4. Browsers Mozilla 1.1, Konqueror 3.02 and Galeon 1.2.5.
5. Graphic package GIMP 1.2.3.
6. GCC 3.2 compilers, Glibc 2.2.5 libraries.
7. Apache server 1.3.26.
8. PHP Interpreter 4.2.3.
9. MySQL 3.23.52 and PostgreSQL 7.2.2 database servers
10. MTA Sendmail and Postfix agents.
ALT Junior Linux is a single disk distribution for home and novice users. This distribution can be used as a workstation distribution, but not as a server distribution. It includes all the necessary software for a home computer, including some pretty good toys.
The ALT Junior 1.0 distribution is based on the 2.4.5 kernel, supports most modern chipsets, Matrox G-series 3D graphics accelerators, ATI Rage & ATI Radeon, Intel 810/815, 3DFX Voodoo 3/4/5. Added support for all nVidia video cards.
ASPLinux 7.2 is another general purpose distribution that will suit both server and workstation. Separately, I want to note the unique installation program. In addition to its simplicity, it has some features that I lacked in other distributions:
1. The ability to install the main packages (kernel and libraries) for a specific processor, which improves system performance and does not require recompiling the kernel after installing the system to optimize its operation.
2. It is now possible to create a root file system on a RAID device.
3. Added support for new RAID controllers.
OS ASPLinux 7.2, unlike other distributions, supports all processors of the i386 family: from i80386DX to Pentium IV.
The only inconvenience is the lack of a driver for nVidia 3D accelerators (I have a Riva TNT2), but it can be freely downloaded from www.nvidia.com
Support for Russian and Ukrainian languages deserves special attention.
For you, as a system administrator, the pptpd package, which allows you to organize VPN networks for Windows clients, as well as the portslave package, which, in combination with an improved version of pppd, allows you to organize a remote access server with authorization through the RADIUS server and using the callback function.
Also noteworthy is the completely revised documentation: it is on a special documentation CD (Documentation CD).
At the end of this short review, I will note a rather non-standard Astaro Security Linux distribution. With this distro you can turn an ordinary office computer into a real bastion. All that is needed for this is to simply boot from the installation disk, enter the necessary network parameters and no longer approach this computer: you can immediately turn off the monitor, because all server administration is performed via the https protocol through a browser. Unfortunately, this distribution does not support SCSI (however, SCSI disks on the gateway are redundant) and ISA buses, which does not allow using old network cards.
1.10. Glossary
This short paragraph provides descriptions of the main terms that were used in the first chapter, as well as some new ones.
Authentication - authentication.
Interface - means and rules of interaction between system components.
Collision - attempt of simultaneous access of two or more machines to the information transmission medium. The simplest (and slightly incorrect) example of collisions is a parallel phone. It has probably happened in your life that someone needs to talk on the phone at the same time, and you tried to dial the number at the same time.
concentrator(hub) - a device that simply forwards received packets to all its ports, regardless of the destination. All devices connected to the Ethernet hub (including other hubs) "see" all network traffic, but only the node to which it is addressed should receive the packet. All other nodes should ignore this packet.
router(router) - a device for forwarding packets. The router collects information about the topology of interconnections and, based on this information, forwards network layer packets to the destination network. The router can be software and hardware.
Routing(routing) - the process of transferring data packets between two subnets.
Bridge(bridge) - a device for connecting two or more physical networks. Bridges forward packets to the port to which the destination is connected. However, unlike most Ethernet switches, bridges do not forward packet fragments on collisions or error packets because all packets are buffered before they are forwarded to the destination port. Bridges are protocol independent.
Port - physical or logical device through which the process of receiving and transmitting data is carried out.
Protocol - a set of rules that determines the interaction of subscribers of a computer system and describes the method of performing a certain class of functions.
Server - a special computer that provides certain services to other computers.
socket(socket) - in many ways similar to a file descriptor (file handle). The socket provides the connection endpoint. An application, when creating a socket, specifies three parameters: the IP address of the host, the protocol (TCP or UDP), and the port used by the application.
Node - device connected to the network.
Gateway(Gateway) - gateway converter. Performs functions similar to a bridge, but is used to connect networks of different types, such as LAN and WAN. Usually, the term "router" is used for the device that links two local networks, and the gateway is used for the device that connects your local network to the Internet, although both of these devices perform the same function - packet routing.
How to connect several computers to each other and to the Internet, distributing the same speed to the Internet? Through such connections, you can not only use files located on another PC, the Internet, but also printers that are connected to any link in this network. Let's try to consider all the options for setting up a local network, from the simplest to the most complex.
We divide the sequence of actions conditionally into two stages.
To begin with, let's analyze and discard the option when you only need to share the Internet.
Internet connection of 2 or more computers in one apartment without creating a local network
You can solve this issue in several ways:
- Installing a router (router)- allows you to have access to the Internet to each of the computers without connecting the second one to the network. Since the Ip-address (the identification requisite of a computer on the network) is assigned directly to the router, you will have one tariff for the provision of Internet services, and you can use the Internet by two computers at once.
- wifi technology- wireless network connection. It is possible when using a special set of equipment and its settings.
1st stage. LAN setup
How to connect two computers in a network (Network Bridge)
One of the computers connects to the Internet, the second computer connects to the first. The main disadvantage in this case is that in order to access the network of the second computer, it is necessary that the first computer is also on the network. And also, if your Internet connection goes through a network card, then you need an additional network card to connect the second computer to the first one, because. the built-in network card is already busy (it accepts the Internet).
To connect two computers to each other and to the Internet via a Network Bridge, you will need:
1. Special cable (twisted pair) and possibly an additional network card.
Twisted pair can be obtained from radio markets or specialized stores. It is made independently, using a special tool called "crimping" and based on the required length of the cable itself. The pinout can be found on the Internet. And you can ask to compress the "vituha" directly on the radio market (tell the seller what you need to compress for the connection type "via network cards" or "comp-comp", there is also a "comp-switch") or buy a ready-made cable (if any), but it may be short. There is no factory assembly of such a cable, only a "comp-switch" is on sale, you can buy it, but then one end of it is cut and crimped.
A twisted pair is an 8-core cable (eg UTP-5) with RJ-45 connectors. The ends of the cables are crimped special. tool (special pliers) into the connectors in accordance with the colors of the ends. Crimping order network cable is: BO-O-BZ-S-BS-Z-BK-K at both ends to connect to the hub. To connect a computer to a computer, one of the sides should be: BZ-Z-BO-S-BS-O-BK-K, where O is orange, Z is green, S is blue, K is brown, BO is white-orange, etc. etc. (do not go into too much detail, but give the cable to knowledgeable people for crimping).
Twisted pair ($2-2.5 - 3 m)

Crimp tool
So, with the help of "twisted pair" we connect computers card-to-card (connection type "comp-comp")!
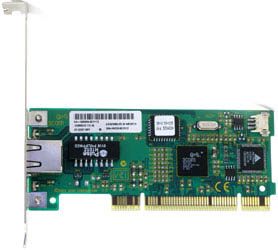
Network card ($3-6)
2. After connecting 2 computers via cable, you need to configure them programmatically.
Computers must be in the same workgroup, in the same address range, and with different network names. The setting of these parameters is shown in the graphic diagram:
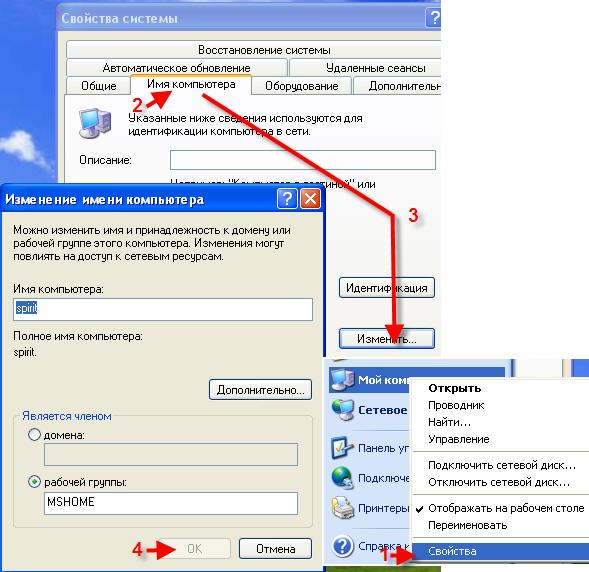
In this case, it is also desirable to set the IP addresses and the subnet mask manually (the subnet mask is generated automatically when the IP address is specified). IP addresses can be selected in the range 192.168.0.xxx. At the same time, on all computers on the local network, the IP address must necessarily begin with "192.168.0.xxx", and the last three digits (xxx) must be different (otherwise there will be a conflict, since this is equivalent to two different houses have the same address) and be in the range 0 - 255. The IP address setting is shown in the graphical diagram:

2.2. Wizard Setup
To do this, go to "Control Panel" -> "Network Setup Wizard", and follow the instructions of the wizard.
You can also combine manual network setup and setup using the wizard, for example, after setting up the network using the wizard, specify the IP address.
After all this, you can give access (share) some folders in the folder properties, in the "Access" tab. Shared folders can be seen by going to "My Computer" and in the "List of typical tasks" select "Network Neighborhood". Or through Total Commander go to "Network and Plugins" (rightmost drive button) -> "Entire Network" -> "Microsoft Windows Network".
3. Printer setup.
3.1. Sharing a Printer on a LAN
To do this, go to Start - Control Panel - Printers and Faxes. We find the printer connected to this PC, right-click on it and in context menu select "Sharing...". After that, this printer will automatically be detected on other PCs connected to this local network.
3.2. Using a Shared Printer on a LAN
On other PCs, go to Start - Control Panel - Printers and Faxes. Click on "Install Printer", and then follow the instructions of the printer installation wizard.
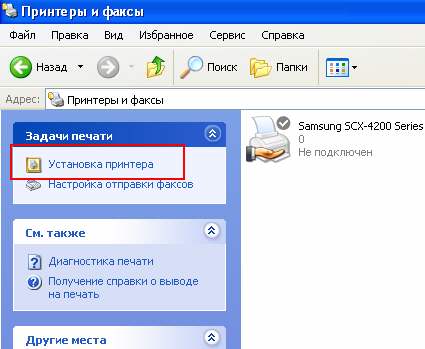
I. Select "A network printer or a printer connected to another computer"
Let's move on to the next step.
II. We put the choice on "Overview of printers"
We do an overview of printers on the local network.

III. If you plan to use this printer frequently or permanently, set it to “Use this printer as default?” - "Yes".
This completes the setup.
We connect 3 PCs through network cards by the type of Network Bridge
It is not necessary to have a router or a switch to connect 3 PCs, it is enough to buy one more network card.
This option is cheaper than a switch, because. a switch is 3 times more expensive than a network card. To connect 3 computers, you need to select one of them and make it the master, the other two slaves. You need to put 2 network cards on the host computer. Then connect with 2 other twisted pair and create a Network Bridge. Then share the internet and local folders, while the slave computer must be constantly turned on and connected to the Internet.
We connect 3 or more computers (up to 20 PCs) through an external hub (switch or network hub)
How to connect 3 or more computers to each other and to the Internet, provided that you need to distribute the same speed to each?
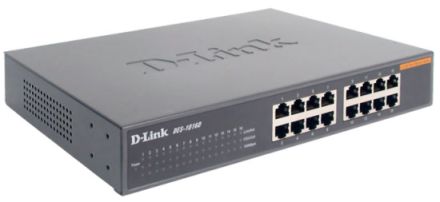
The simplest solution is to buy a switch (Hab), for 5 or more ports, N cables (taking into account the distance of each from the supposed location of the switch to each computer) with a comp-switch crimp (this has already been discussed above), where N is the number computers. After acquiring the necessary, you need to connect the computers to the switch. After that, we set up computers in the same way as with a connection between two computers.
We connect 3 or more computers (up to 6 PCs) through an internal hub (Hub)
We create a local area using an internal 5-port 100 Mbit hub
This option is perfect for organizing a network for a home and a small office (up to 6 computers) using a hub (or, as they say, a hub), for example, Genius GF4050C. The advantage of this PCI hub is that it is placed inside the computer like a regular expansion card. And for very little money ($45) you will get a 100 Mbps high-speed network in your office. But it should be noted that when the server (the PC where the hub is installed) is turned off, the network will not work. However, the hub does not require an extra power outlet and does not take up space on the table.

Internal hub
We connect 5-20 or more PCs through the Central PC server
We create a network with a central server computer that serves as a switch.
This option is designed for large offices and corporate organizations. More than 20 PCs can be interconnected. The central server computer with some server OS installed on it, for example, FreeBSD + switch, serves as a hub.
After exceeding the number of computers in the local area more than 20, you need to abandon the switch (hub) and install a central server, because. with so many PCs, data transfer will slow down the computer. This is due to the extra load on the processor when transmitting / receiving data, since there is a lot of processing, for example, when a movie is downloaded (resources are spent on creating packets where data is read, and parsing packets where data is received). All this leads to a slowdown in the performance of both computers: the one who reads and most of all the one where the data is read. If there is a center. server, then it is engaged in this business, and not client computers. That is why they put the central server. The switch takes over some of the processing, but this is not enough when in large numbers networked PCs.
But it is better, of course, to use a server with a smaller number of computers, while there will be no braking, but in this case, you need to spend extra money on a server, i.e. to another PC. In addition, the server must be served by someone, for this there is such a position as " System Administrator". In general, if there is no money for additional computer, it is possible to start up to 20 computers through a switch.
Let's decide on the starting points: a small company, let's say about 15-50 employees. As a rule, there is no qualified network specialist. And most likely it was the "dedicated" for working with the network, the network administrator by state. Let's agree - your specialist is still needed. And he needs to be paid money, and good money at that (what a horror, right? That's news for many directors). I will try in this article (perhaps with a continuation) to act as a network administrator for such a small company. So, we build a network ourselves. Why not? There are many arguments "against" "home-made", and all of them are true (unless, of course, this is not outright "noodles" from a potential contractor). But still, you can do it yourself. Arguments "for" also abound. We will not bring them here - we believe that we decided to do it ourselves. We will not make new-fangled radio, Wi-Fi and other networks, but an inexpensive, but high-quality cable network of a traditional wired type for the daily work of the company. However, one must understand that the work must be performed by a specialist (or several).
Introduction
Let's decide on the starting points: a small company, let's say about 15-50 employees. As a rule, there is no qualified network specialist. And most likely it was the "dedicated" for working with the network, the network administrator by state. If there is - a jack of all trades, and often forced to deal with some "urgent" business like Windows installation or drivers on some computer, instead of working with the network. Together with other "computers" (if any). Is the network working? Let the deck through the stump, well, okay, a little later we will do it (let's do it).
Let's agree - your specialist is still needed. And he needs to be paid money, and good money at that (what a horror, right? That's news for many directors). I will try in this article (perhaps with a continuation) to act as a network administrator for such a small company.
Initial data
So, we build a network ourselves. Why not? There are many arguments "against" "home-made", and all of them are true (unless, of course, this is not outright "noodles" from a potential contractor). But still, you can do it yourself. Arguments "for" also abound. We will not bring them here - we believe that we decided to do it ourselves.However, one must understand that the work must be performed by a specialist (or several). You can’t train (“though inferior, but your own”) and raise your specialist in this way. You can put your own into practice to the person doing the work (we will not take into account drilling holes with a puncher in the walls and fixing the cable channel - any man should be able to do this).
One more factor, let's add, so to speak, "pepper" - our company, in addition to the office, has a store and a warehouse, which are quite remote.
We will not make new-fangled radio, Wi-Fi and other networks, but an inexpensive, but high-quality cable network of a traditional wired type for the daily work of the company. For work, not for surfing news and/or porn sites from a laptop from a hotel couch. We may return to these issues in the sequel (not to the hotel and others like it, of course, but to modern technologies).
Last, and also very important: we count money, but we are not greedy.
Plan
At the very beginning, you must definitely do one very simple, but very important thing - take a few pieces of paper, a pencil and sit down for a draft business plan. It is very important to more or less clearly "take on a pencil" everything keywords, which will come to mind from the question "what do I want from the network." Sketch these positions on the first sheet. On the second - to group them into separate categories. For example - the category "services". What kind of services do we want to receive from the network, and what quality? What do we need? File-, ftp-, print-, internet service?It would seem that everything is clear, why write, draw? But, if you do not take everything on a pencil - then it will be worse. For example, it turns out that you need to go to the director and / or to the accounting department: “Sorry, we bought the wrong piece of iron here, and not for 100 USD. necessary, but for 500.
Now you can take a break to add what you need, throw away the excesses. And put it all aside for at least a day. Then the draft can be transferred to the third sheet. With "final" additions and corrections. Why quotes - you yourself understand, this is not the last sheet, and far from the last "sketches".
Services are services, however, the base is SCS, that is, a structured cabling system. Let's try not to run too far ahead of the horse.
Usually there are two options - an office "from scratch" and an office "ready". The first case - bare walls and ceiling, repair - ours, and that's good. The second option is "done". Those. - we begin the external laying of the SCS. But, let's not start with that, yet.
Electricity
An important stage, because God forbid, not just one or two ordinary computers “fly”, everything can “fly”. Well, we believe that everything is in order with the power network in our office. There is only one important point here - sources uninterruptible power supply(UPS). They are necessary. Believe me. A diesel generator is, of course, good, but not necessary in all cases, but sparing money on installing a UPS on each server or communication closet is simply stupid. However, we will return to the issue of UPS in due time.SCS and basic active equipment
Structured Cabling System (SCS) is one of the cornerstones. SCS must be properly designed and built. Let's break the question into sections:
* Communication cabinet (with "stuffing")
* Cable lines
* Subscriber sockets
This is where the plan of the premises, with clearly marked places for employees, is very useful. It must be borne in mind - it’s also good to note power sockets. Next - in order, let's start with the closet.
Communication cabinet: find a convenient place to install a cabinet with equipment. It is important to find the optimal distance to workstations in order to reduce the cost of twisted pair, cable channel and other "little things". There are many factors: limiting the length of the line to 100 meters (or rather, 90 meters, according to the classical formula 90 + 5 + 5); office layout (where is it convenient to put or hang a cabinet, is it convenient to pass the walls when pulling the cable, will the cooling not put pressure on the ears of customers or employees, etc.); in fact, the design of the cabinet (floor, wall, its height in U, the amount of equipment that needs to be installed in it, whether there will be a cooling unit).
There are a wide variety of cabinets, you need to carefully look at the prices and quality of the proposed purchase, do not forget to stock up on capacity (!) In those very U. Be sure to have at least one shelf. However, in some places it is quite possible to do wall brackets, to secure the equipment. But this is specificity. We will assume that for the office we chose a 12-14-height cabinet with a glass door. Looking ahead a little, it is necessary to mention what will be installed inside:
A shelf: it will always come in handy, even if it is empty (I doubt it) - it can be removed. You should not spare 10-20 dollars when you have to "suddenly" put a device or two in the closet, remember these lines.
Switch (switch): 24 ports at the lower limit of company employees in the office - let there be 10-20 people in the office (and do not forget about servers and other network equipment). However, if there is a high density of jobs, there will be no problems adding the required number of switches and other related equipment.
Distribution panel (patch panel): 24 ports, everything is the same with the switch. It is on the patch panel that all lines from workstations and servers will be reduced.
Panel (block) of power sockets: by the number of connected equipment in the cabinet, plus a supply of 1-2 sockets on the panel. Here we may well expect an "ambush" if we have to connect power supplies - it may not be enough (remember 99.9% of the market filled with surge protectors with tightly-obliquely planted sockets).
You can put a cheap, simple option (that's when a shelf comes in handy, but you can also put it on the floor of a cabinet), you can also use a 19 ”UPS designed for installation in a cabinet.

So, having looked at the products offered on the market, we believe that we have decided on a cabinet: 14-height (14 U). For example, Molex MODBOX II 14U:
Suitable for 19" 1U fan cabinet
. Standard cabinet set:
. Lightweight steel profile provides the cabinet with greater rigidity and strength
. Aesthetic glass door with lock
. Door of universal design with the possibility of hanging (left, right)
. 19" depth adjustable frame
. Grounding of all cabinet elements
. The cable entry holes are equipped with a protective brush to prevent dust from entering the cabinet
Switch. His choice is a more complex issue. Absolutely cheap switches do not want to be considered. There are devices that are more expensive (and very expensive), but you still have to choose from two types: unmanaged and managed.
Let's take a look at the following two devices: ZyXEL Dimension ES-1024 and ES-2024:
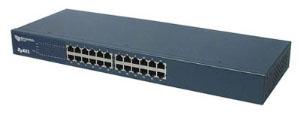
It is a cost-effective Fast Ethernet solution and can be used to build highly efficient switched networks. The data staging feature significantly reduces latency on high-speed networks. The switch is designed for workgroups, departments or backbone computing environments for small and medium enterprises. Due to the large address table and high performance, the switch is an excellent solution for connecting departmental networks to a corporate backbone or for connecting network segments.
Specifications:
24-port Fast Ethernet Switch
. IEEE 802.3, 802.3u and 802.3x compliant
. RJ-45 Ethernet ports with 10/100 Mbps auto-speed selection
. Automatic crossover cable connection detection on all 10/100 Mbps RJ-45 Ethernet ports
. Back-Pressure-Base flow control support on half-duplex ports
. Pause-Frame-Base flow control support on full duplex ports
. Store-and-forward switching support
. Support for automatic address detection
. Maximum Wired Transfer Rate
. Built-in MAC address table (8K MAC address capacity)
. Power LEDs, LK/ACT and FD/COL
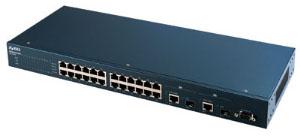
Application of ES-2024 switch will allow you to unite a group of users and connect them with high-speed lines to corporate network. Additionally, it will be possible, thanks to the use of iStackingTM technology, to combine a group of switches for network management, regardless of their location.
Specifications:
24 RJ-45 ports with automatic 10/100 Ethernet speed selection and automatic crossover cable connection detection
. 2 x 10/100/1000 Ethernet ports
. 2 mini-GBIC standard slots, combined with ports
. 8.8 Gbps non-blocking switching bus
. Support for IEEE 802.3u, 802.3ab, 802.3z, 802.3x, 802.1D, 802.1w, 802.1p protocols
. Table MAC addresses 10Kb
. VLAN support: Port-based and 802.1Q
. Possibility to limit the rate on the port
. 64 static VLANs and up to 2Kb dynamic VLANs
. MAC address filtering
. Support for ZyXEL iStacking™, up to 8 switches (up to 24 in the future) managed by a single IP address
. Control via RS-232 and WEB-interface
. Telnet CLI
. SNMP V2c(RFC 1213, 1493, 1643, 1757, 2647)
. Control over IP: static IP or DHCP client
. Firmware update via FTP
. Updating and Saving System Configuration
. Standard 19" Rack Mount
As you can see, there is a difference, and a very significant one. As there is a difference in price - approximately 100 and 450 dollars. But, if the first switch is a decent, but "stupid" box, then the second one is in some sense intelligent, with much more functionality and manageability, with potential strengths. We choose the second option. We want to build a good network, don't we?
By the way, right now it is quite time to ask yourself why, in fact, we are building a “hundredth” network? Today, every second computer has not just a gigabit network interface, but two gigabit ones?
This is the case where you can safely save. The fact is that a 100-megabit network is more than enough for an office to work. If, moreover, the switch is decent! Yes, but on the two gigabit interfaces of the selected switch - safely "sit down", for example, two servers. Here they are, the servers, it's just for the benefit.
Of course, you can take something like ZyXEL GS-2024 and put everyone on a gigabit channel, but this is just a case of unreasonable spending of money, and for that kind of money we can buy a complete cabinet with a more complete filling.
Patch panel. Also the case when you should not save much. Choose a panel like Molex 19" 24xRJ45, KATT, 568B, UTP, PowerCat 5e, 1U.
Compliance with the requirements of category 5e. The compensation system is implemented directly on the printed circuit board. The use of CATT type connectors speeds up and simplifies cable installation. Dedicated space for labeling channels. The panel is powder coated. All necessary fastening and marking elements are supplied in the kit.
There are many options here, as already mentioned, you can put any cheap one, it can be more expensive, you can use a 19” rack-version - there will be beauty at all. Who doesn't know APC? You can see for example this UPS:
APC Smart-UPS SC 1500VA 230V - 2U Rackmount/Tower
Or, like this:
Without delving into the characteristics, we note that many devices are equipped on request with guides for installing the UPS in a 19 "rack. Also, it is possible to equip, if desired, with an SNMP module for monitoring and managing the UPS over a computer network. Of course, this will cost money, but It can be very convenient.Let's opt for IPPON.It should be noted that models 1500, 2000 and 3000 can be equipped with SNMP support, but not 750 and 1000.
Power outlet block:
Without any special comments - maybe you can find something cheaper, easier. But a dozen "strangled raccoons" will not make the weather.
It remains to remember to decide whether a fan unit is needed in the cabinet? Expensive pleasure, especially when paired with a thermostat unit. However, we will attribute this to the specifics of the place / office.
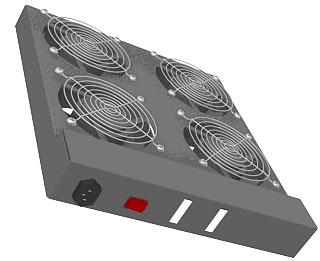
We more or less figured out the closet, there were all sorts of “little things”, without taking into account which there will be annoying delays later:
* Screws with nuts for mounting equipment in the cabinet;
* Nylon non-opening ties for laying and fastening the cable (packs of 100 pieces, 100, 150, 200 mm long);
* Marking for the cable (adhesive sheets with a protective layer).
In fact, we got to the SCS itself. A very important "detail" is the cable, which will be used for wiring the SCS. Yes, again a call not to save. A good twisted pair cable is a good investment. We take Molex, unshielded UTP PowerCat 5e cable.
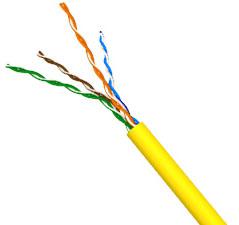
The cable is the core element of the PowerCat product line. The line is designed for use in high-speed telecommunication networks (eg GigaEthernet 1000Base-T).
We, of course, will come to subscriber sockets, and then what? Next - buy the required number of patch cords to connect workstations. Naturally, you need to think over the length, look at the office plan mentioned above. But that's not all. You also need a strainded cable (normal - solid). This is a special twisted pair, "soft", from which patch cords are made. After all, sooner or later you will definitely need a patch cord of a greater length than there are ready-made ones at hand (if at all by that time they remain). it will be necessary - as you wish) to make short - 30-50 cm, patch cords for crossing SCS lines and active equipment in the cabinet itself. Therefore, we "take a pencil" a couple more packages of RJ45 connectors, in common parlance - "chips". And packaging of rubber caps for them.It is better to take soft caps and with a slot for the "chips" retainer, and not with a "pimple" for the retainer.
We have almost reached the network interfaces on user computers, but subscriber sockets are still needed. Someone against such a wonderful thing as Molex OFFICE BLOCK 2xRJ45? ;-)
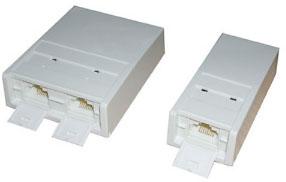
Compliance with the requirements of category 5e. The modules are designed for high-speed telecommunication networks. Possibility of cable entry from the sides, top or rear. As standard, the modules are equipped with dust shutters. Ease of labeling channels. The built-in magnet simplifies mounting the modules to metal surfaces. Possibility of fastening with screws. Cable fastening inside the module without cable ties. Free choice of connection sequence (568A/B). Connector type "KATT" facilitating installation. The kit includes mounting elements. .
Here it is necessary to determine the quantity. After all, there are single options. Again we take the plan of the office. There is another important point in determining the installation locations for sockets - it is advisable to add one or two additional SCS lines to each cabinet. One is just "just in case". What if the layout in the office changes a little or someone will need to connect a laptop? The second one is not bad to have based on the print server, for organizing network printing. It is very nice to have one or two network printers for your office or office that work without problems and whims of the owner (or Windows).
Do you think that's all? No. Another factor that is present in any office is forgotten - telephony. It's a good idea to think about this too: if telephones should be wired to some workplaces, then why not make a wiring in the general SCS? After all, the issue can be solved simply: throw a line or two to the necessary places, put an RJ-12 socket next to the RJ-45, even in one housing (unit). In the socket - DECT, for example, with several handsets, and in the cabinet we draw a line (lines) from the PBX - they can be put on sockets, neatly glued with Velcro inside and on the side. Lines from jobs - on them.
It seems like it's time to take on the cable channel and dowel-nails? Yes. It is time. But this is already clear to any handy man, we will not dwell on this for a long time. You just need to take into account the number of lines laid in the cable channel. And, of course, a small margin is needed. It is very good if the office has a suspended ceiling, the lines can be pulled behind it right to the workplace and lowered in a cable channel along the wall. When drawing lines, it’s a good idea to mark them (as well as sockets in the future). The easiest method is the first socket to the left of the door - No. 1, further in a circle.
After stretching the lines, you can start splitting the patch panel and sockets. Needless to say, this job requires accuracy and skill. It is at this moment that line marking will come in handy for us - if all the lines are split in order, then in the further operation of the SCS it will be possible to practically do without an installation map (layout), something like this:
Socket
However, this card is still needed in the future. Will definitely come in handy.
When laying cables, you must follow a few simple rules (just simple ones, we will not delve into standards and other ISOs now):
* Do not severely bend, rub or step on the cable. Cable bending is allowed: during installation - 8, and, during operation - 4 radii of the cable itself;
* Do not lay lines near power lines: if necessary, lay them in parallel - at a distance of at least 20 cm;
* Crossing power lines is allowed, at a right angle;
* Mandatory testing by a cable tester.
Separately, about the last point. Remember the joke about the Japanese supply of something there? “Dear customers! We don't know why you need this, but we still decided to put in the boxes one defective chip for every ten thousand, according to your requirements. Yes, you can just split and forget. An experienced installer is not mistaken. However, a really experienced installer will definitely check, and not only the layout of the line, but also the quality.
Here we come to the most interesting moment. If we check a trifle with a simple and cheap tester, then to carry out tests and certify lines - no, it will not work:
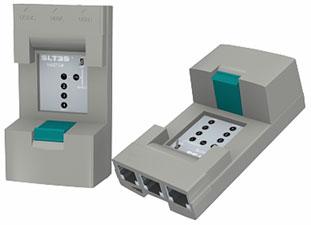
Which exit? I really don't want to leave the issue of line quality unresolved. There are three options. The first is to buy a good tester, for example:
But, alas, we are very sorry for $6,000, even if it is for such a wonderful and necessary device.

It is a compact, handheld tool used for qualification, testing, and troubleshooting of coaxial and twisted-pair cabling in local area networks. The tester is recommended by leading manufacturers of information cabling systems for testing for system certification up to Class E inclusive. The high level of reliability, convenience and accuracy of the device provided him with one of the first places among the products of this class. For fast and high-quality testing of cable connections in an extended frequency range up to 350 MHz, digital pulse signal processing technologies are used.
The second option is to invite a familiar admin or installer who has such or a similar device. Of course, having previously bought a case of good beer. Half an hour of work, plus a beer evening in the pleasant company of a friend.
The third option is to officially invite specialists from a company that provides such services. and pay for these services. This is not so much, especially if you do not require a certificate on paper.
Remote workstations
Having "finished" (quotation marks because we must first still plan everything and make the necessary purchases and negotiations) with the work at the main office, we remember the warehouse and the store.
Now (in these notes) we will consider not a "tricky" solution like VPN, but the simplest one - organizing communication computer networks with subnets (workstations with a network) via a dedicated line. Effective, cheap and cheerful. By the way, allotments, of course, should be placed in a closet and connected to sockets, like telephones.
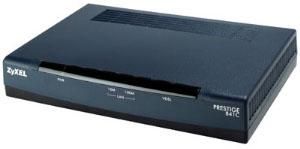
If the distance and, accordingly, the resistance of the leased line are small, you can try to install a pair of "bridges", for example, the already mentioned firms ZyXEL Prestige 841С and ZyXEL Prestige 841. Model "C" is "master", so this device is best installed at the head office. These are inexpensive VDSL devices, but they give the necessary results for our task. What ZyXEL says:
Depending on the type and condition of the cable, as well as on the distance, the Prestige 841 paired with the Prestige 841C provides the following data exchange rate:
In the direction to the subscriber - within the range from 4.17 to 18.75 Mbps
. in the direction from the subscriber - from 1.56 to 16.67 Mbps
. the total bandwidth of the line can reach 35 Mbps
Specifications:
VDSL Ethernet Bridge
. LAN connection at 15 Mbps up to 1.5 km
. Plug&Play, transparent to all protocols
. Working in pairs
. Desktop execution
. Non-volatile memory (Flash ROM)
. Size: 181 x 128 x 30 mm
This option will give 18 Mb in each direction, ideally, of course. This is VDS.
When using Prestige 841 there is another plus. These devices have a built-in splitter, and we can get "free" telephony from a remote location. It is enough to plug into the “phone” socket on the one hand the telephone of the remote workplace, and on the other hand, connect the office mini-PBX.
If the VDSL bridges don't "stretch" the line, you need to look at other devices, xDSL. For example - something from the 79 series ZyXEL, SHDSL.
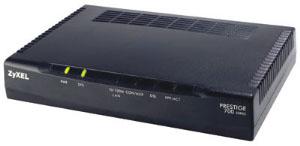
Optimization of the hardware and the use of advanced technologies have made it possible not only to reduce the dimensions of the device, but also to reduce the cost and improve functional characteristics. provide symmetrical connection at speeds up to 2.3 Mbps and can work on a leased 2-wire line both in point-to-point mode and as a client of an Internet provider hub.
Specifications:
. SHDSL router
. G.991.2 support up to 2.3 Mbps symmetrical
. Connecting networks or accessing the Internet over long distances
. Encapsulation PPPoA, PPPoE, RFC-1483
. TCP/IP Routing, Full NAT, Packet Filtering
. Support for IP Policy Routing, UPnP, connection redundancy
. Management via console, Telnet, Web, SNMP
The ideal speed is 2.3Mb over two wires. If you "charge" 4 wires, the speed will be correspondingly greater. However, these devices will cost a large amount - 400-500 dollars per pair. In any case, roughly speaking, the worse the quality of the line, the lower the speed and the higher the costs. However, we will postpone the tuning (tuning) of devices for the future, this is a separate conversation, especially since in the case of VDSL 841 this does not make too much sense at all. xDSL devices should be placed on a shelf in a closet. I told you it wouldn't be empty.
Internet connection
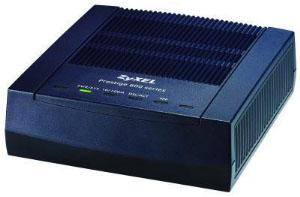
ZyXEL Prestige-660
A modern office is unthinkable without the Internet. To connect, we can use ADSL technology, for example - ZyXEL Prestige 660.
As ZyXEL describes this device:
Modem P-660R belongs to the fourth generation of ADSL modems and combines in one device the functionality necessary to connect an existing office or home network to the Internet: ADSL2+ modem, router and firewall. The modem will provide your office with a permanent Internet connection that works quickly and securely. Installation and maintenance of the P-660R modem is simple and will not cause any problems even for inexperienced users.
Main advantages of ZyXEL Prestige 660:
* High-speed Internet - up to 24 Mbps
* Reliable connection on problematic lines
* Free phone
* Permanent connection
* Does not require driver installation
* Works with W
We build a network with our own hands and connect it to the Internet, part one
We are starting to publish a series of articles on the topic of deploying a small (within a home or small office) local area network and connecting it to the Internet.
I suppose the relevance of this material today is quite high, since only in the last couple of months, several of my acquaintances, who know computers quite well in general, asked me questions on network topics that I considered obvious. Apparently they are not for everyone ;-)
Throughout the article, terms from the networking field will be used, most of them are explained in mini-faq about networks compiled by Dmitry Redko.
Unfortunately, this material has not been updated for a long time. Although it has not lost its relevance, there are quite a lot of gaps in it, so if there are volunteers to fill in these gaps, write to the email address listed at the end of this article.
The first time a web term is used, it will be hyperlinked to an explanation of it in the FAQ. If some terms are not explained in the course of the article or in the FAQ, feel free to mention this fact in where this article will be discussed.
So. In the first part, the simplest case will be considered. We have 2 or more computers with built-in motherboard or installed separately network card , switch(switch) or even without it, as well as an Internet channel provided by the nearest provider.
Let's fix that all computers have the Microsoft Windows XP Professional operating system with Service Pack version 1 installed. suffering, we will analyze others). The OS language version is English. On the Russian version, everything will work in a similar way, readers will only need to match the Russian analogues of the names in the screenshots below.
If we have only two computers and there is no switch available, then to create a network between two computers, a network card is required in each of them and cross over cable for connecting computers to each other.
Why cross-over and why is a regular cable bad? The 10 and 100 Mbit Ethernet standards (10Base-T and 100Base-TX) use 4 wires for twisted pair (two pairs of wires twisted together). Typically, a twisted-pair cable has 8 wires, but only 4 of them are used (all eight are used in Gigabit Ethernet).
After receiving the cable, we connect the network cards of computers with it and voila - everything should work (at the physical level). To check the health of the network at the physical level (signal level), it makes sense to look at the indicators (most often green), which are located on the network card near RJ-45 connector. At least one of them should be responsible for indicating the presence of a link (physical connection). If the indicators on both network cards light up, then there is a physical link, the cable is crimped correctly. A burning indicator on only one of the two cards does not mean that everything is in order at the physical level. The flickering of these (or neighboring) indicators signals the transfer of data between computers. If the indicators on both cards are off, then with a high probability the cable is not crimped correctly or it is damaged. It is also possible that one of the network cards is out of order.
Of course, what is described in the previous paragraph does not mean that the operating system sees the network card. The burning of the indicators only indicates the presence of a physical link between the computers, nothing more. In order for Windows to see a network card, you need a driver for this card (usually, the operating system itself finds the right one and installs it automatically). Quote from forum: Just yesterday I diagnosed a case with a connected network card that was not fully inserted into the PCI slot. As a result, the network “physically” worked, but the OS did not see it.».
Let's consider the second situation. Available switch and two or more computers. If two computers can still be connected without a switch, then if there are three (or more) of them, then combining them without a switch is a problem. Although the problem is solvable - to combine three computers, you need to insert two network cards into one of them, put this computer into router (router) mode and connect it to the two remaining machines. But the description of this process is already beyond the scope of this article. Let us dwell on the fact that to combine three or more computers into one local network, you need a switch (nevertheless, there are other options: you can combine computers using a FireWire interface or USB DataLink cable; as well as using wireless (WiFi) cards, transferred to Ad Hoc mode of operation ... but more on that in the next episodes).
Computers connected to the switch straight cable. Which termination option (568A or 568B) will be chosen is absolutely not important. The main thing to remember is that on both sides of the cable it (terminal) coincided.
After crimping the cable (or buying it in a store), and connecting all available computers to the switch, you should check for a physical link. The check proceeds similarly to the method described above for two computers. On the switch, next to the ports, there should also be indicators indicating the presence of a physical connection. It may well turn out that the indicators are not located next to (top, side, bottom) with the port, but placed on a separate panel. In this case, they will be numbered according to the port numbers.
Having reached this paragraph, we already have 2 or more computers physically connected to a local network. Let's move on to setting up the operating system.
First, let's check the correctness of the IP addressing settings on the network card. By default, Windows OS (2K/XP) itself assigns the necessary IP addresses to the cards, but it's better to see for yourself.

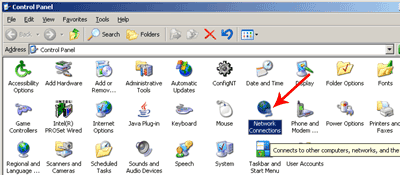
We go to the settings of the network card. This can be done in two ways, through the control panel (Start -> Control Panel -> Network Connection)
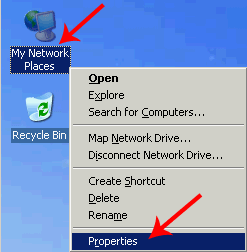
Or, if the network environment (Network Places) is placed on the desktop, then just click on it right click and select Properties.
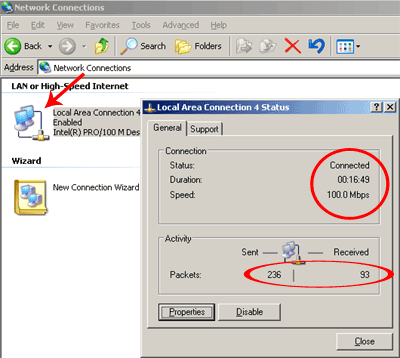
In the window that appears, select the desired network adapter (usually there is only one). The new window tells us quite a lot of information. Firstly, the connection status (in this case, Connected, i.e. there is a physical connection) and its speed (100 Mbps). As well as the number of sent and received packets. If the number of received packets is zero, and there is more than one computer on the network (turned on), then this may indicate a malfunction of our network card or switch port (if the computer is connected to it). It is also possible that the cable itself is defective.
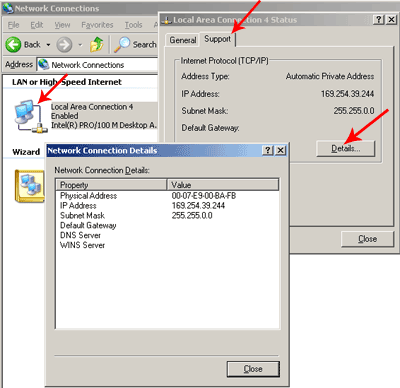
By selecting the Support tab, you can find out the current IP address and subnet mask assigned to the network card. By default, Windows gives adapters IP addresses in their range 169.254.0.0 -- 169.254.255.254 with a subnet mask of 255.255.0.0. Discussion of masks, subnet classes, and so on is beyond the scope of this article. The main thing to remember is that the subnet mask of all computers from the same network must match, and IP addresses must differ. But again, the digits of the IP address, which coincide in position with the non-zero digits of the subnet mask, must be the same for all computers, i.e. in this example, all hosts from the local network in the IP address will have the same first two positions of digits - 169.254.
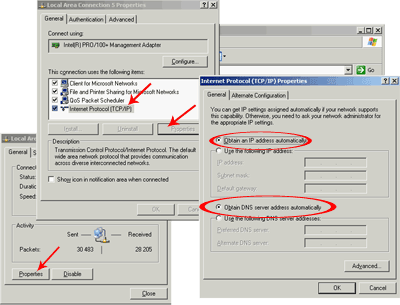
The IP settings of the network card can also be set manually (Network adapter properties —> Properties —> Internet Protocol (TCP/IP) —> Properties). But in most cases, it makes sense to set the settings to the default value (automatic determination of the IP address and DNS) and the operating system will configure the network adapters itself.
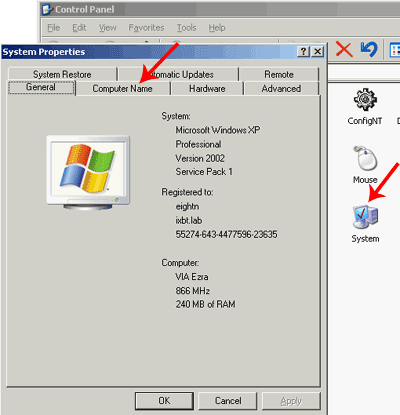
In addition to network addresses, all computers must be given the same workgroup name. This is configured in the system settings (System Properties). You can get there through the control panel (System -> Computer Name). Of course, you can set different names for workgroups. This is convenient if you have many computers on the network and you need to somehow logically separate the working machines among themselves. The consequence of this will be the appearance of several working groups in a networked environment (instead of one).
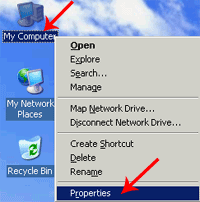
or, if the My Computer icon was displayed on the desktop, then right-click on this icon and select (Properties -> Computer Name).
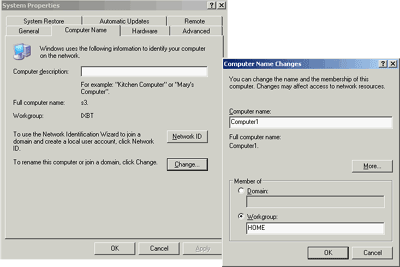
In the window that appears (appearing after clicking the Change button), you can change the name of the computer (each machine has its own unique name). And then you need to enter the name of the working group. All computers on the local network must have the same workgroup name.
After that, the OS will ask you to reboot, which will need to be done.
On any of the computers, you can "share" (ie share) directories. This is done in the following way:
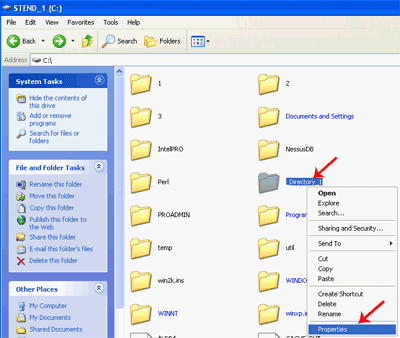
In File Explorer, right-click on the directory and select Properties.
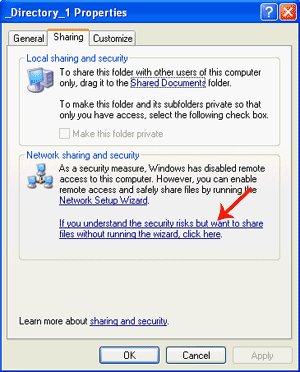
Sharing directories for general access is carried out in the Sharing tab. For the first time, we will be asked to agree that we understand what we are doing.
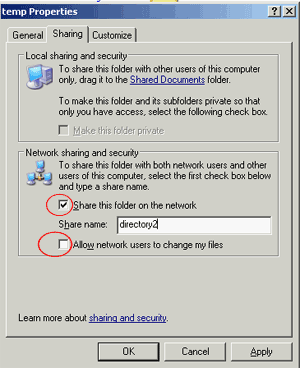
In all subsequent ones, you just need to check the Share this foldier field (the directory will be accessible over the network in read-only mode). If you want to allow changing data over the network, you will have to check the box Allow Network User to Change my Files.
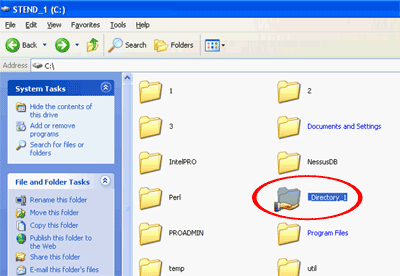
After confirmation (pressing OK), the directory icon will change to the one shown in the screenshot.
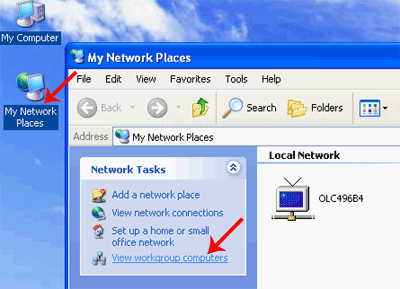
From other computers, you can access the shared directories by going to the network environment (My Network Places) located in the Start menu or on the desktop, selecting View Workgroup Computers,

and then click on the desired computer name.
Shared directories will be presented in the window that appears.
After selecting any of them, you can work with them in the same way as if they were located on local computer(but, if the permission to change files when sharing a directory was not activated, then you will not be able to change files, only watch and copy).
I draw your attention to the fact that the above method will work without problems if both computers (on which the directory was shared and which is trying to access it over the network) have the same usernames with the same passwords. In other words, if you, working under user USER1, have shared a directory, then in order to access it from another computer, user USER1 must also be created on it with the same password (as on the first computer). User rights USER1 on another computer (the one from which they are trying to access the shared resource) can be minimal (it is enough to give him guest rights).
If the above condition is not met, there may be problems with access to shared directories (drop-down boxes with inscriptions like access denied, etc.). These problems can be avoided by activating a guest account. True, in this case, ANY user within the local network will be able to see your shared directories (and in the case of a network printer, print on it) and, if modification of files by network users was allowed there, then anyone will be able to change them, including deleting.
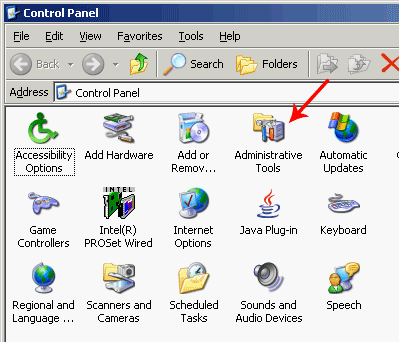
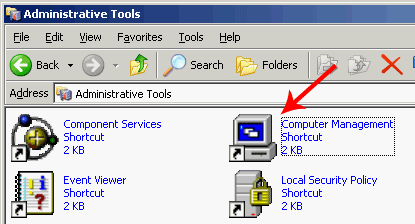
Activating a guest account is done as follows:
Start —> control panel —>
such a view as in the screenshot, the control panel acquires after clicking on the Switch to Classic View button (switch to classic look)
-> administration -> computer management ->
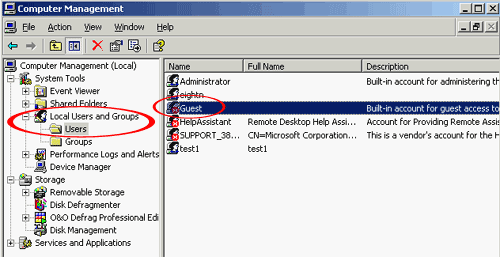
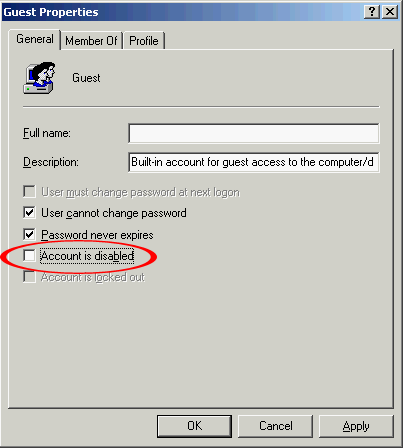
In the computer management window that appears, select the local user and group management tab, find the guest account and activate it. By default in Windows guest The account is already in the system, but blocked.
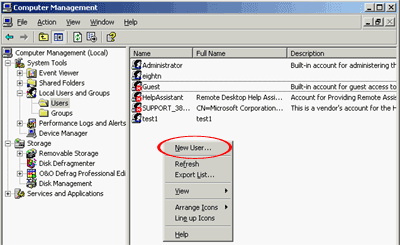
A few words about adding users to the system (more on this in future articles). In the same manager for managing local users and groups, right-click on an empty space in the list of users, select new user(add new user).
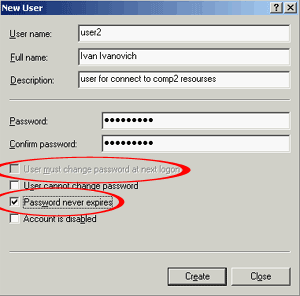
In the window that appears, enter the login (in this case, user2 is entered), the full name and description, the last two values are optional. Next, assign a password (password), in the next field - repeat the same password. Removing the checkbox User must change password at next logon(user must change password at next login), allows the user to log in with the specified password and will not require changing it at the first logon. And the jackdaw opposite Password never experience(password never expires), makes it possible to use the specified password indefinitely.
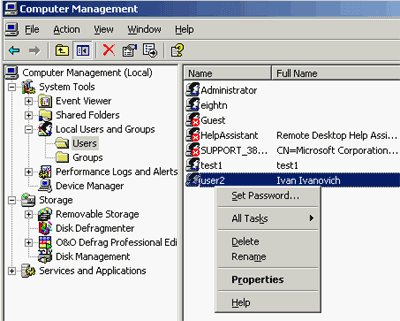
By default, the newly created user is a member of the group Users(users). Those. the user will have rather limited rights. Nevertheless, there will be quite a lot of them, and on the local computer it will be possible to log in under this login and work quite comfortably. You can further restrict the rights (to a minimum) of this user by removing him from the group Users and adding to the group guests(guests). To do this, right-click on the user, select Properties(properties),
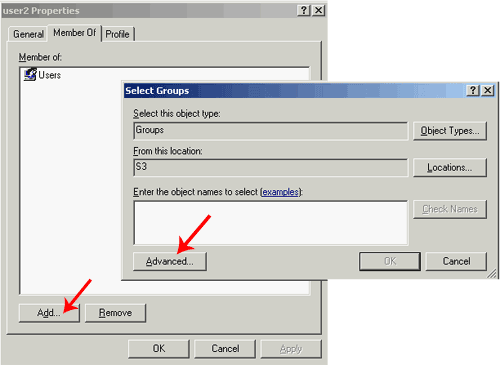
Member of —> Add, in the window that appears, click on Advanced(additionally)

Click find now(find). And in the list that appears, select the desired group (Guest, guests).
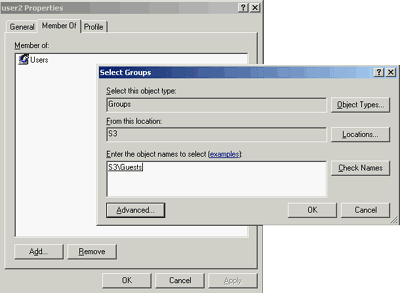
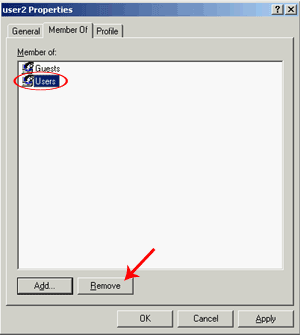
The user has been added to the Guest group. It remains to remove it from the Users group: select it and click on the button Remove(delete).
More flexible access control to shared resources can be obtained by disabling the Simple File Sharing mode (simple file access) in Explorer's settings. But this is again beyond the scope of the current article.

Sharing (sharing) printers is done in a similar way. On the computer to which the printer is connected, select its icon (via start -> printers), right-click on it, select properties (properties).
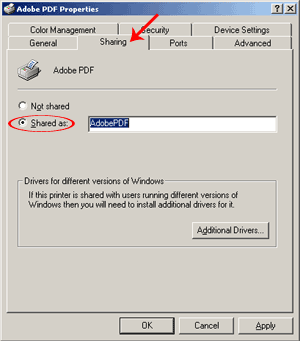
Control public access to the printer is carried out in the Sharing tab. You need to select the Shared As item and enter the name of the printer, under which it will be visible in the network environment.
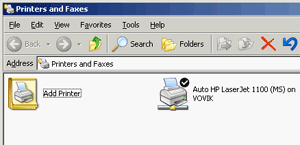
On other computers connected to the same local network, network printer, most likely, he will appear in the menu of printers. If this does not happen, launch the Add Printer icon (add a printer),
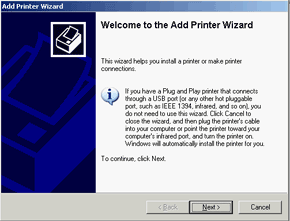
which will call the wizard for connecting printers.
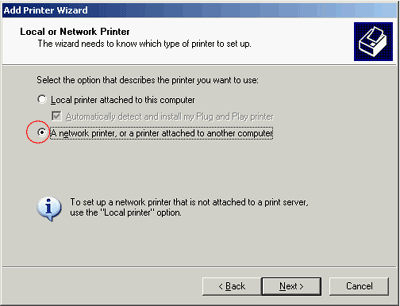
We indicate to him that we want to connect a network printer.
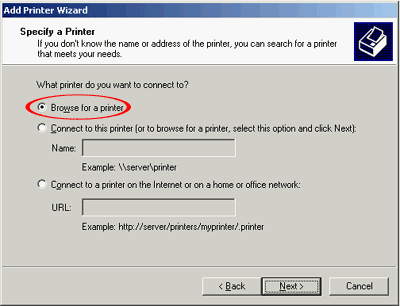
In the next menu, we indicate that we want to find a printer in a network environment. You can also enter a direct UNC to the printer, for example, \\computer1\printer1, using the Connect to this Printer item.
UNC (Universal Naming Convention) - Universal network path, used in operating systems from Microsoft. Represented as \\computer_name\shared_resource_name, where computer_name = NetBIOS machine name, and shared_resource_name = the name of the shared directory, printer, or other device.
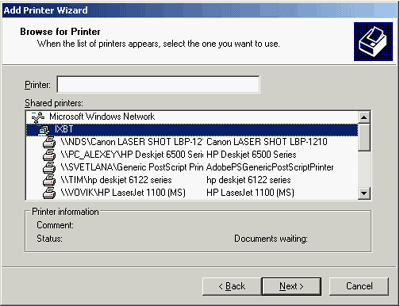
If we selected the item to search for a printer in the network environment, then after clicking the Next button, a network environment browser window will appear, where you need to select a shared printer. After this operation, with local machine You can send documents for printing to a remote printer.
So. We got a working local network. It's time to give her access to the Internet. Later in this article, we will tell you how to organize such access using one of the computers as a router (router). To do this, it must have two network cards. For example, one is built into the motherboard, and the second is external, inserted into the PCI slot. Or two external ones, it doesn't matter.
We connect the wire coming from the provider to the second network card of the router (the first one looks into the local network). It can be a twisted pair cable (crossover or direct cable) from an ADSL modem, or a twisted pair wired by local network installers in your area, or something else.
It is quite possible that an ADSL modem (or other similar device) is connected to a computer via a USB interface, then a second network card is not needed at all. It is also possible that the router computer is a laptop that has one network card connected by wire to the local network and a WI-FI (wireless) network card connected to wireless network provider.
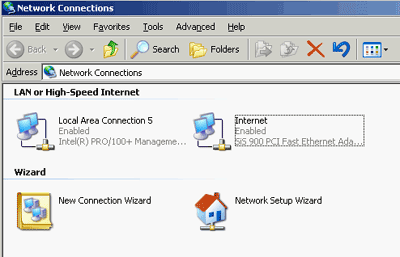
The main thing is that two network interfaces are visible in the Network Connections window. In this case (see screenshot), the left interface (Local Area Connection 5) is responsible for access to the local network, and the right one (Internet) is responsible for access to the global Internet. Of course, the names of the interfaces will differ in each case.
Before implementing the following steps, the external interface (facing the Internet) must be configured. Those. from the computer-future-router, Internet access should already work. I omit this setting, since it is physically impossible to foresee all possible options. In general, the interface should automatically receive the necessary settings from the provider (via a DHCP server). You can check if the network card has received some addresses, similar to the method described above in this article. There are options when the provider's representative gives you a list of parameters for manually configuring the adapter (as a rule, this is an IP address, a list of DNS servers and a gateway address).
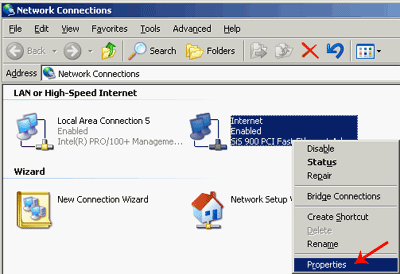
To activate Internet access for the entire local network, right-click on the external (looking towards the Internet) interface.
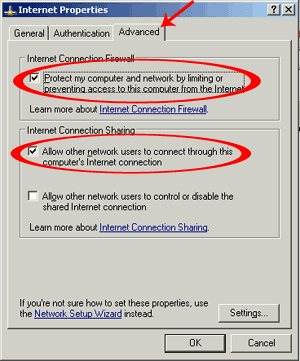
Select the Advanced tab. And here we check the box next to Allow other Network Users to Connect through this Computer "s Internet Connection. If you want this Internet access to be controlled from other computers on the local network, turn on Allow other Network Users to Control ...
If the machine does not use any additional firewall (firewall), in addition to the built-in Windows one (i.e., a program that was additionally installed on the machine), then we must turn on the firewall (protecting our router from outside world) - Protect my Computer and Network. If an additional firewall is installed, then the built-in protection can not be activated, but only an external firewall can be configured. The main thing is that the firewall on the interface facing the Internet must be turned on, built-in or external.
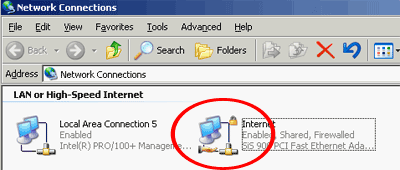
After confirmation (pressing the OK button), the router mode is activated in the computer, implemented through the NAT mechanism. And above the network interface where this mechanism is activated, a palm symbol appears (a padlock on top means that the firewall protection of this interface is enabled).
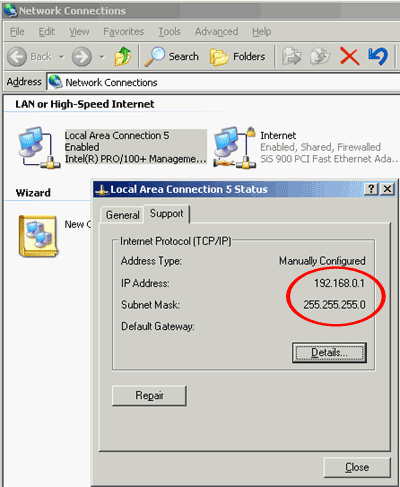
A direct consequence of this mode is changing the address on the local (looking into the local network) interface of the router to 192.168.0.1 with a subnet mask of 255.255.255.0. In addition, the DHCP service is activated on the computer acting as a router (the router starts distributing the necessary IP addressing parameters to all computers on the local network), and DNS (transformation of IP addresses into domain names and back). The router becomes the default gateway for all other computers on the network.
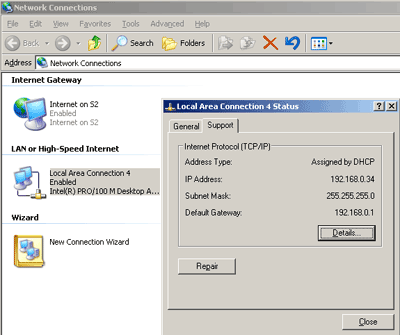
And here is how it looks from the point of view of other computers on the local network. All of them receive the necessary IP addressing settings from the router via DHCP. To do this, of course, in the settings of their network cards, they must automatically obtain an IP address and DNS. If this has not been done, then nothing will work. Setting up automatic obtaining of an IP address and DNS was described above. It is possible that the computer will not receive the necessary addresses from the router immediately, so as not to wait, you can click the Repair button, which will force the DHCP service to provide the necessary information.
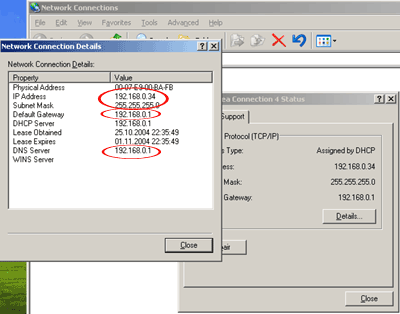
If the network card is configured correctly, computers will receive addresses from the range 192.168.0.2---254 with a mask of 255.255.255.0. The default gateway (default gw) and DNS server will be set to 192.168.0.1 (router address).
From now on, the computers on the local network should be able to access the Internet. You can check this by opening any site in Internet Explorer or by pinging any host on the Internet, for example, www.ru. To do this, click Start -> Run and in the window that appears, type
ping www.ru -t
Of course, instead of www.ru, you can choose any other working and responding to ping host on the Internet. The "-t" switch enables infinite ping (without it, only four packets will be sent, after which the command will complete its work and the window with it will close).
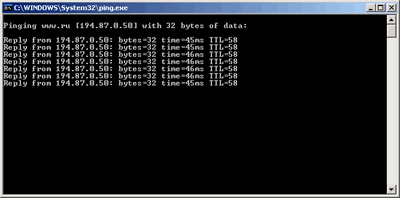
In the case of normal operation of the channel to the Internet, the output from the ping command should be approximately the same as in the screenshot, i.e. answers (reply) should go. If the host does not respond (i.e. the Internet channel does not work or something is incorrectly configured on the router), then timeouts will appear instead of responses (reply-s). By the way, not all providers allow the ICMP protocol that the ping command uses. In other words, it is quite possible that “ping does not work”, but there is Internet access (sites open normally).
Finally, I will dwell on the NAT mechanism in more detail. NAT - Network Address Translation, i.e. technology of translation (transformation) of network addresses. Using this mechanism, several machines from one network can access another network (in our case, several machines from the local network can access the global Internet) using only one IP address (the entire network is masked under one IP address). In our case, this will be the IP address external interface(second network card) of the router. IP addresses of packets from the local network, passing through NAT (towards the Internet), are overwritten by the address of the external network interface, and returning back, the correct (local) IP address of the machine that sent the original data packet is restored on the packets. In other words, machines from the local network work under their addresses, not noticing anything. But from the point of view of an external observer located on the Internet, only one machine works on the network (our router with an activated NAT mechanism), and another two, three, one hundred machines from the local network located behind the router are not visible to the observer at all.
On the one hand, the NAT mechanism is very convenient. After all, having received only one IP address (one connection) from the provider, you can bring at least a hundred machines to the global network by literally making a few mouse clicks. Plus, the local network is automatically protected from intruders - it is simply not visible to the outside world, with the exception of the router computer itself (numerous vulnerabilities of the Microsoft OS family again fall outside the scope of this article, I will only note that activating protection, i.e. turning on the firewall on external interface of the router, as mentioned above, is required). But there is also the other side of the coin. Not all protocols (and therefore not all applications) will be able to work through NAT. For example, ICQ will refuse to send files. Netmeeting will most likely not work, there may be problems accessing some ftp servers (running in active mode), etc. But for the vast majority of programs, the NAT mechanism will remain completely transparent. They simply will not notice it, continuing to work as if nothing had happened.
But. What if there is a WEB or some other server inside the local network that should be visible from the outside? Any user accessing http://my.cool.network.ru (where my.cool.network.ru is the address of the router) will get to port 80 (by default WEB servers respond exactly on this port) of a router that knows nothing about the WEB server (because it is not on it, but somewhere inside the local network BEHIND it). Therefore, the router will simply respond with a whack (at the network level), thereby showing that he really did not hear anything about the WEB (or any other) server.
What to do? In this case, you need to configure a redirect (redirect) of some ports from the external interface of the router into the local network. For example, let's set up port 80 redirection inside, to the web server (which we have on the computer 169.254.10.10):
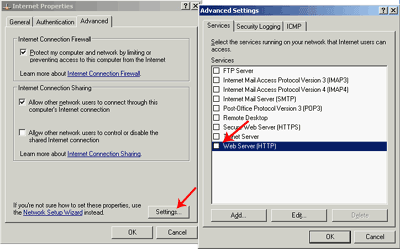
In the same menu where NAT was activated, click the Settings button and select Web Server (HTTP) in the window that appears.
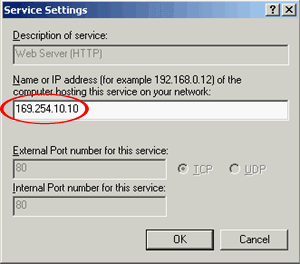
Since we chose the standard HTTP protocol, which was already listed before us, it is not necessary to select the external port (External Port) to which the router will accept connections and the internal port (Internel Port) to which the connection will be redirected to the local network , - the standard value 80 is already set there. The protocol type (TCP or UDP) is already defined in the same way. It remains only to set the IP address of the machine on the local network, where the incoming Internet connection will be redirected to the web server. Although, as I was correctly corrected in the forum, it is better to set not the IP address, but the name of this machine. Since the IP address (which is issued automatically by the DHCP server) may well change, but the machine name does not (it can only be changed manually).
Now, from the point of view of an external observer (located on the Internet), a web server has appeared on port 80 on the router (the local network behind it is still not visible). He (the observer) will work with it as usual, not assuming that in fact the web server is located on a completely different machine. Comfortable? I guess yes.
If you need to give external access to some non-standard service (or standard, but not pre-listed), then instead of selecting services from the list in the above screenshot, you will need to click the Add button and enter all the required values manually.
Instead of a conclusion
In the first part of the series of articles, the possibility of organizing local network access to the Internet using the built-in features of Windows XP from Microsoft was considered. It should not be forgotten that the router computer obtained as a result of the configuration must work constantly, because if it is turned off, the rest of the hosts from the local network will lose access to the Internet. But a constantly running computer is not always convenient (it makes noise, heats up, and it eats electricity).
Options for organizing access from local networks to the global one are not limited to the above. Future articles will look at other ways, such as through hardware routers. The latter have already appeared in reviews on our site, but in those articles the emphasis was on testing features, without much explanation of what these features give the user. We will try to correct this unfortunate omission.
Navigation
- Part One - Building a Basic Wired Network
- Part Three - Using WEP/WPA Encryption on Wireless Networks