Instruction
In fact, any remote files can be restored. This will require a special program. Very convenient and easy to use is the universal utility TuneUp Utilities. Download and install the program. After installation is complete, restart your computer, even if you are not prompted to do so.
Also keep in mind that recovering files from damaged drives is almost impossible. Even the most expensive recovery software will not be able to completely restore files, only partially. Here are some of best tools for you to try.
Top Three File and Folder Recovery Tools
All you have to do is choose whether you are looking for a specific file or you can view all files. You can then select the desired drive or view all drives on your computer. If you want more custom scans, select Advanced Mode.
After restarting your computer, launch TuneUp Utilities. The first launch of the application will be a bit lengthy. The program will scan your computer for errors, unnecessary files in the registry, and other problems. At the end of the scan, you will be prompted to resolve these issues and optimize the system. Agree, because in any case it will not hurt. After the optimization process is completed, you will be taken to the main menu of the program.
Advanced mode provides more options, such as deep scanning. But you know what they say - never judge a book by its cover. This software can work with most file systems and device types. Knowledge of more than 200 file formats increases the chances of successful photo recovery.
The program "holds your hand" and performs every step of the recovery process. Okay, let's start with supported devices. Thus, it supports all existing devices. If you accidentally deleted a folder that was not so long ago, the free software is the right choice for you. It is likely that your files will be restored. These software provide easy exit. It supports multiple file types and is more advanced and more efficient than free software.
In the upper window of the program, select the "Fix problems" item. A window with various actions will appear. Select the "Recover Deleted files". The next window will display a list with a section hard drive. The section from which they were removed files, check the box and click Next. You will see the "Search Criteria" line, in which you should enter the name of the file to be restored (it is not necessary to enter the full name of the file, you must enter at least a partial name of it). If you don't know the name, you can enter the file type, for example, doc or avi.
This program can recover files and folders that were deleted a year ago. The first step is to select the Restore File option. When the scan is completed, all your deleted files will be listed in the original direction. Files that have been removed from the Recycle Bin are located in the Recycle Bin folder. If you remember the file name, you can find it in the search bar.
The last step is to save the files to another drive or partition. What is one of the most famous online file storage services available today? From an end user perspective, this allows you to do something not very common, i.e. you can forget to sync files and create backups from time to time as it does it on its own.
Once all options have been selected, click Next. A file search will be performed, after which a list of all found files with the selected parameters will appear. Select the desired file and click Restore. You can restore to the original folder from which the file was deleted, or choose a different folder.
Click this option to "Show Deleted Files" and you should see all the files that have been deleted in the last 30 days. Move your cursor over these files and you will see an arrow next to these files on the right. You will also see that the popup menu as mentioned above gives you another "Previous Version" option.
On the next page, you will see the "Restore these files" option. Click on it and you will add all the deleted files to the folder again. To get started, click the button on the trash can icon located next to the search bar. It displays all deleted files in the last 30 days.
Sometimes it happens that you mistakenly deleted the necessary files. For example, such files were audio or video recordings. Restoring these records will not be difficult for you, because. There are many multimedia files on the World Wide Web. But what about documents and reports that are of great value to you. In this case, data recovery programs can come to the rescue.
Now you can highlight all the files you want to recover and just click the "Refresh" button to do so. While electronics may not surprise us with something new almost daily, there are some common problems that everyone has encountered. Let's see how to overcome the inconvenience.
The process of restoring files from a backup is relatively simple. First, make sure you have a backup attached to your computer, then run the tool Reserve copy and restore from the control panel to decide if you want to restore all your backed up data or only selected folders or files.
You will need
- Software to recover data on the hard drive.
Instruction
The most important thing in this matter is to stop any work on the computer. When you delete files, they are only overwritten, not deleted as you might think. If you look at the information about the free space on the disk, you can see that there is a certain amount of free space on it. Turns out, HDD is constantly filled with information, but the unnecessary information that you have deleted becomes just invisible. Therefore, when using specialized programs, you can recover up to 99% of deleted files. This is possible only on the condition that after their deletion there were no operations with files on the hard disk (creation and deletion of folders and documents). Once you discover it's missing necessary files, take the following steps:
To restore all data, click the button located in the "Recovery" section, and in the next window select the "Find folder" button. In explorer select desired folder and press. Continue with the "Next" button and finally choose whether to restore the data to the original location or to the next location where you specify a new path. Restart the button by clicking the Refresh button.
You can practically do the same for recovery specific files, just select "Find Files" instead of the "Find Folder" button and select the desired data again in File Explorer. You can also use the "Search" button to serve you if you don't know the exact location of the files you want, but you do know their full or at least partial name.
Cancel all the work that was done at the moment;
Install a specialized program to recover deleted files;
After they are restored, you can resume your work.

Restore your computer from an image
There are three options for recovering an image from an image, but for each of them it is true that you cannot choose separate folders or files, but completely restore the entire image, including installed programs and system settings that will delete the current disk state of your computer! The image will put the system as it was when you made the image. Before proceeding with the restore, make sure you have the storage device that you backed up to.
Let's use the Ontrack Easy Recovery utility to recover data. This multifunctional program is distinguished by its simplicity and a wide range of settings. Go to the program, it will automatically start scanning your disks. Select the disk on which the file was erased, click the "Next" button. In the window that appears, the program automatically determines file system disk, it can also be set personally by clicking on the "Advanced Options" button. After that, click "Next" again, it will start searching for recently deleted files. After a deep scan, the results will appear in front of you: all the files that you see in this window can be restored. To do this, you can use the buttons on the toolbar or select one of the items on the file's context menu.
The first of the system recovery options is to use the recovery tool. In the next window, select an option to decide if you want to back up your files before performing a restore. If not, go to the "Skip" button and start the process by clicking the "Reboot" button. Insert the media into the drive and restart your computer.
Now you need to set up your computer to boot from optical media. The procedure varies by manufacturer, but you should notice this information at least briefly on the screen as soon as the computer is turned on. First select the language of the wizard, then the second option. To restore, use the system image created earlier, and then a specific image. In the next window, you will find the option to format the disk and create partitions by image, which we recommend using.
Are folders missing from your desktop and you don't know how to get them back? Then you have come to the right place. Sometimes this happens and the reason for such a loss is rather banal. To return them back is a matter of one minute, and for this we do not need any programs. Let's look at several ways to return your folders to the desktop, and start with the simplest.
Just note that all data residing on the target drive will be deleted from target disk. Start the process with the "Finish" button. Once the recovery is complete, the computer will restart. Now you're no longer a wheel with a built-in optical disc but you can login more.
In this section, select "System Restore" and select "System Image Restore" in the wizard. In the next workshop, we'll show you how to find the faulty component that's making the "unhealthy" sound. We will also focus on the problem of deleting files that require administrator access.
Usually the desktop folders and files just become invisible because you changed the screen resolution and the folders were on the edges of the desktop. In this case, they simply “gone” off the screen.
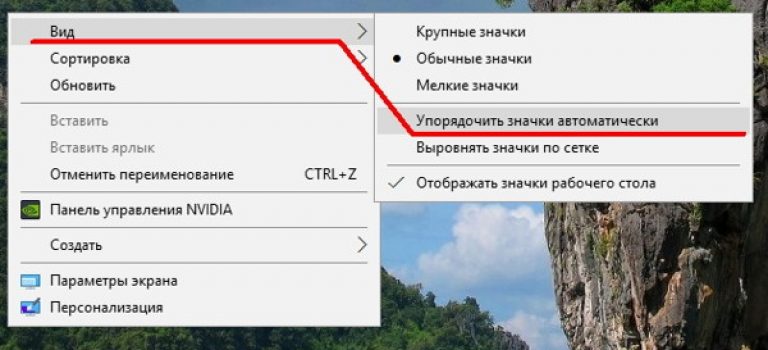
In order to return them, you need to arrange the icons. This is done simply.
- Click right click click on an empty space on the desktop and select from the drop-down context menu paragraph – View – Arrange icons automatically .
First, find it in the Deleted Items folder. If you didn't find it there, check the Recovery folder you access using the Recover Deleted Items tool. Unfortunately, folders cannot be recovered after they have been permanently deleted. Using the steps in this section, you can recover messages from a deleted folder.
How to recover deleted items such as letters, appointments, events, contacts and tasks
Restoring an item that is still in the Deleted Items folder
Tips for recovering items in the Deleted Items folder. Restore an item that is no longer in the Deleted Items folder. If you can't find a specific item in the Deleted Items folder, look for it in the Restore Files folder. This is a hidden folder where items are moved after one of the following actions.It happens that you accidentally dragged one folder to another, and did not notice it. Then you need to look for it with search. To do this, do the following:
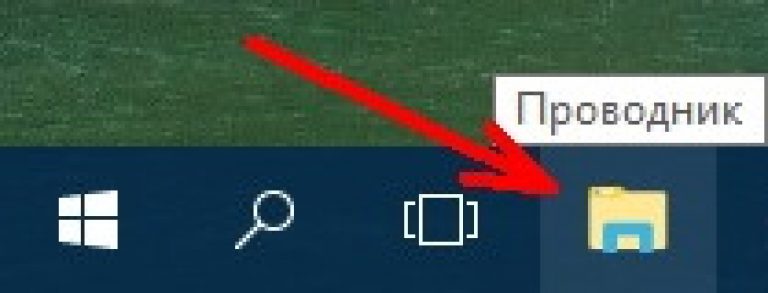
- ATWindows 10 open Conductor,
- Remove items from the Deleted Items folder.
- Empty the Deleted Items folder.
you can recover emails, contacts, calendar items, and tasks from the Restore Items folder. Where do recovered items go? Items recovered from the Restored Items folder are moved to the Deleted Items folder. Once you restore an item, you can find it in the Deleted Items folder and then move it to another folder.
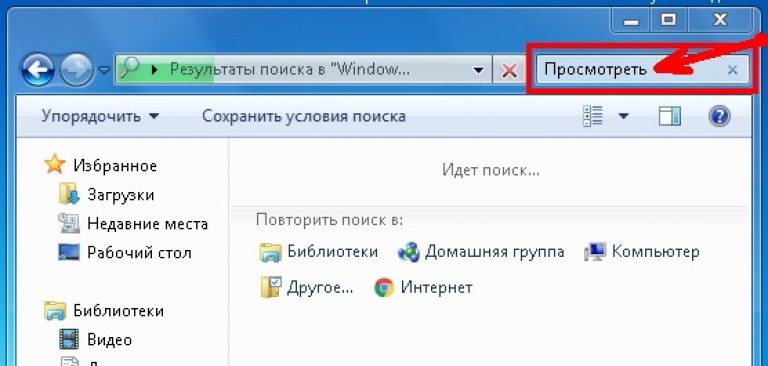
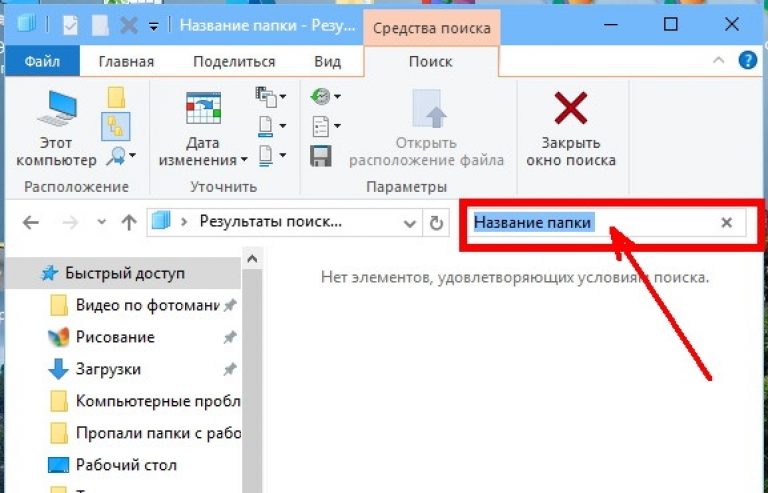
And just like in the previous example, enter in the upper right corner in the field search the name of the missing folder.
What to do if all folders from the desktop are gone?
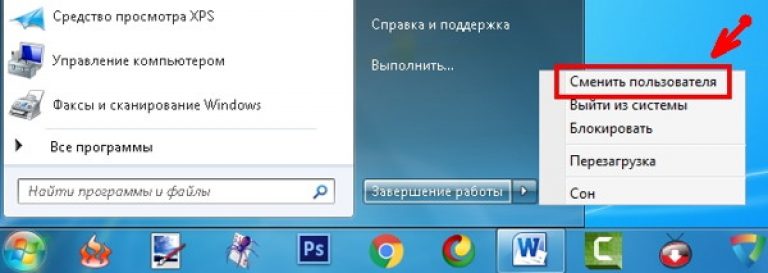
If almost all or all folders have disappeared from the desktop, then you are most likely logged in as a different user. In this case, you must either restart the computer or change the user (in Windows 7 this can be done without restarting).
If, after rebooting or changing the user, the folders did not return, then most likely there was a glitch, as a result of which a new user was created instead of yours, and yours became inactive.
Then we do the following:
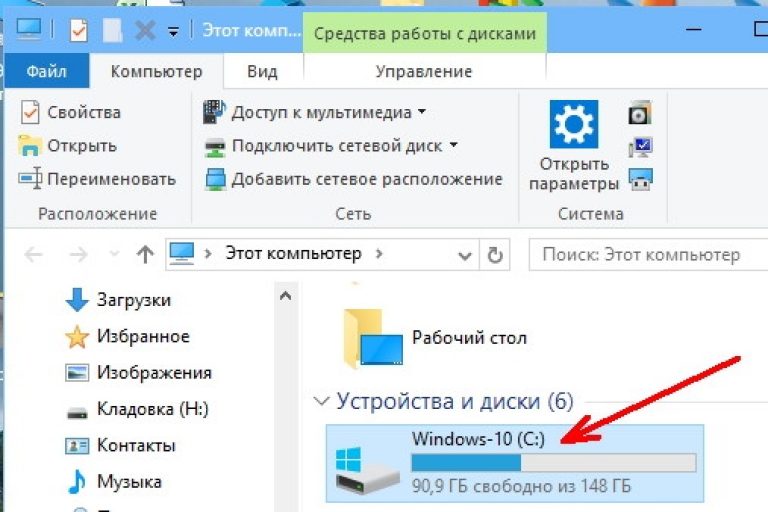
- Let's go to My computer or open Conductor, and find the disk " WITH:».
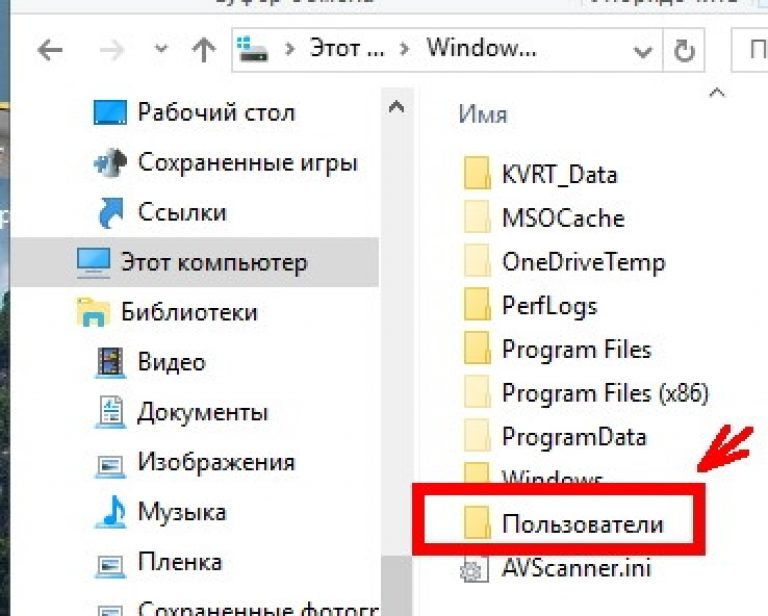
Open it and look for the folder " Users" (in Windows 10), or the folder " Users" (in Windows 7).
We open these folders and look for a folder there with the name of the user under which you log in. I have this folder Lyudmila". In Windows 7, a warning may pop up that you do not have permission to open this folder. Click the button " Continue».