We continue to work with the browser from Google and next in line we have a question about how to add a bookmark to google chrome.
In this tutorial, I want to show you how easy it is to add a bookmark to your browser. Google Chrome. First, let's make our browser show the bookmarks bar. To do this, go to the browser settings using the button in the form of three stripes in the upper right corner, then select "Bookmarks" from the drop-down menu, and "Show bookmarks bar" from the sub-item. Also, you can show the bookmarks bar using a keyboard shortcut Ctrl+Shift+B. Now the bookmarks bar will be shown all the time. If you want to remove it again, just repeat the steps above.
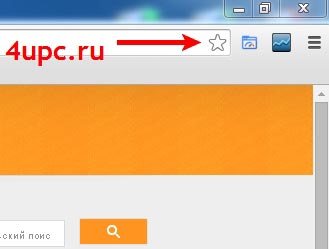
It's time to consider the process of adding bookmarks to the google chrome browser. And so, to bookmark open page site you need to press the key combination Ctrl + D or just click on the star icon on the right side of the address bar.
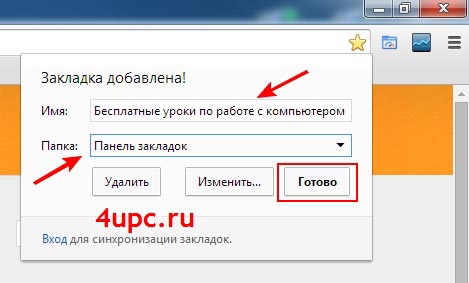
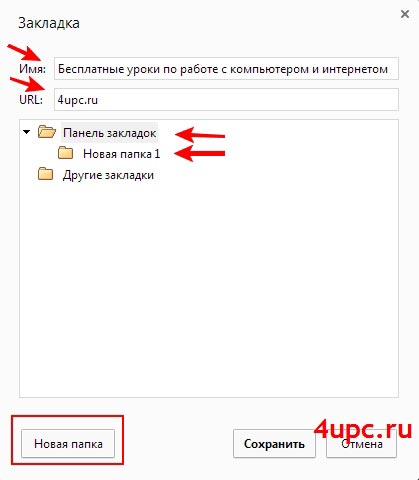
A window will appear in front of you in which you need to enter the name of the future bookmark, which will be displayed on the taskbar, select the location where the bookmark will be stored (select the bookmark bar) and at the end click done.
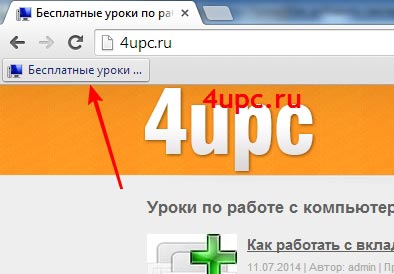
Everything, our bookmark is ready and is already displayed on the bookmarks bar. By clicking on it with the mouse button, you will automatically go to the page of the site.
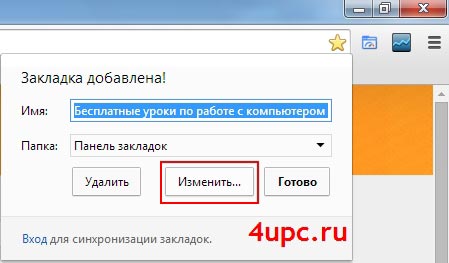
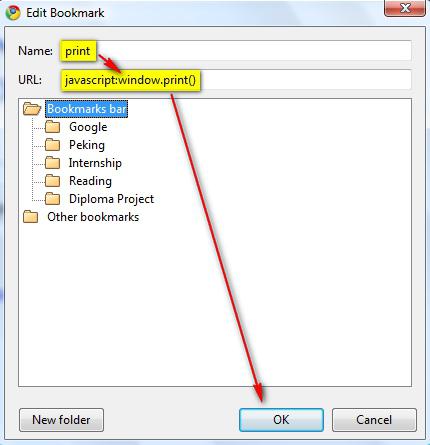
Also, when adding a bookmark, it is possible to change it. To do this, you can click on the "Edit" button in the process of adding a bookmark.
Another window will open in front of you in which you can change the name of the bookmark, correct the address of the bookmark site, and also specify exactly where the bookmark will be stored. Please note that you can create folders to put bookmarks of similar topics there.
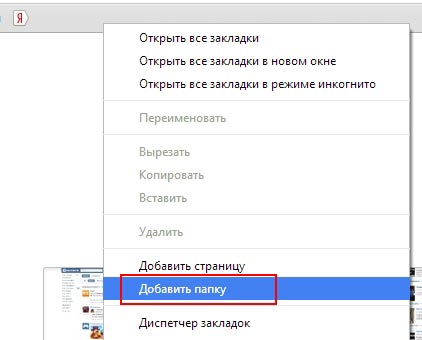
You can also create folders simply by right-clicking on the bookmarks bar and selecting "Add Folder" from the drop-down menu. And if you right-click on a folder, you will be able to rename it using a special item in the drop-down menu.
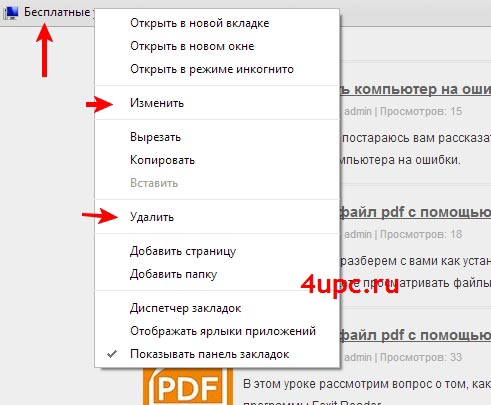
Do not forget that you can change, delete or change the location of an already added bookmark. To edit or delete a bookmark, simply right-click on it and select the item of interest from the drop-down menu.
In order to change the location of a bookmark, simply hold it down with the left mouse button and simply drag it to a different location on the bookmarks bar. In the same way, you can add bookmarks to folders and from the folder back to the bookmarks bar.
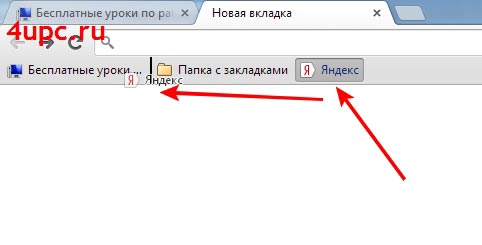
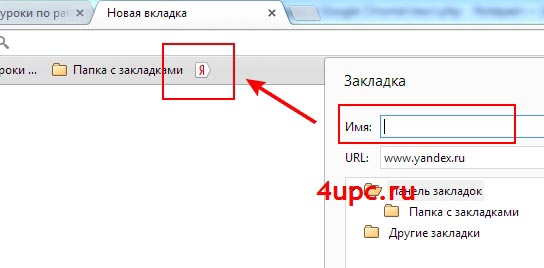
And a small note. If you only want to add the site's icon to the bookmarks bar, leave the bookmark name blank.
That's basically it. In the next lesson, we'll talk about how you can export and import bookmarks in the Google Chrome browser.
New TOP-project from a reliable admin, REGISTER!
Stay up to date with site updates, be sure to subscribe to the channel Youtube and group
A huge number of users around the world have chosen this particular program by default on their computer. And this is no accident, because Google Chrome has a lot of advantages compared to other popular browsers. The advantages include the following: high page loading speed and simple management. But even in such a browser, some users do not know how to add bookmarks. In Google Chrome this process can occur in several variations. We will talk about this in the article.
1 way
How to add bookmarks to Google Chrome in large numbers? This method is relevant for those who use several programs for viewing sites. If you have used another browser for a long time before, then you probably have a lot of bookmarks that you do not want to part with. And copying one at a time will seem too tedious to you. In these cases, the creators of Google Chrome have provided an option to import bookmarks. The transfer is made from another browser that you used before. To import bookmarks, follow these steps:
- Open browser.
- Go to the settings by clicking on the corresponding sign in the upper right corner.
- In the window that opens, you will see the "Users" panel, at the bottom there is an item "Import bookmarks and settings".
- By clicking on it, you must select the desired browser from which the transfer will take place.
2 way
The Google Chrome browser also provides a second option for adding bookmarks. In this case, they will have to be entered manually. To learn how to add bookmarks to Google Chrome without using import, we suggest you use the instructions below:
- Setting. First you need to enable bookmarks. To do this, go to and check the box next to the "Show bookmarks bar" option.
- Addendum. After the first paragraph, you should have an additional one Clicking on it right click mouse, you need to select "Add Page". Then fill in all the required fields and click "Save".
Additional features
The previously stated instructions allow you to learn how to make bookmarks in Google Chrome without. That is, they are displayed as small icons with the name of the page. But many are accustomed to using large bookmarks with a built-in site preview screen. And, as you might expect, Google Chrome caters to that need. Next, you will learn how to visual bookmarks in google chrome:
- The browser has its own app store. It's easy to find it with a search engine.
- Next, in the search bar of the site you need to enter "visual bookmarks".
- Choose a more suitable extension and install it.
findings
The Google Chrome browser is very flexible, fast and easy to use. And now that you know how to add bookmarks to Google Chrome in several ways, your options are expanding.
The well-known Chrome browser, whose search system has a large number of features: various extensions, external design, desired applications- a small part of its potential.
Chrome gives its users a wide variety of options to choose from. It helps to set up a profile for each - according to your needs.
Create bookmarks
Using different browsers over time, everyone has several pages that need to be accessed quickly and conveniently, without spending too much time on it. In chrome, the creators and developers took this fact into account and the ability to bookmark pages was introduced.
In order for the desired page to be saved, you must open this page, find the menu button, which is located to the right of the address bar. In this list, select the Bookmarks section.
Next, use the mouse cursor to click on the Add page to bookmarks item. Or just use the keyboard shortcut Ctrl+D 
Below the line with the address, a form will open that confirms the operation and its success. There you can also determine the location of the saved bookmark. If you skip this step, it will automatically save to the others folder.
Selecting to save the Bookmarks Panel, it will immediately appear in the panel below the search bar. 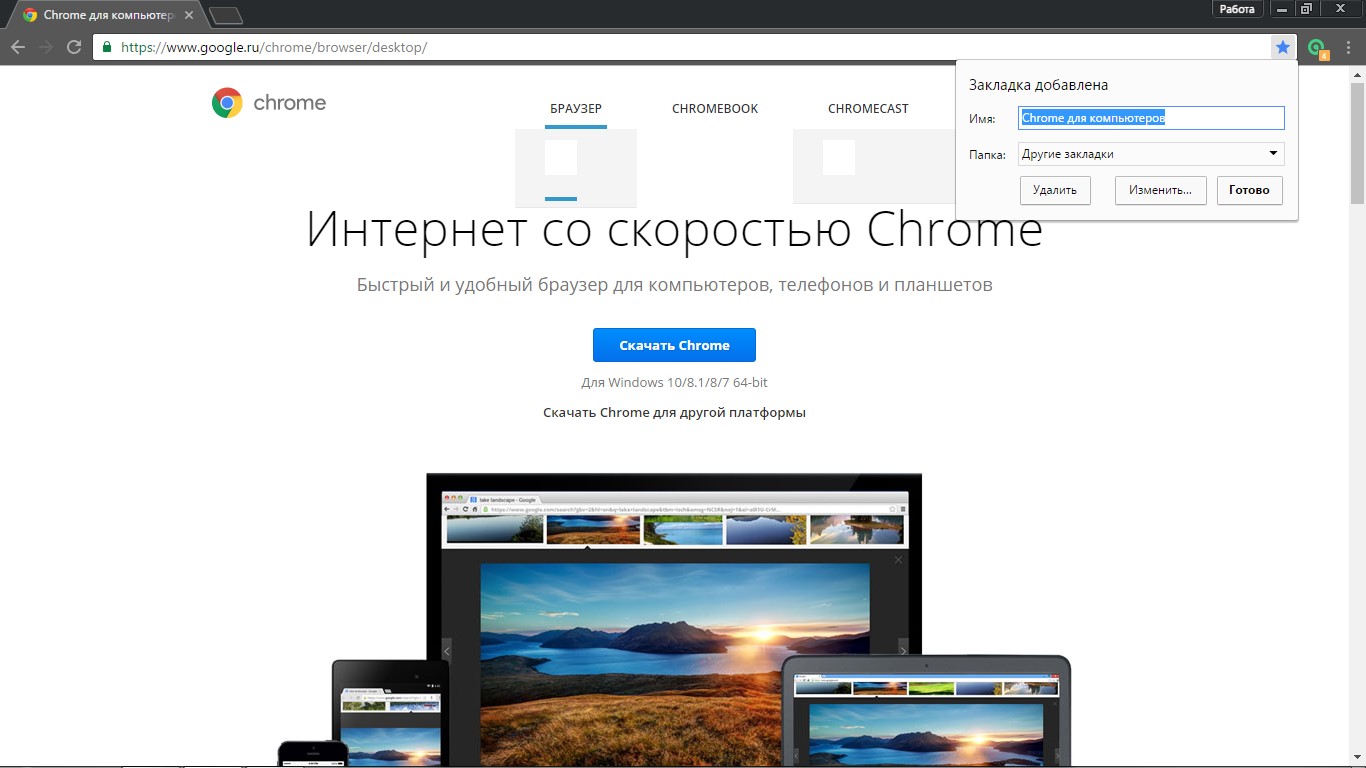
Selected links will be opened with just one click from the list in the selected section in the menu or from the bookmarks bar. 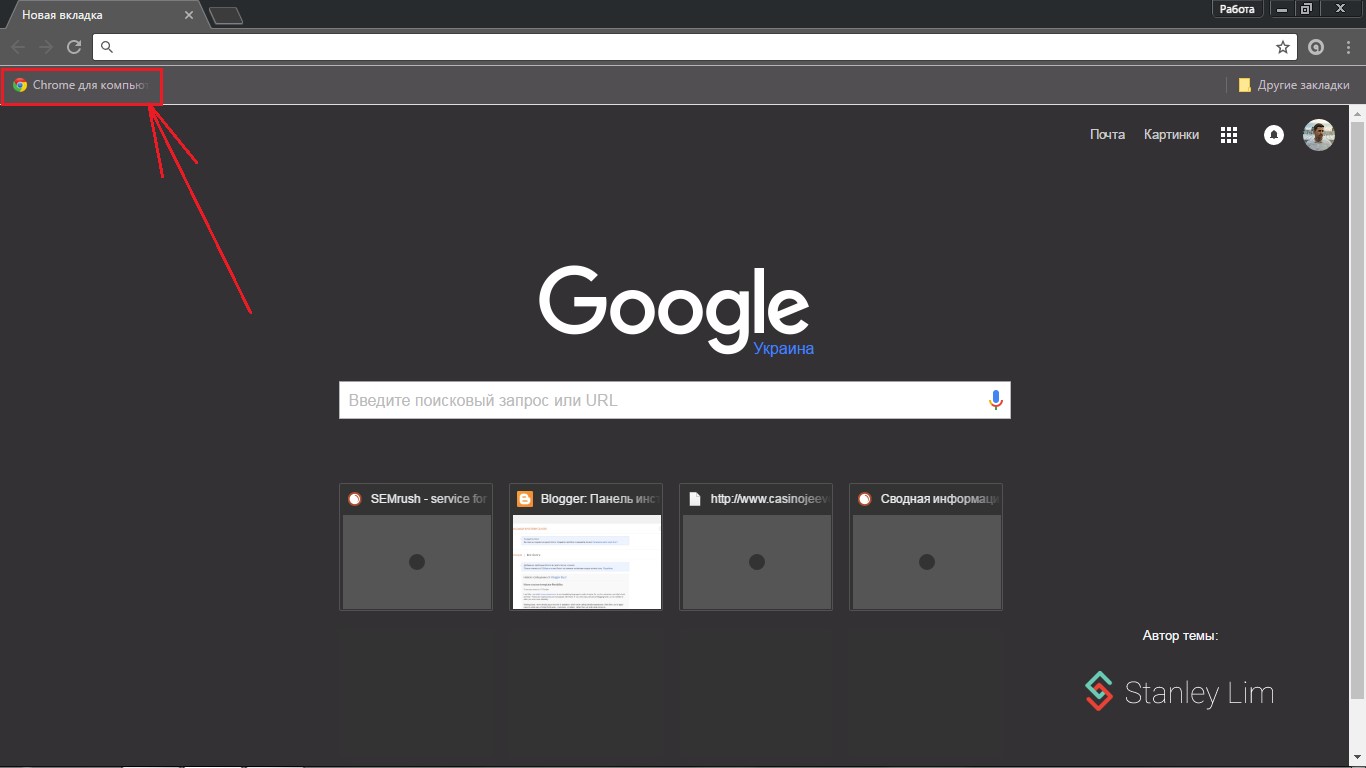
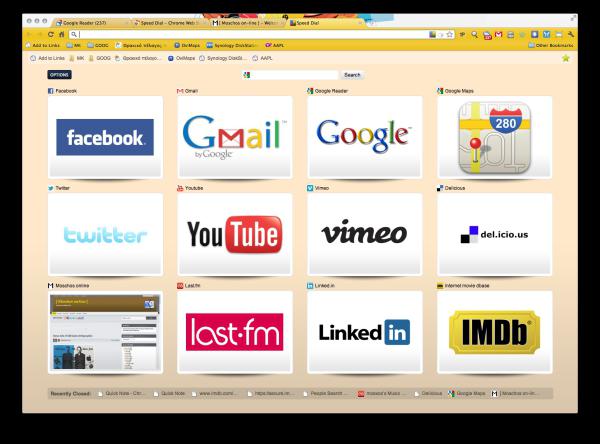
Create visual bookmarks
In order to further facilitate the work in Google Chrome, you can use certain extensions that can add visual chrome bookmarks. All you need to do is check out the Chrome Store on your device.
To do this, you need to register Speed Dial in the search bar. Then, in the search, select Speed Dial 2. First, click on the add free button, after which you will be taken to a new window where you will have to confirm the installation.
After installation is complete, open new tab, confirm saving the data you have changed in the open window, where you will see a warning
After all these steps, the application is ready to use and you can try adding your first bookmark. Immediately you will be given the opportunity to read the full description of all functions and features. If you want to skip it, just click the Skip Welcome button.
After reading or skipping all the possibilities, you can start using the application and start adding the necessary bookmarks.
To add a page, select the plus in the circle. After that you will see a special new window where you will be able to edit and change your bookmarks according to your requests and requirements.
In this window you will see:
- The string to copy the link.
- The name of the link that will be visible under the small bar.
- Key to save bookmarks.
- A key used to save bookmarks when you are on an open page.
After that, the page with your bookmarks will always open when you open any new tab. This feature can be easily turned off by opening the Chrome browser settings.
If we consider the Opera browser, there is also such a convenient feature as the Express Panel. She looks like start page, where the user adds the necessary sites on his own, in order to have quick access. In Chrome, the same panel looks a little different. In this case, sites are added to the panel automatically, depending on the number of visits to the site. That is, those sites that you most often visit will appear on the panel.
Tabs in Chrome have a limit of eight squares. You can't use more sites here. It is worth remembering that when you delete the history in the browser, all hosting sites on the panel will be deleted.
But after certain manipulations, you can configure the Express Panel in the same way as others, for example, in Opera. It will have the same features and functionality. How to do this, we will consider further.
Express panel in google chrome
Now we will take a closer look at how to add pages in the Google Chrome browser to the panel with visual bookmarks. This can be done in two different ways:
- Using visual bookmarks in Yandex.
- By downloading and installing the Speed Dial 2 app mentioned above.
Creating an express panel using Yandex
First of all, you need to visit the online store Chrome browser. 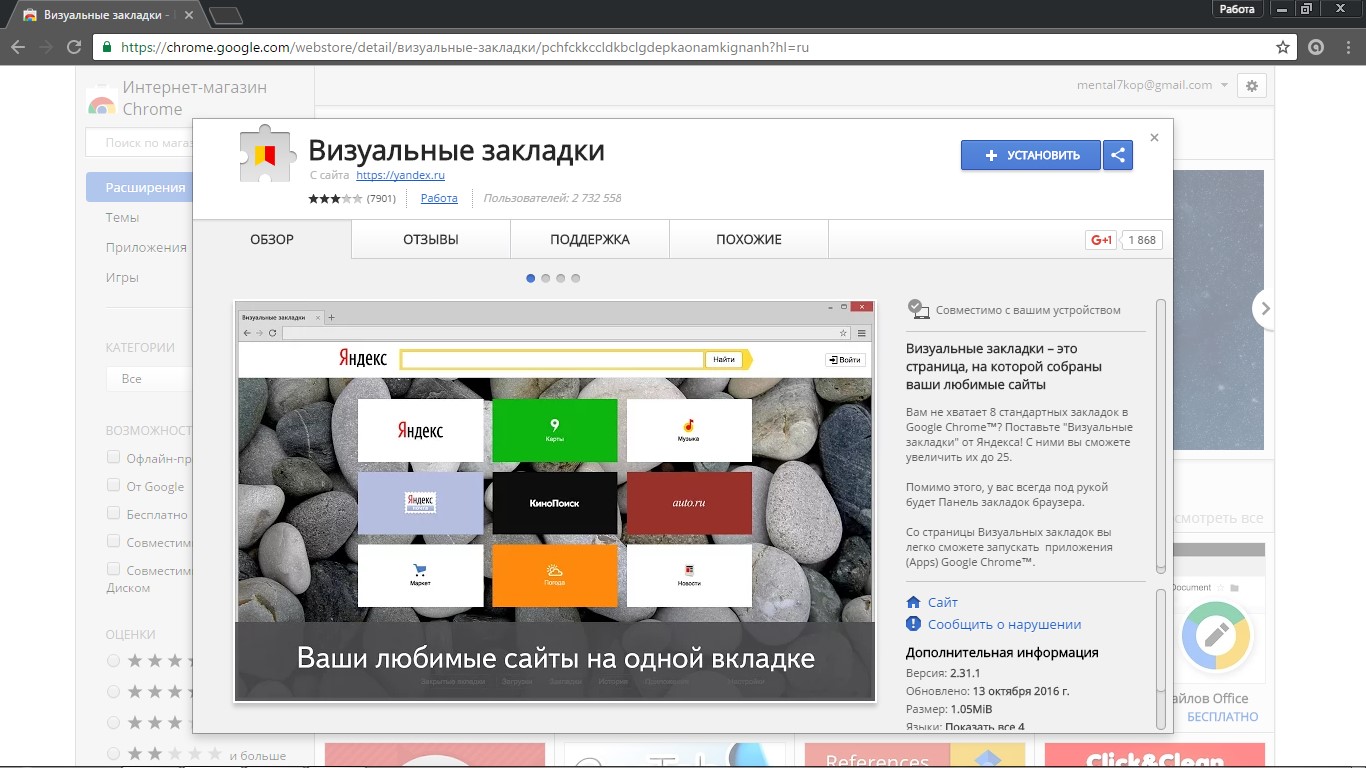 Earlier we already told you how to do this, but in order to completely reduce the time for searching, you can simply use this link.
When you open the store's website in any way convenient for you, in the search bar you need to enter search Visual bookmarks and mark the Extension type. Next, you will see applications that are presented by Yandex. It is this extension that you will need to install on your device. Just select the Free key.
After you click on Free, a new window will open where you will need to select Add. After waiting a few minutes, another window will appear, which will symbolize the successful installation of the extension. And after all these operations, when you first load the browser or just open a new tab, you will now have your visual bookmarks open.
Panel settings from Yandex
Next, we will look at the settings provided by the express panel from Yandex. Use the link in the bottom right corner. Now you will see a list where certain job settings will be presented. There you will have the opportunity to:
- Determine the number of bookmarks you want to see on the screen.
- Appearance of the express panel
When you select the More Options button, you will be able to:
- Manage header titles.
- Customize the search string.
- Set a few extra bookmarks
- Confirm or cancel receiving anonymous statistics for Yandex on how the extension works.
If you pay attention to the bookmarks that you have and have already added, you will see the sites that you visited recently. This is due to the fact that Yandex thus fills the void that occurs if there is not a single bookmark. In order to get started, you also need to be able to delete bookmarks.
Deleting Bookmarks in Chrome
Deleting bookmarks is fairly easy. To do this, you need to move the mouse cursor over the selected bookmark, then you will see a small cross that will appear in the upper right corner of the bookmark. After that, confirm the deletion by clicking on the cross. 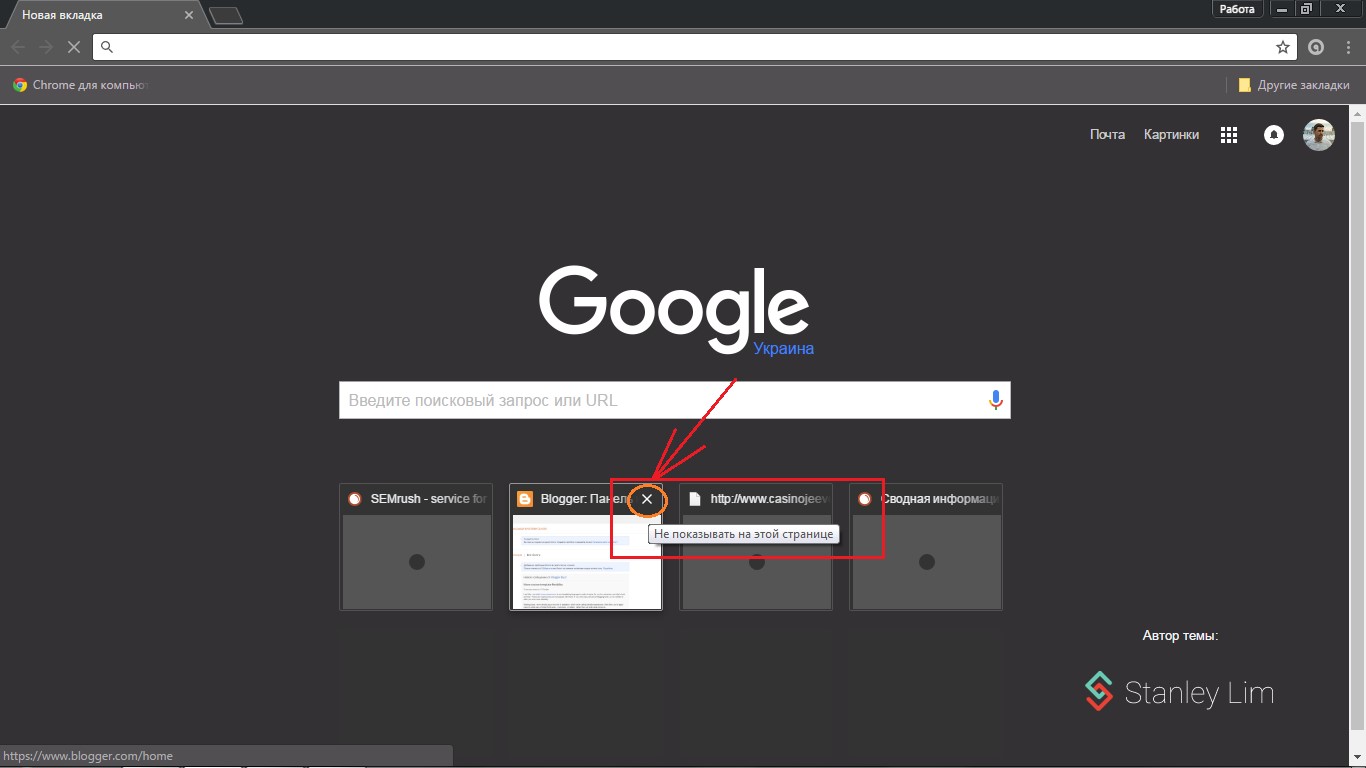
Now you can see that a void has appeared in this place, which can be used according to your application. Just hover over an empty cell and you will see the button that is used to add.
Adding new bookmarks
Next, you will see several rows that you need to fill. In the first cell, you need to specify the site address, after you start writing the name, the browser will help you and offer the site you need. You just need to choose the right one. Then confirm all your changes with the Save button. That and all that is needed to create a bookmark.
You also have the ability to edit the data that was entered when adding the bookmark. Just move the mouse cursor over the desired bookmark and select the icon that looks like a gear. Make changes and save.
It's worth mentioning that you also have the option to rearrange bookmarks. Hold down the left mouse button and move to the desired location.
Visual bookmarks in Google Chrome, for more than 3 and a half years of the existence of the browser, have not been created by its developers. Perhaps Google does not consider it so important to have such a tool in their browser, but visual bookmarks have been popular with users of other browsers for a very long time. And for many, this is the only reason to stay with a less popular, but more convenient browser. In this article, I will tell you about a third-party solution to add visual bookmarks to Google Chrome.
Visual bookmark issue in Google Chrome
I only switched to Google Chrome when I found a solution to implement visual bookmarks in Google Chrome. Before that I was quite satisfied with Opera.
Visual bookmarks- an express panel in an Internet browser designed for quick access to favorite, frequently visited sites. Represents site thumbnails on an empty browser tab.
Google Chrome displays frequently visited sites on the main page, and selects them automatically and often sculpts there not what you need. In other browsers (for example, in Opera), the user himself chooses what he wants to see on the page of visual bookmarks, adding the necessary sites.
For Google Chrome users who can't come to terms with this browser flaw, third-party developers have created a special extension for Google Chrome that adds visual bookmarks to home page browser.
Speed Dial 2
- visual bookmark plugin for Google Chrome. All you have to do is install the Speed Dial extension and add your favorite sites to installed panel visual bookmarks.
Speed Dial 2 has many different settings and features thanks to which you:
- convenient addition of new sites to the visual bookmarks panel;
- unlimited number of visual bookmarks;
- installation background image on the bookmarks bar;
- automatic updating of sketches;
- hotkeys for adding new sites;
- import/export extension settings.
The Speed Dial 2 extension is the #1 plugin that must be installed in the Google Chrome browser for the convenience of working with it. This extension is starting to be published also on my site.
In Speed Dial 2, you can change and customize almost everything. Instead of site thumbnails, you can install a logo from the proposed collection, or use any other image. If you need more tabs, just add the number of columns in the extension settings. Under visual bookmarks, you can enable the display of installed applications and games in Google Chrome, which is not available in other visual bookmark extensions. You can also change the appearance of this extension to your taste, change the background or style of site thumbnails, add or disable built-in functions, and export extension settings or import existing ones.
With the Speed Dial 2 extension, you won't need to set up your bookmarks bar again after you reinstall your computer. You can export all extension settings and load them back in a few clicks in pure Google Chrome.
So after you've finally configured the extension (and after adding new tabs), don't forget to save its settings in a safe place, such as one of the . This way you will never lose all the saved sites added to the visual bookmarks bar.
To export settings, go to plugin settings, import/export tab. Click the "export settings" link, select and copy the code that appears into a text document.
"Visual Bookmarks" from Yandex is a similar extension from Yandex with a minimum number of settings. In the extension from Yandex, it is more convenient to add new sites to the bookmarks bar - you can select them from the list of open sites. It is also possible to set the thumbnail refresh interval for each individual bookmark. It is convenient to use for sites with a dynamic (frequently updated) main page.