Today I’ll tell you how you can quickly make yourself a desktop flip calendar out of paper and cardboard with your own hands. Empty windows for future sketches are left on the pages of my calendar, but you can easily decorate such a blank to your taste by pasting your favorite photos or any beautiful pictures. This handmade calendar can be a great gift for a friend on New Year or February 14, especially if you beat it with thematic photos, dilute it with funny inscriptions or wishes for each month. The flip calendar is done very quickly, in 1-2 free evenings, and then pleases the whole year!
Necessary materials
- 6 sheets of A4 watercolor paper or any other thick cardboard - for pages with the names of the months
- dummy knife
- Paints and ink if you write the names of the months and dates by hand (or a printer to print the finished layout)
- Soutache, satin or any other decorative ribbon - 20 cm (or 2 small rings for the album: you can disassemble finished notebook on rings or buy rings at a scrapbooking store)
- 1 sheet of scrapbooking paper 30.5 x 30.5 cm (or any other beautiful paper for the cover)
- Cardboard 23x42 cm. (I cut out from a sheet of ordinary Whatman paper)
- PVA glue or glue stick
- Stationery punch for 2 round holes
- Ruler
- simple pencil
If everything is ready, then you can proceed. The scheme of work is very simple:
- making page blanks
- I create the basis for a calendar made of cardboard,
- I paint the pages
- I collect all the elements into a single whole.
Pages with months
I cut six sheets of A4 watercolor cardboard in half, I get the future 12 pages. 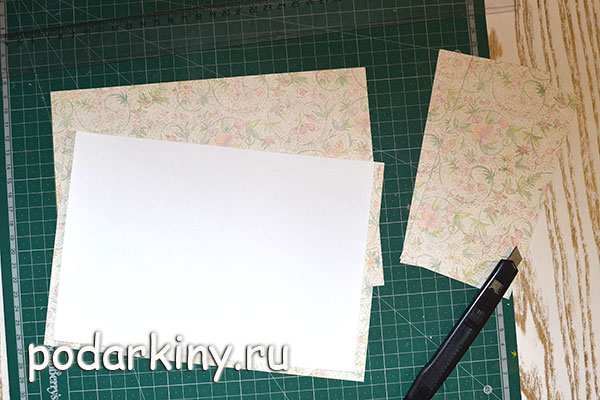 I mark the middle of the sheet with a pencil and draw a line along it. Combining the middle line with the mark in the middle of the hole punch, I make holes on 3 sheets at once.
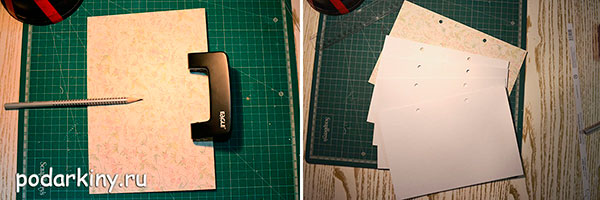 I repeat the operation 3 more times and get 12 leaves with exactly matching holes.
basis for the calendar
I cut out 2 rectangles of 22x15 cm from scrapbooking paper. These are the future endpapers of the calendar.  From whatman paper I cut out a sheet measuring 23 x 42 cm. From one edge I glue both rectangles of scrap paper to it one after another. After drying, I crease the folds and fold the triangle, not forgetting to leave 1-2 cm for gluing from the bottom to the side wall. In the upper part of the triangle, I also mark the middle and make two holes with a hole punch. After that, I glue the bottom with the side wall and get a rather rigid structure, which will be the basis for our desktop calendar.

A little lettering wouldn't hurt!
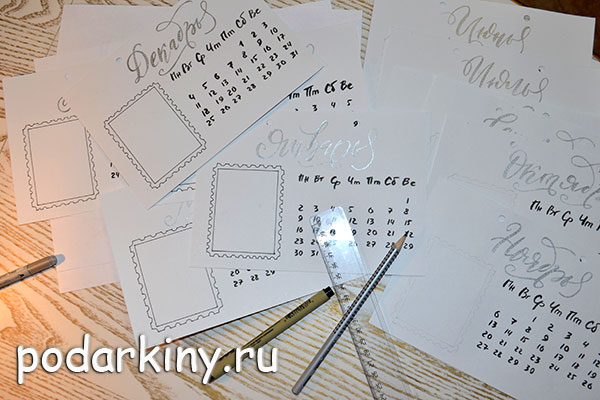
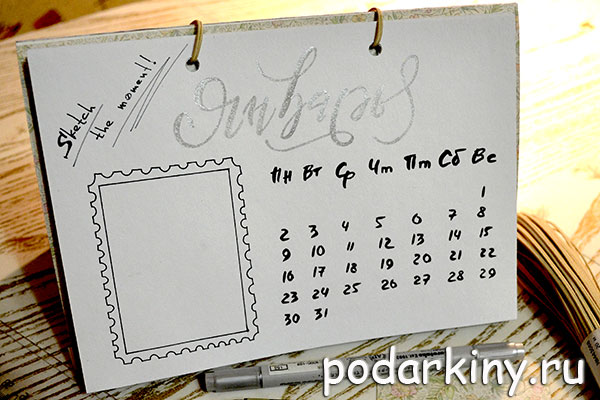
Pages with months can be arranged in a thousand different ways, who has enough imagination for anything, starting from a banal printout of ready-made templates and ending with colorful drawings for each page. 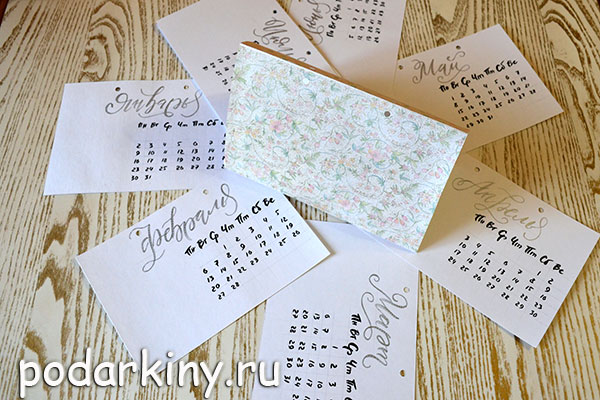 You can make free lines for planning or notes. Since I make my calendar for sketches, it is important for me to leave a little free space for future drawings. Therefore, I write the names of the months with silver acrylic paint, the days and dates with black ink, and draw a window in the center in the form of a stamp. Here's what happens in the end.
Assembling a calendar
I cut 20 cm of soutache tape in half. I thread each segment from under the triangular base, stretch it through the leaves with months and again wind it back, inside the base of the calendar, where I tie a knot.  It is important not to tighten the tapes too much, leaving enough freedom to easily turn the pages. I cut off the ends of the tape. Calendar is ready! If you need to draw something on it, then at any time you can fold it in half, and then spread it again into a triangle. It is very comfortable!
If you want to add a note block to your calendar, make it brighter, or just practice scrapbooking once again, then you can be inspired by this wonderful video tutorial from Lena Pol on creating a desk calendar with a fluffy fox.
Creative mood to you, great inspiration and the most interesting and beautiful calendars!
From cardboard on the site there are still excellent master classes on creating postcards, postcards, and paper!
Of course, you can buy such a calendar, but it is much more pleasant to make a waiting calendar with your own hands. We are sure that the children will be happy to take part in a creative search, throw interesting ideas and help make them happen.
If the phrase "advent calendar" is new to you, we suggest reading our article. She will answer the question what is Advent. Learn about the history of advent calendars and advent traditions. And, importantly, he will tell you how advent calendars help in the development of children.
And now, according to the tradition that has already developed with us, we offer you to look at a selection of new, original and easy-to-use ideas for do-it-yourself advent calendars.
1. Advent calendar from boxes and rolls
This advent calendar looks like a big bird house. You don't have to go to the store to make it. Just look around and look at boxes, paper towel rolls or toilet paper rolls. As thematic presentations, there can be small figurines of birds.
Another advent calendar from the boxes, which is shown in the first picture, you will find
2. Winter forest
If your family loves outings in nature, this advent calendar made of colored paper and rolls will be to your child's taste: mountains, Christmas trees, a fire and a favorite dog.
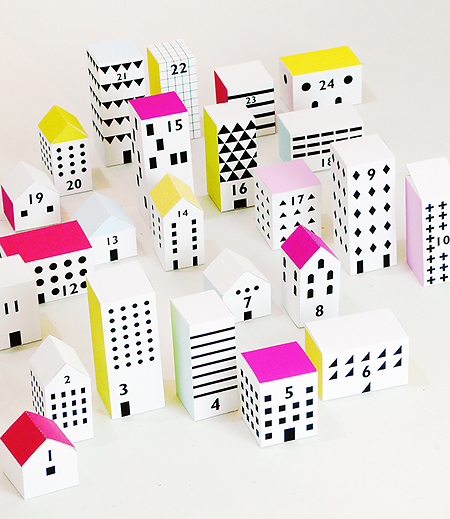
3. Advent calendar "City"
With this waiting calendar, you can make a plan-map of your area and “go to visit friends” for a whole month.
4. DIY Advent calendar in the form of Santa Claus
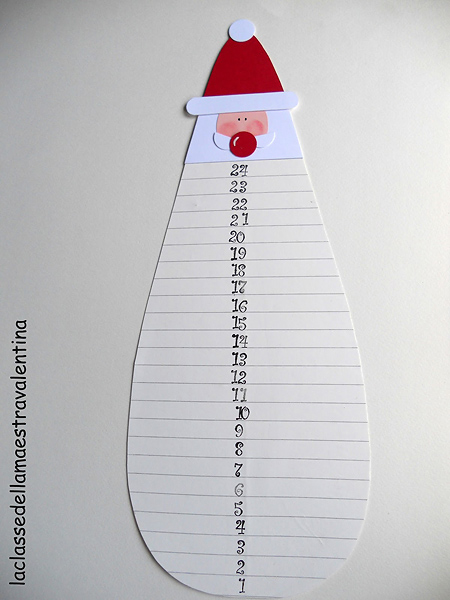
This Santa Claus is an excellent simulator for practicing scissor cutting skills.
5. Sweets for a sweet tooth
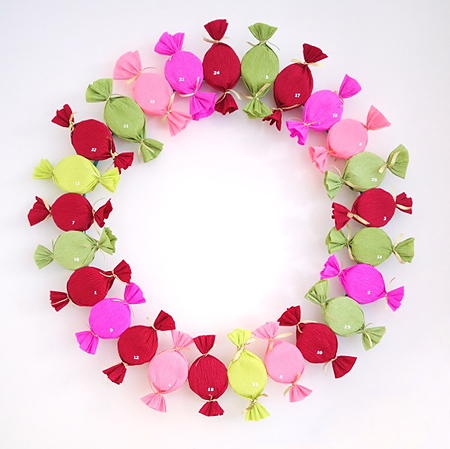
Candy garland advent calendar. In small plastic boxes you can put sweets or small toys.
6. Advent calendar "Streets of the city"
Another opportunity to work out orientation on the ground. Make a school out of boxes or Kindergarten, shops and nearby houses. Get the shortest or longest route, for example, to a toy store.
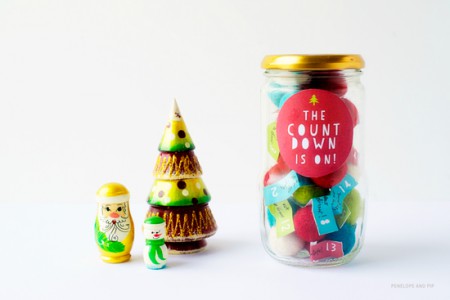
7. Waiting calendar from pom-poms in a jar
Such a simple waiting calendar is comparable to a daily kind word or good wish. Glue sticker strips to the pom poms and put them in a small jar. Every day, the child will take out one pom-pom and read your little notes.
Very cute and concise boxes on which the date is written in chalk. Decorate the Christmas tree with them or spread them around the room. Or maybe you will play Zarnitsa every day and this cute present will be a treasure.
10. Mini Forest Advent Calendar
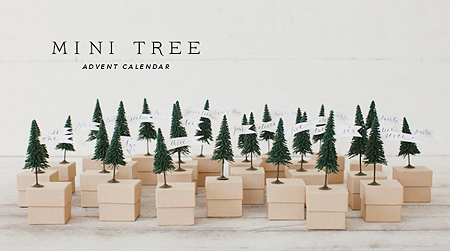
Our review is completed by such a mini-forest of boxes and small trees. It will cheer up anyone. Put funny erasers or sharpeners, tape measure, counting material in the boxes. Make sensory boxes or a set of sorters out of them. Any flight of fancy.
3. Be sure to check out the large selection of calendars at
Today, almost everything can be bought: there is no shortage of goods, besides, the choice is now really huge. Okay? And who argues? On the other hand, there is a pattern ... but truly original things come across not so often. And so you want to be extraordinary, boast (at least to yourself) of an exclusive. This simple desire to stand out to some extent served as an impetus for the fact that people took up needlework, began to attend various master classes and combine business with pleasure. Let's follow their lead. Let's turn our attention to... calendars. You can make a real masterpiece with your own hands! Well, let's get started?
Painting
The easiest way to create DIY calendars is to draw them with your kids. If it will Wall calendar, you will need whatman paper if pocket is just a small piece of white cardboard. First of all, you need to think about how the numbers will be placed on paper. There are many options here. In the case of Whatman paper, months and dates can be placed around the entire perimeter, as if creating. You can also make a classic calendar, the upper part of which is occupied by a drawing, and the dates follow. If the calendar is pocket, then the numbers will be located on one side (back), and the picture on the other, front. There are already a huge number of options. You just need to decide what you would like to admire for a whole year, of course, given the age of the children. It is worth noting that such a calendar is also excellent for grandfathers, who can not see a child so often.

Applications
To make calendars with your own hands, you can resort to the application technique. The creation process itself will be similar to the previous one: you need to come up with a plot, as well as decide how the numbers will be placed. If you have an idea, you can get down to business. It's best to prepare the numbers first. So, you can cut out everything from newspapers or magazines, trying to choose approximately the same font and letter size for months and numbers for dates. After gluing the calendar itself, in the remaining place you need to draw some kind of drawing. Options - darkness, again, everything will depend on the desire and interests of the master himself.
Buttons
We suggest you create an interesting wall calendar. Almost everything will be done by hand here. So, we make a replaceable button calendar. What will be needed to create it? Frame, plywood, fabric (thin for the base and felt for letters), Velcro, buttons ( the same size). First you need to cut the main fabric to the size of the frame itself (taking into account the fold allowances). Now you need to decide how the buttons will be placed. Most likely, you will need to make seven columns and five rows. Above and to the right, you need to leave some space for inscriptions (names of the month and days of the week). Now, on the reverse side of each button, you need to sew a part of the Velcro, while the other part is sewn onto the fabric exactly in the place where the buttons with dates will be attached. Yes, you need to glue pre-printed and cut out numbers on the buttons. Thus, you will get a universal calendar, on which every month you can easily change the buttons and put them in the right places. Now it remains to work with the inscriptions (they will also be attached to a pair of Velcro). The basis for them can be made of felt, and a rather thick paper can be sewn or stitched on top, on which this or that name of the month will already be written or printed. That's all, the original and every year up-to-date calendar is ready!

Sewing
You can also try to sew calendars with your own hands. To do this, you need a fairly dense fabric. The calendar itself will change dates every week. First you need to stitch together six pre-cut squares of the desired size, which will be responsible for the first six days of the week. Sunday will be placed at the very bottom, stretching across the entire calendar. The base is ready. Now you need to glue the Velcro in the place where the numbers will be located (ideal - at the bottom right of each square). On the left, a small window-pocket will be placed in which it will be possible to write what is important that should happen on this day. It will also be possible to leave pieces of paper there: memos: what needs to be done or who needs to be congratulated. From above, in the remaining place, you can sew something interesting: the sun, a cloud, a flower - whatever your heart desires. Where we left space for Sunday, you will need to put the name of the month (again on Velcro). Below, if desired, you can make several pockets to store pieces of paper and a pen for notes. That's all, original calendar, which is perfect, for example, for a children's room, is ready!
quilling
And now we will tell you how to do desk calendar do-it-yourself quilling technique. So, for the base you will need (so the finished product will look very colorful and original), which is folded into a triangle so that it fits perfectly on the base. Next, you need to print and paste the calendar itself approximately in the center of the stand. The remaining space on the left is for decoration, on the right you can stick a small block with tear-off leaves to make notes. Now fill in the remaining (left) part. If a person is just getting acquainted with (skillful paper rolling), you need to choose a simpler decor, for example, unpretentious and at the same time very beautiful curls. Also, everything can be decorated with leaves and flower petals, which are quite easy to make using this technique. Now everything is glued to the base. Such calendars, created with your own hands, will be an excellent decoration and addition to the interior.

Photo
Don't know what else to come up with something so unusual? Try making DIY photo calendars. It will be, again, excellent or other relatives who live away from you. So, you can do where the corresponding photo will be pasted for each month. Alternatively, you could go to a print shop and design a large wall calendar with a photo of you or your friends as the background if you want to please them. This is a great idea that many will like.
Our regular customers are already well aware of our new product - . With it, you can do unique gift with their own hands, spending a minimum of time and money on it. Everything you need is already included in the kit: 13 sheets for printing, a base of cardboard and springs for assembling structures.
To create a calendar, we need:
- 12-13 themed photos for each month
- Special for creating calendars, available for free download.
Let's get started!
Let's run it on the computer.
Select the type of object. If you are preparing an A5 format calendar - select "Calendar A5", B6 - "Calendar 4x6", A5 photo album - "PhotoBook 8:5". In our case - "Calendar 4x6".
Select the type of display of information in the calendar. I liked the third option better - the photo above, calendar days below.

Select the year for which we make the calendar.

Photos relating to each month are placed on calendar pages. To do this, select the folder in which the photos are stored in the folder tree. And simple drag and drop We place the desired photo in the desired location. If the photo size is larger than the calendar area, it is located in the center. If necessary, you can change the location of the photo in the allotted area. To do this, click right click click on the image on the calendar page and, holding it down, drag the photo.
We do this with every calendar page.

Additional text can be added to the calendar page if needed. To do this, on the top toolbar, click the "Text" button and enter the required text in the bottom toolbar. After entering the text, the inscription can be moved around the calendar page in the same way as the picture in the previous paragraph.

After all calendar pages are filled, it's better to save the project. To do this, click the "Save" button on the top panel and save the file in the right place on the computer.
It is important to note that 13 sheets are included in the package. It is understood that the thirteenth leaf is intended for title page calendar. But don't rush to use it. Little whether that? Maybe the printer will ask you to reset the cartridges at the most inopportune moment and the page will go to waste? In a word, leave the last sheet in reserve.
Before sending the calendar to print - print one test sheet. This is necessary in order to:
- Make sure the printer prints well, is calibrated, and all nozzles are clean.
- See how correctly place calendar sheets in the printer. In our case, we used an Epson P50 printer with a BlackBox CISS. It prints images from the bottom up, so the calendar sheets need to be placed with the holes up.

The field for printing all sheets - we collect the calendar. To do this, fold the base along the folds and attach the two springs included in the kit from above.

After - we dress the sheets of the calendar on the spring in the correct order. Calendar is ready!

In our case, we got an excellent cat calendar for bookkeeping))).
By the way, without the selection of photos, the calendar was made in 15 minutes.
It turns out that by spending 15 minutes of time and 5-7 USD, you can make a great gift that will delight a person for a whole year! What could be better?
Make heartfelt gifts with Printchip!
0225.ru