The calendar attracts much more attention than a beautiful picture on the wall or photographs enclosed in original frames. After all, it is not only a decor item, but also a reminder of important dates and events. The calendar is an important human assistant. However, despite wide selection sometimes it is difficult to choose the one that harmoniously fits into the interior. In this case, you need to make it yourself. Consider how to make a calendar that would become your pride.
Computer comes to the rescue
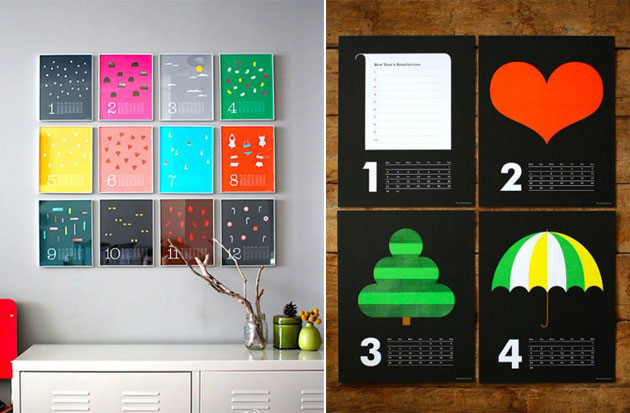
Initially, determine what kind of view your calendar should have. It can be a wall poster or a flip calendar. Perhaps you will like the desktop "assistant".
Make a calendar with a photo will help you computer program. There are a lot of them, and choosing the most optimal one is not difficult.
This is perhaps the easiest way to create. It is necessary to carefully select suitable photographs, think over the design, design.
It remains only to print your creation and choose a place for it.
Easy option
How to do Initially, you should make a template that you can decorate at your discretion. Be sure to involve children in creativity. They will love this collaboration.
You will need:
- cardboard (you can use white or color) - 12 pcs.;
- pencil;
- ruler;
- markers.
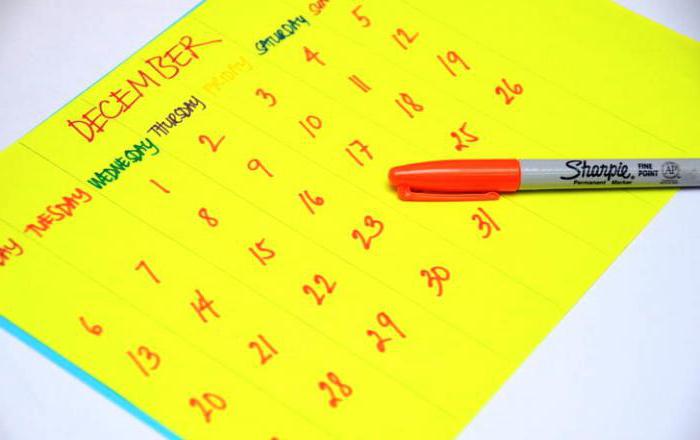
Now let's figure out how to make a calendar:
- On each sheet of cardboard, draw a plate consisting of 7 columns (days of the week) and 5 lines.
- Write the name of the month at the top. Label the columns. These are, as previously stated, the days of the week.
- Enter the dates in the cells. To do this, you can use a regular calendar.
- Time to move on to decorating the product. For decoration, use whatever you like: crayons, stickers, stickers, felt-tip pens, sparkles.
- And be sure to highlight important dates. For example, on December 31, you can stick a Christmas tree or a snowflake on a cell, on a birthday - a flower or a toy (if the holiday is for children).
- To hang your masterpiece on the wall, fold all the sheets and make two identical holes in them. Stretch the ribbon to secure the cardboard.
Desk calendar-diary
Maybe you will like the next idea. Thinking about how to make a calendar for a year, you can combine it with your family's diary. For 12 months, you and your household write down on its pages the amazing stories and events that happened on this day. Just imagine how interesting and exciting it is to re-read it, say, in 10 years.
For manufacturing you will need:
- postcards or thick pictures - 12 pcs.;
- scissors;
- small box;
- notebook;
- rope;
- date stamp.
Working process:
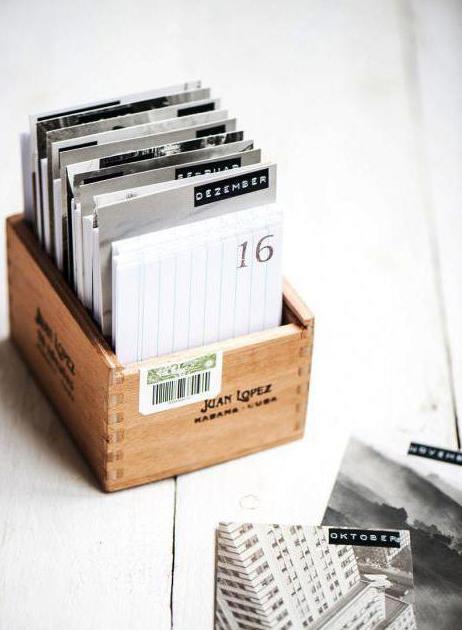
Calendar with photos
This is another easy model to make. You can create one easily if you learn how to make a photo calendar.
For work you will need:
- beautiful pictures;
- leaflets with the months of the year (they can be easily done using a computer);
- cardboard;
- double-sided tape or glue;
- scissors;
- wrapping;
- satin ribbon or twine.
To understand how to make a calendar, a master class will help:
- Initially determine you will need 12 images of the same size.
- Under the size of the photos, “pull up” the printouts of the months and cardboard. If you are using colored paper, you can make the photos slightly smaller. In this case, sticking them on cardboard, you will get a finished frame. You can attach photos with either glue.
- Assemble the calendar in the correct order. Make a hole at the bottom of all leaves. It is it that will allow you to hang the calendar on the wall (unfolded). At the top you will need 2 holes. Pass a twine or ribbon through them and fasten your model.
Universal calendar
If you want to create a model that will delight you for many years, then consider creating a “helper” on canvas.
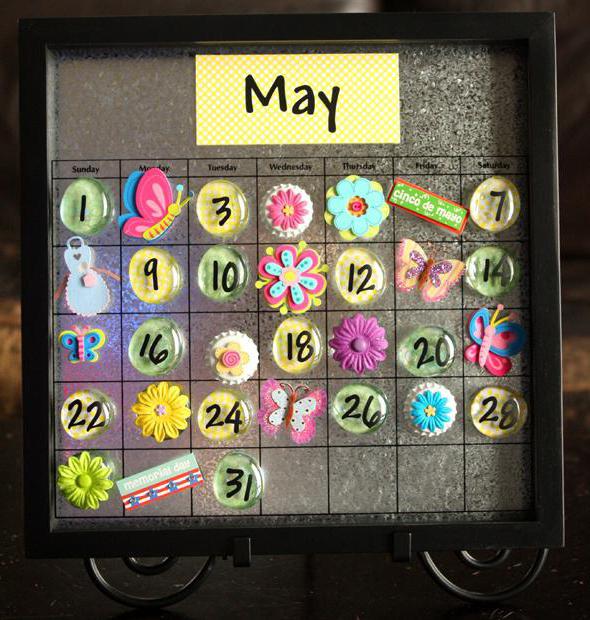
Prepare the following:
- canvas (you can choose the dimensions yourself, for example 400x500 mm);
- wire cutters;
- pins;
- satin ribbon;
- colored cardboard and paper;
- stickers or double sided tape.
The instruction will allow you to understand how to make a calendar:
- Using a satin ribbon, divide the canvas into cells. You need to delimit 7 columns and 5 rows. Insert beautiful pins at the intersections of the ribbons. On the reverse side, bend them with wire cutters.
- Cut colored paper or cardboard into equal squares. Write on them the numbers corresponding to the days. Secure them to the canvas in each cell using double tape. You can use stickers. Also make the name of the month.
- Your universal calendar is ready. You can write about important events on stickers. Reminders can be left on separate sheets by slipping them in the selected cell under the satin ribbon.
It's easy to make your own calendar. Moreover, you can create a unique and inimitable thing.
Now it has become fashionable to make and give calendars. On the one hand, specialized programs have appeared that allow you to create your own calendar in just five minutes. On the other hand, the printed base has tightened up. For example, in a photo lab you can print an A3 picture for a not so expensive price. And if you add a little, you get a print of A2 and even A1 format. Such huge home-made calendars, which contain photographs of places and people close to the hero of the day, are accepted with great gratitude, considered for a long time, and by all guests. And then this imprint hangs before your eyes for a whole year, reminding you of a festive event. In this article, I would like to write a review about my own experience with Calendar Design program firms AMS.
Why draw calendars yourself?
First, let me explain how it is for me, not the latest software specialist Adobe Photoshop, Adobe Lightroom, suddenly it occurred to me to exchange for some kind of "left" programmatic line, which, compared with professional editors, has a lot of limitations. How did it happen that, having a licensed subscription to Adobe products, I suddenly spent extra money to buy Calendar Design?
To answer this question, I will have to tell, at least briefly, how a calendar is made, say, in Adobe Photoshop CC.
For example, I will show one of the latest products:
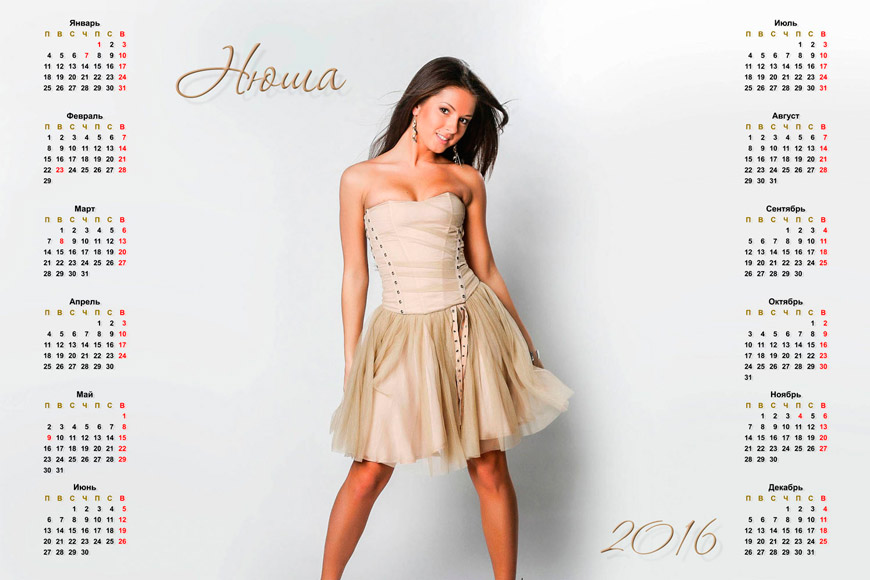
The client wanted it! In principle - nothing extravagant. Almost minimalism. But before the calendar appeared, a significant amount of time had to be spent looking for an up-to-date calendar grid. Then it was necessary to recolor the names of the working days (Mon, Tue, etc.). Then the grid had to be disassembled into two columns (initially it was generally a horizontal version).
In a word, even I needed a lot of time and considerable effort for all this. It was then that I first thought about having some special program that would allow me to quickly and easily make calendars.
And at one fine moment, my colleague, who knew about my wishes, recommended that I look at the Calendar Design program.
Calendar Design Program
I must say right away that the program is paid. It comes in two flavors: Basic and Pro. The cost, respectively, 950 and 1950 rubles. True, I was lucky to take advantage of the discount and save 30% on the pro version.
The program can be downloaded from the official website and used completely free of charge for 10 days. Personally, this trial period was enough for me to make a purchase decision.
I propose to look at what the program can do.
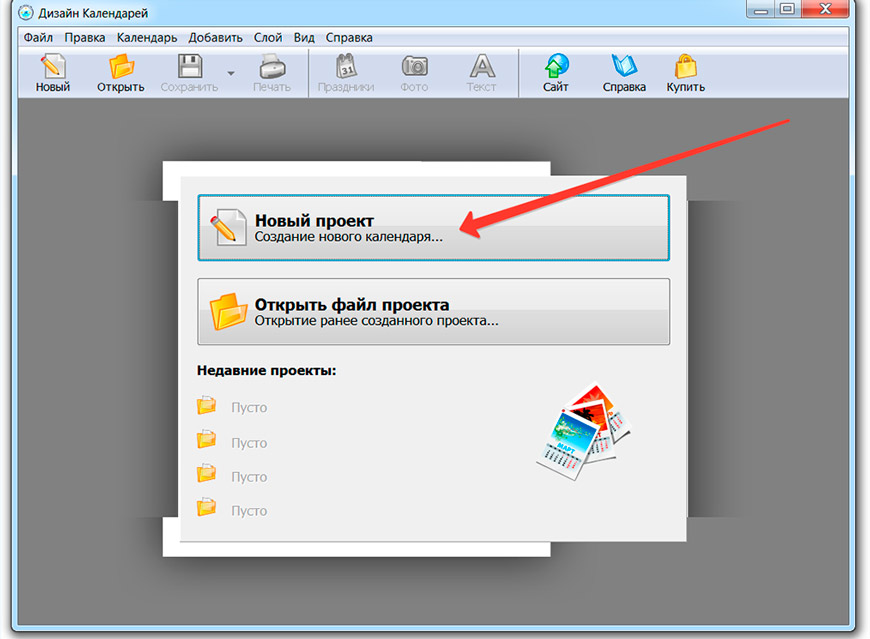
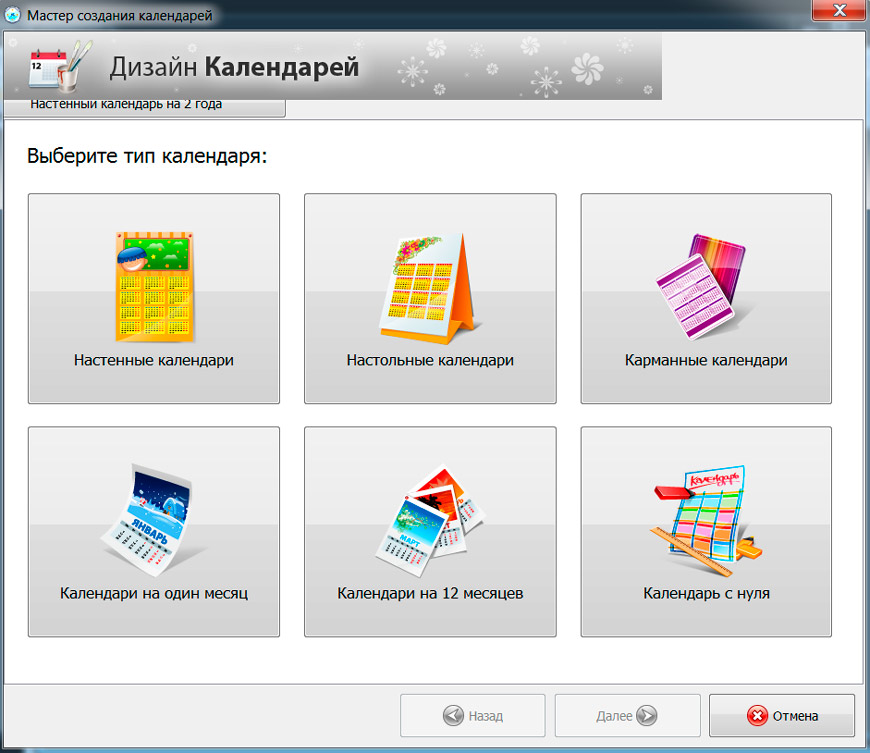
Previously drawn and saved calendars can be further opened and modified. You can start a new project. The next step is to choose a calendar type. After all, they are different - desktop, wall, for one month or for a quarter:
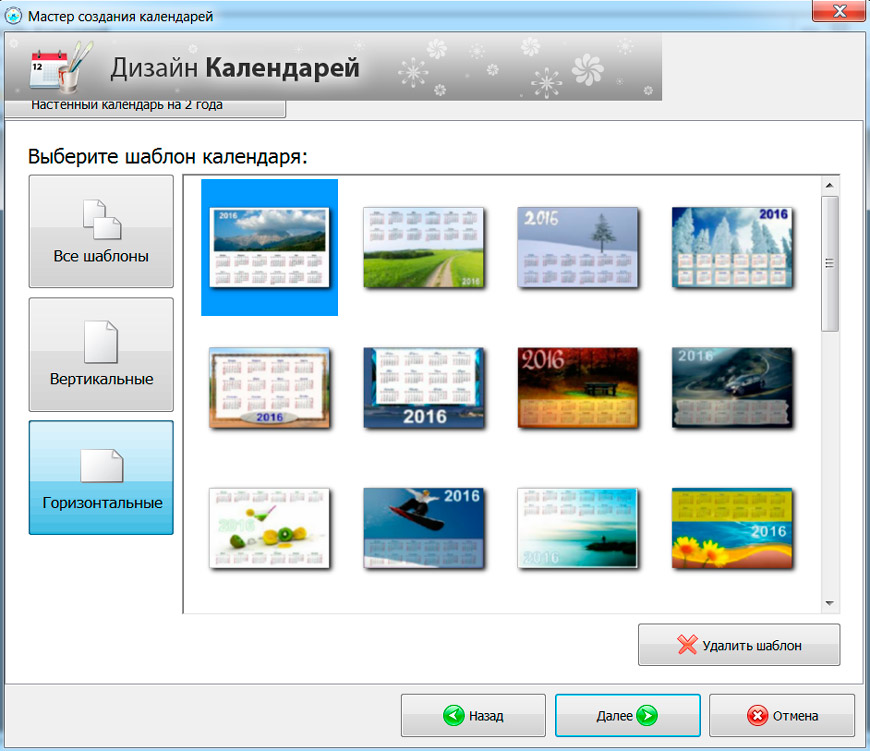
Next, select a design template. I know that at the word "template" true connoisseurs of aesthetics and uniqueness of design begin to have a nervous tic. Nevertheless, do not rush to judgments and draw hasty conclusions. The fact is that in the process of subsequent processing, the calendar can be changed beyond recognition. It really will turn out strictly individual.
And the template as such simply allows us to have the desired calendar grid, with the search for which is usually the main problem. It is especially acute when creating a calendar for two years. For example, from September 2016 to August 2017. Try to find the calendar grid for the next year on the Internet right now. And in good resolution, transparent background. I don't think it will happen right away (if at all).
So I immediately liked the Calendar Design program, at least because it will save me forever from a long and painful search. Drawing a grid manually is cheaper either to shoot yourself right away, or to get and use Corel Draw. There is a plugin that solves the problem.
After choosing a template, we have to set the size of the future calendar. It all depends on what we are going to print it on. If we only have an A4 printer at our disposal, then the size must be selected accordingly. You can order a print of the calendar in a photo lab. Then the size can be made larger. In any case, it is advisable to first find out in the laboratory itself what size they can print and how much it will cost.
For example, in one of my "familiar" laboratories, a 30x45 cm canvas will cost 100 rubles, and a 60x90 cm format costs almost 1,600 rubles. And it will be a real "wet" photo printing, not a print made on an inkjet printer or plotter.

After all the settings, we see a ready-made calendar created automatically based on the template we have chosen. In principle, if you do not need any special theme in the design, you can immediately print the calendar.
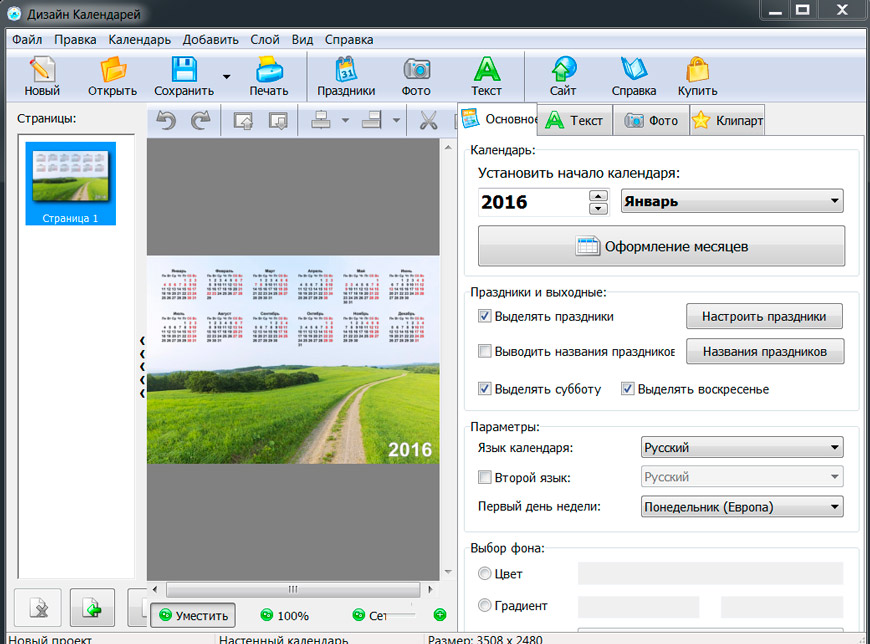
By the way, in the free trial version you can print the received calendar on printer, but can't save it as a file for printing, for example, on a photo machine.
For the most part, in the design of calendars, which are made by hand as a gift to friends or as a toady to superiors, it is usually customary to use some special images in the design that will be pleasing to the donee.
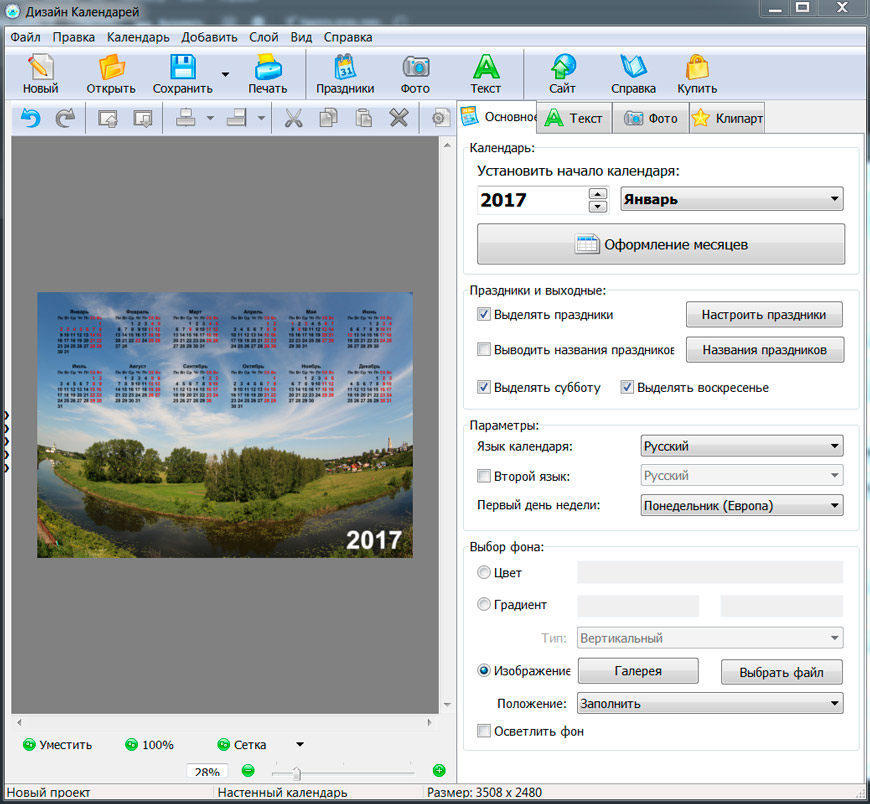
For example, you can replace the background photo with a different one. Or even use some kind of abstract drawing. You can go even further and simply fill the background of the calendar with some color or gradient.
This should be done if the calendar contains inscriptions and photographs in addition to months. Then the background image will no longer make sense. It will still be closed.
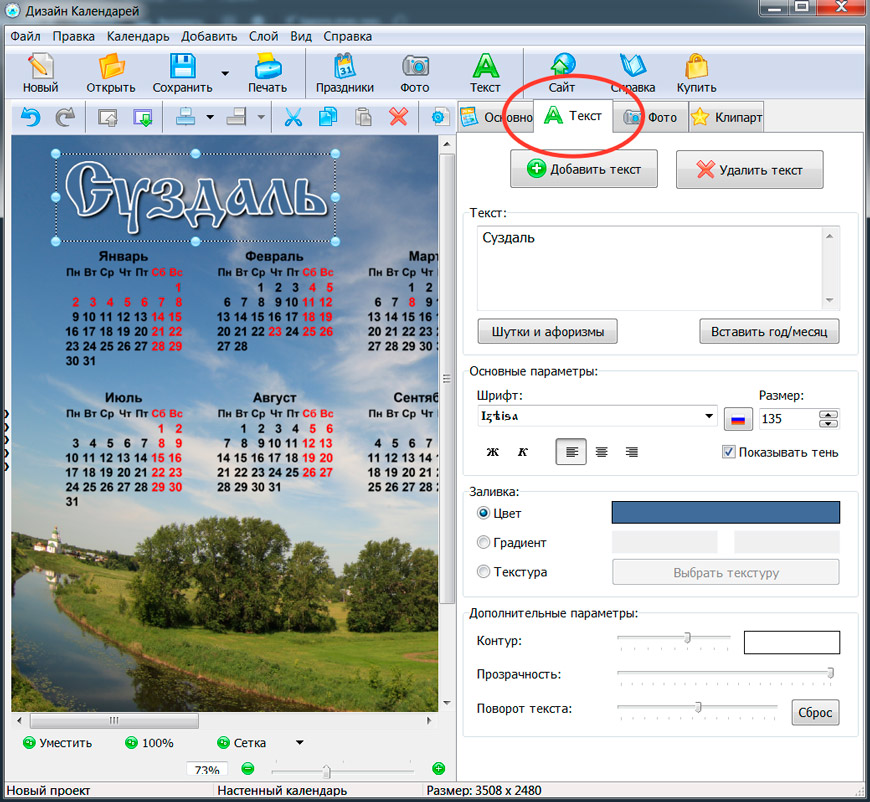
Of course, in working with inscriptions and additional photographs, we will not have the same flexibility as in Adobe Photoshop. For example, we will not be able to make the shadow behind the inscription paler or more blurry. However, you can choose such a size of the inscription and such a background that even this non-adjustable shadow looks normal.
A big plus of the program in comparison with analogues is the ability to take a color sample directly from the image when choosing a font color. So many calendars, including those sold in kiosks, suffer from the same drawback. The color of the font in them is often chosen very unsuccessfully. The inscription looks like an alien element and spoils the whole composition.
This is due to the fact that a color is selected for the font that is not in the background image. Look at the previous picture: the color of the font in the word "Suzdal" corresponds to the color of the sky, against which the word is located. If not for the white frame and shadow, we would hardly have been able to read it. The inscription would simply blend into the background.
However, as you can see, the word looks quite harmonious. Why? Simply because the main condition for choosing a color is met - a color is taken that is already present in the background image (or in the composition as a whole). If we took purple or orange here, the inscription would look like a patch.
Similarly, you can customize the font colors in the calendar grid itself. For example, red names and weekend numbers don't look good on a blue dream. But if you make them yellow, it will be a completely different matter. Similarly, you can change the black color to white if we are dealing with a dark calendar background.
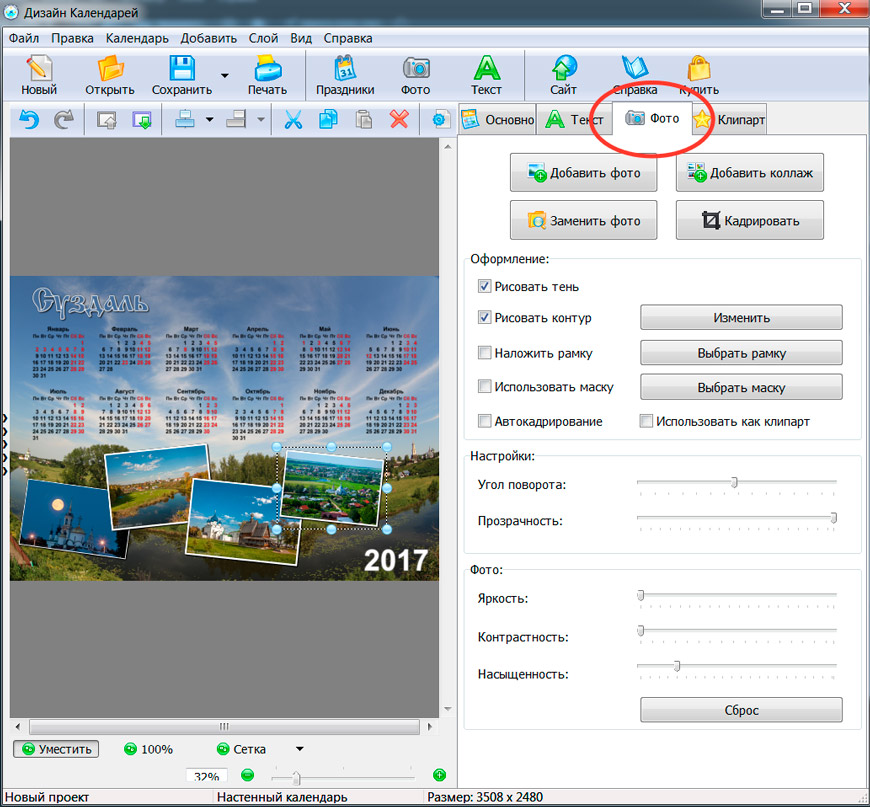
Except background image additional photos can be inserted into the calendar. Their number is limited only by free space on the total area of the calendar. In principle, you can completely abandon the background image and focus the main semantic load on individual well-chosen photographs.
You can work with each photo separately. You can resize it, rotate it, add a border, a shadow.
All this, of course, can be done in Adobe Photoshop. However, there are several thoughts that speak in favor of Calendar Design software as a highly specialized tool.
- For the user who has no idea about graphic editors, Mastering Calendar Design will be faster than Adobe Photoshop. In other words, to get the same external result, it will take different time for the initial development of programs.
- The cost of a lifetime license of Calendar Design in the basic version is equal to the cost of only three months of using a license for Adobe Photoshop. That is, if a person is going to constantly draw calendars (for their own needs, or to order), it is much more profitable for them to purchase Calendar Design.
- Even professional users of Adobe Photoshop need a simpler tool from time to time to quickly satisfy any client who is not particularly demanding on design delights.
As a result of understanding the pros and cons of the program for creating calendars, I came to an unexpected conclusion. Why didn't I draw calendars as gifts for relatives and colleagues before? After all, this is such a simple and convenient sign of attention! It turned out - because there was simply no time (and sometimes too laziness) to draw a calendar layout in Adobe Photoshop.
If you have a simpler tool in your hands, then the time for preparing the layout is reduced significantly. Let there be some restrictions - who except me knows about them! No one will notice that the shadow turned out to be too dense, and the framing of the photos is solid, not gradient. Now that there is a specialized program, it will be easier to fulfill orders from third-party customers and prepare pleasant surprises for friends and relatives.
Additional and less obvious features of Calendar Design include, for example, the creation of a calendar for weekly planning. It is printed on a regular printer, maybe even without a picture, and has empty cells for planning things.
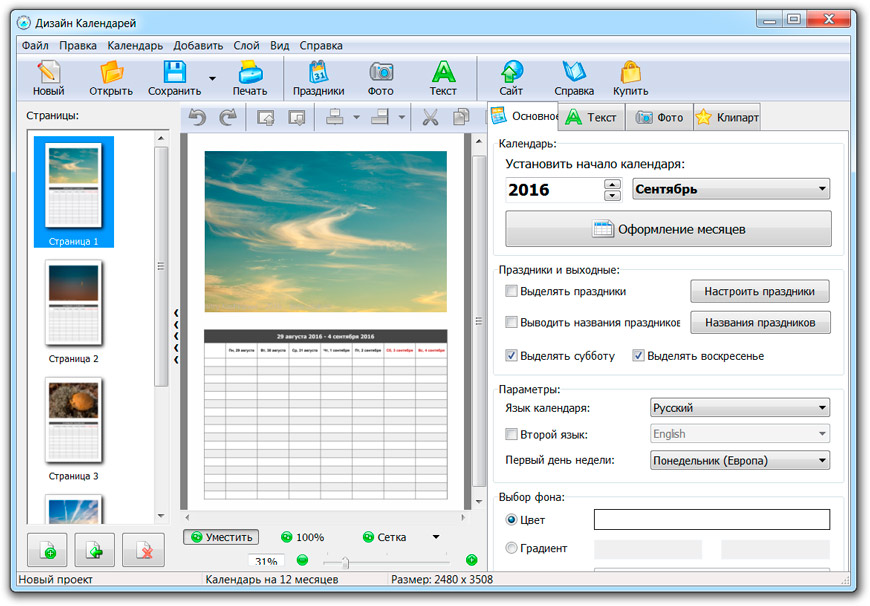
For those who are constantly under stress from a bunch of piled-up cases, I think it will be useful to have such a scheduler at hand. As practice shows, one has only to write down all their problems on paper and it becomes clear that the snowball is not so big as to fall into despair. And if you make it a rule to solve at least one important task every day, it will not take even a couple of weeks before you can breathe a sigh of relief.
The main thing here is how everything should be planned. And this is where the calendar for weekly planning comes in handy. For this opportunity alone, you can fall in love with the Calendar Design program.
Program disadvantages
In order not to create the illusion of reading a custom article, I would like to briefly tell you what is in the program for me did not like.
First, not so important, but striking - inconsistencies in interface elements. The feeling of some blurring of the picture in certain windows. For example, this is how the window that appeared every time you started it looked like and warned that you would soon have to pay for a license:
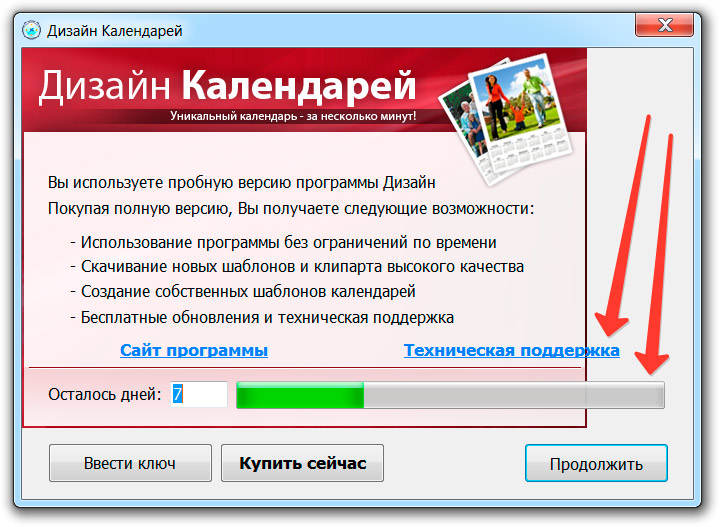
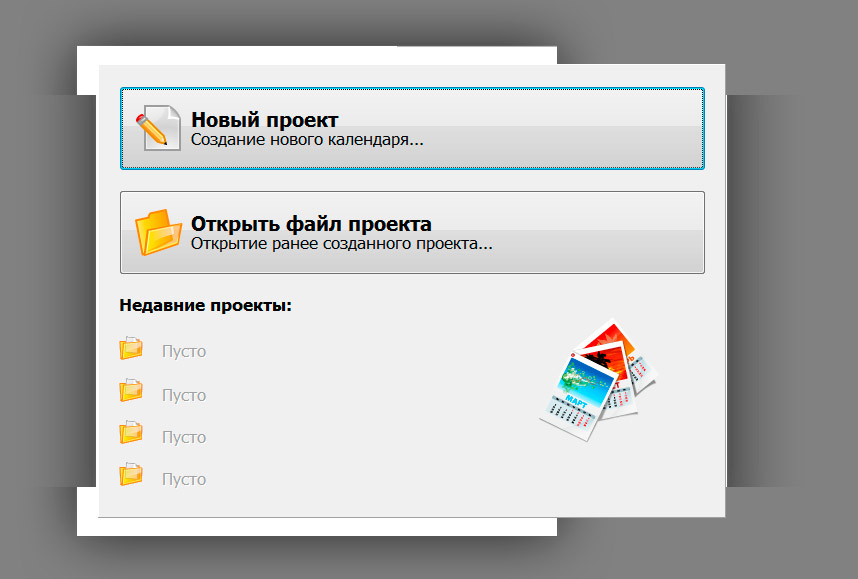
You know, this, of course, is not a running gear. Moreover, there are no such problems in the rest of the interface. However, already at the start, I thought that "can't ours write normal programs, without glitches." Immediately there is a suspicion that there will continue to be constant problems and ease of use will come to naught. Fortunately, this assumption was not confirmed.
Second What was somewhat disappointing was the inability to adjust the font color of the calendar grid for each month separately (or for several selected months). I explain the essence of the problem.
Imagine that the background of your calendar is divided into two parts - dark and light (for example, sky and earth). If you take a dark font color, then it will be read normally on the light part of the background, but will be lost on the dark part. If the font color is light, then everything will be the other way around and also ugly.
It is clear that you can take a different background. But what if the customer insists on his own version?
It is in this case that it would be appropriate to make part of the months "white" and the second part "black". Placing the whites on a dark background and the blacks on a light background would solve the problem right away. Alas, Calendar Design does not allow us to manage each month separately. Perhaps this will appear in future versions.
Third, price. I personally do not mind that it is not a sin to pay for a good thing. Moreover, if you get on any promotion, you can also save a lot. For example, I was able to buy full version for 1300 rubles instead of 1900! However, for many people, the paid basis for using the program puts a bold cross on it. Many people will simply go back to looking for other, preferably free options online, instead of paying once and solving the DIY calendar problem forever.
In no way condemning such tactics, the situations, as they say, are different for everyone, I decided that it was easier for me personally to pay. After all, money can be earned again, but the lost time will not return.
Output
As you probably already understood from the text of the article, the Calendar Design program made a good impression on me. Without claiming to be a global universal tool for graphics processing, it nevertheless does its job perfectly. Having such a program on your computer, you can easily and quickly create calendars with the desired design, right size and with the desired start date.
This adress Email protected from spam bots. You must have JavaScript enabled to view. . The cost of one layout is 100 rubles. The cost of 5 layouts is 300 rubles. The cost of the layout with your photo - 500 rubles.
Every year on New Year's Eve, the children and I collect the accumulated postcards, posters and other little things to make a calendar with our own hands for the next year and make a weather calendar. Our family loves to travel and bring souvenirs from each country. We buy our favorite postcards, calendars and even buttons with colored paper. For what?
Firstly, memory, and secondly, any detail is useful in creating a calendar with your own hands.
weather calendar
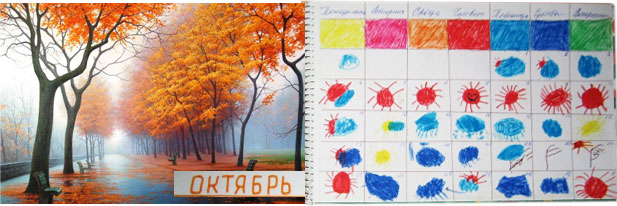
I'll start, perhaps, with calendars that reflect the state of the weather outside the window. Many adults will frown in displeasure. Say, schoolchildren make weather calendars, only on assignment, and only under duress. I don’t know, in our family, the calendar of nature is made just like that and kept for a whole year.
And if a couple of years ago on the wall in the nursery there was one such calendar with lined tables for keeping a weather diary by a schoolboy. Then this year we are preparing another weather calendar for a little daughter.
She still cannot read and write, but she is keenly interested in the world around her. Daughter is learning to recognize colors. Understands the difference between "hot" and "cold", "rainy" or "sunny". She is happy to help her brother color the tables in his weather calendar, and demands the same.
Making a nature calendar for little ones is not at all difficult. It is enough to have on hand hard cardboard, pictures of each season, colored paper, felt-tip pens and a coil of wire.
First, draw and cut out a large circle from cardboard. Then we divide it into four parts. We paint each part in our own colors. Winter is white, spring is green, summer is blue (like the sea), or lilac (like flowers), autumn is yellow. When our blank dries, we will divide each share into three more parts, and write the names of the months.
Now it's up to the small: we fasten the arrow on the wire like on a mechanical watch, we check that it is movable. We decorate each season on the calendar with thematic pictures and mount the entire structure on the wall so that a small child can easily reach it.
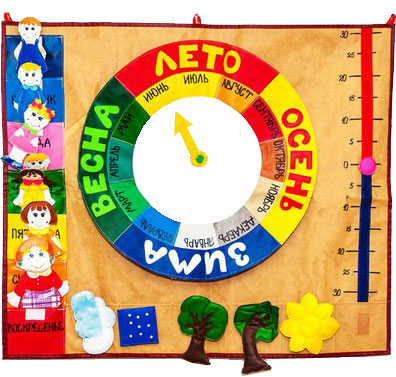
With a weather calendar for a student, you will have to tinker a little. If you follow the strict rules by which textbook weather calendars are built, you can get a boring spectacle, and besides, it will take up decent space on the wall. With my son, we simplified our task a little.
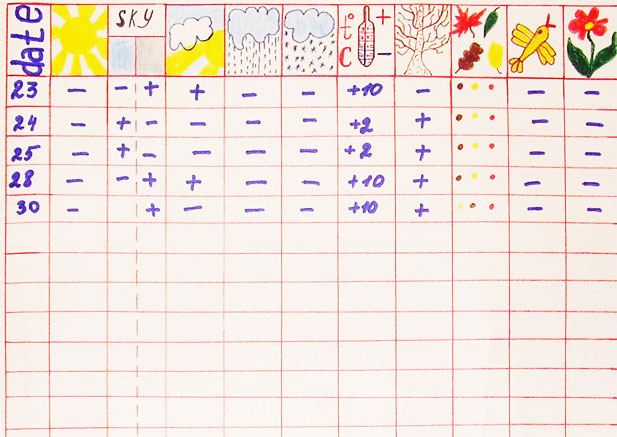
They took an old flip wall calendar as a basis, carefully removed the used sheets from the spring, adjusted the album sheets to fit, made several holes in the blank pages with a hole punch. We drew weather tables on each sheet of the future loose-leaf calendar. We signed the name of the months, measurement scales, assembled the finished product. This calendar will hang in the nursery until the beginning of next December, and then it will go to school along with the report of the young meteorologist.
We make a calendar with our own hands
Someone will say that modern stores have a large selection beautiful calendars. That you can order a calendar under a family photo, hang it on the wall and admire the happy faces. Someone will remember about calendars on mugs and T-shirts. I do not argue with the fact that the choice of ready-made calendars is rich. I just want to tell you how great it is to make a calendar with your own hands with children.
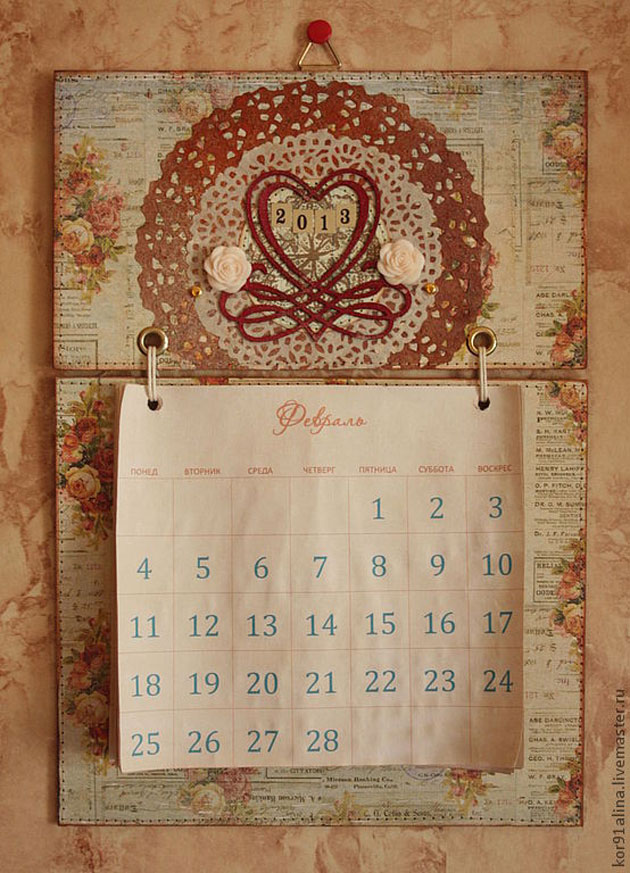
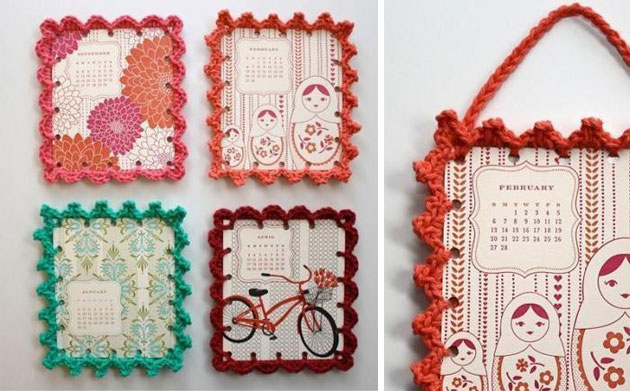
After all, it is not necessary to make a calendar for the house. You can come up with a gift option, or decorate a children's room with unusual installations on the theme of numerology. And you can make a calendar with your own hands, which will not only count the days until the new year, but also help in the development of your child.
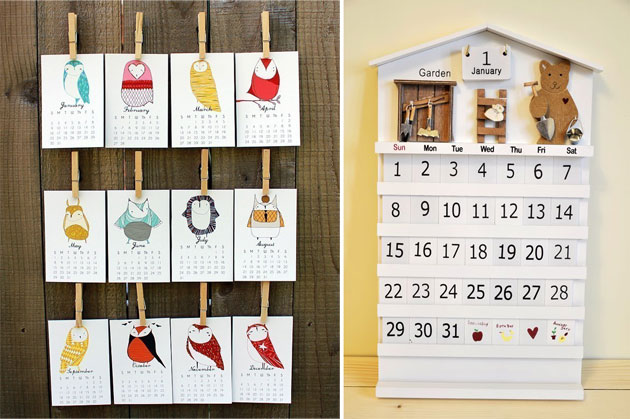
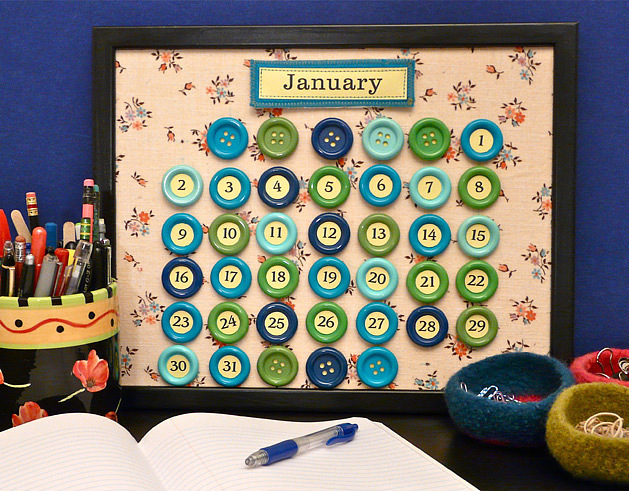
For example, use buttons when creating a handmade calendar. First, ask your child to help pick up the buttons of the right size - the development of fine motor skills. Then lay them out on the canvas according to their height - the development of logical thinking and fantasy. Cut out circles for numbering - developing the ability to work with scissors. Glue buttons on the base of the calendar, help in the design of the base and decorations - the development of perseverance and creative thought. And many many others.
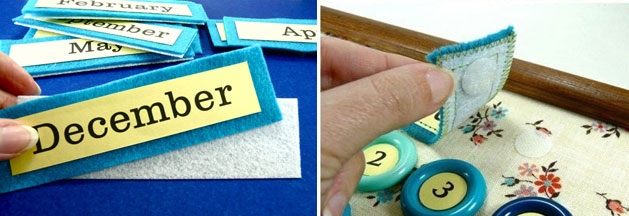
A calendar for a child can be made universal by attaching the name of the month to strong Velcro, and changing the days of the week using lacing. That is, making a calendar with our own hands for a baby, we put great educational, developing meanings into it!
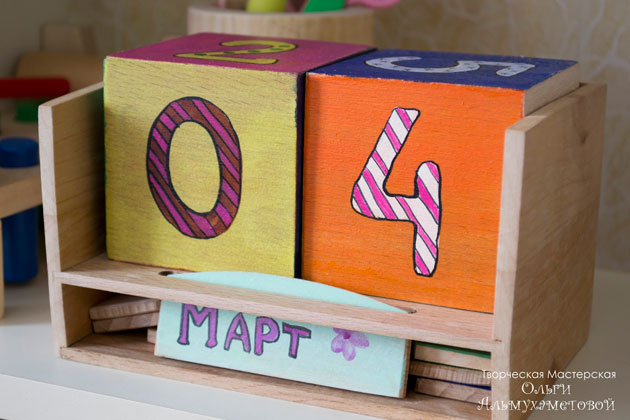
If you are making a calendar for a small child, use large details. How do you like cubes? Just wrap them with beautiful paper, stick a picture with your favorite crumbs on one side, and a number on the other side. You can make perpetual calendars from cubes, using a special wooden blank or a field for the designer as a stand.
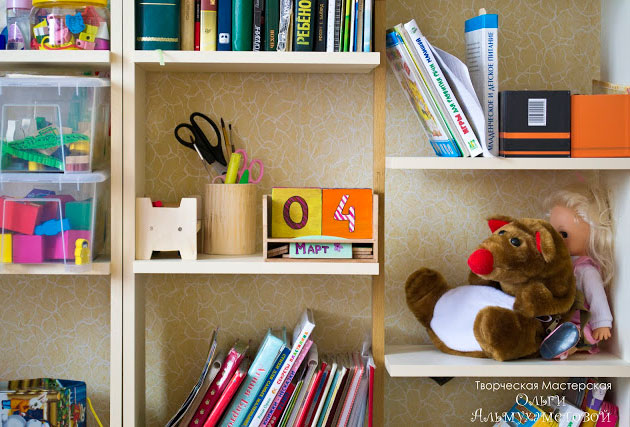
Original ideas for a calendar
We all remember how in childhood we loved to receive gifts. Often a small present was more valuable than verbal praise. Later, we wrote little notes with desires, hiding them under the pillow, started keeping a diary, and so on.
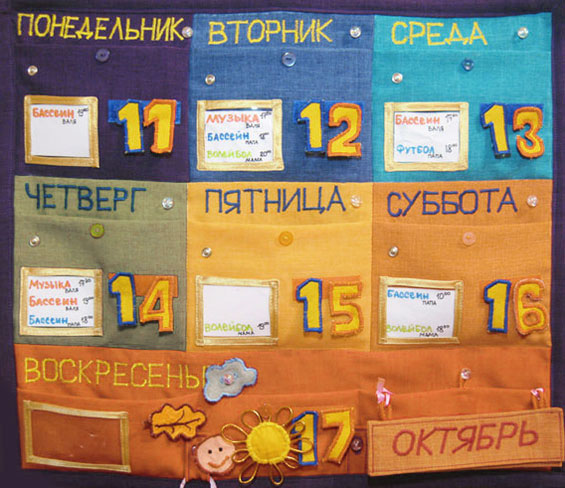
These memories inspired me to make a DIY calendar not just a set of symbols and decorations, but something functional and useful. Somehow an old folder from under the “Kassa-Azbuka” caught my eye. Numbers are still preserved in the pockets, and this gave the idea: to make a calendar with pockets. Naturally, you can’t sew it for all 12 months, but who’s stopping you from making the calendar universal.
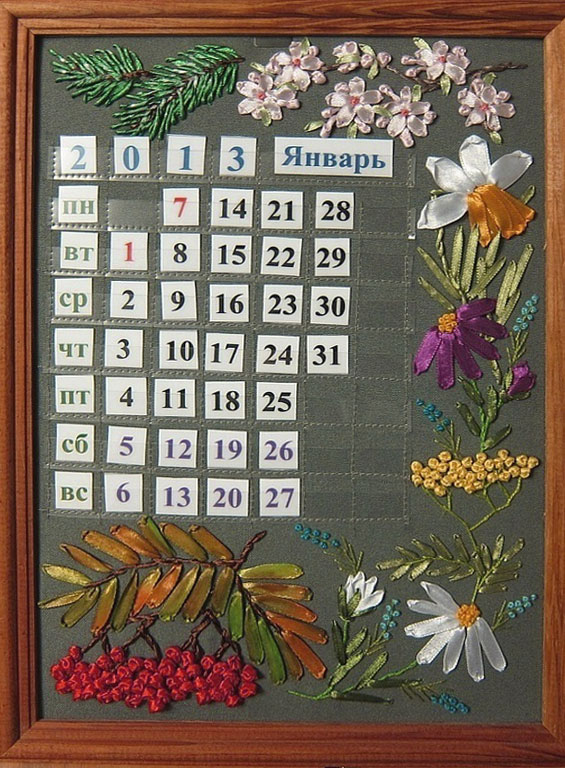
No sooner said than done. I bought scraps of fabric. I cut it at home, stitched the edges, embroidered squares for numbers and pockets. The numbers and the weekly table were prepared by the son, the names of the months were drawn up by the husband, even the little daughter took part, testing the resulting design, when she put several dolls into pockets.
And you know, this kind of calendar not only decorates the interior, but also really works. It is enough for me to put a note with a reminder in the pocket of the desired date, my son will see it and do everything. And he, on the contrary, is pleased to leave notes in his pockets for us, with wishes and requests.
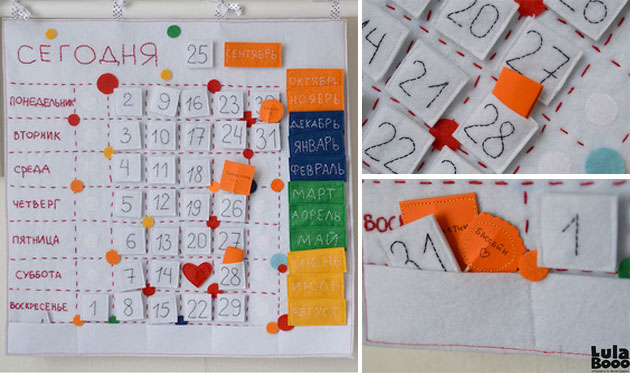
Another interesting option for a homemade calendar is a felt calendar. Making it with your own hands is not difficult. Sew hard cardboard into the base, and present each number in the form of a pocket with numbers. By the way, the idea with interchangeable names of the month and days of the week is well suited here. It is enough to buy Velcro and sew them to the right places. Link master class
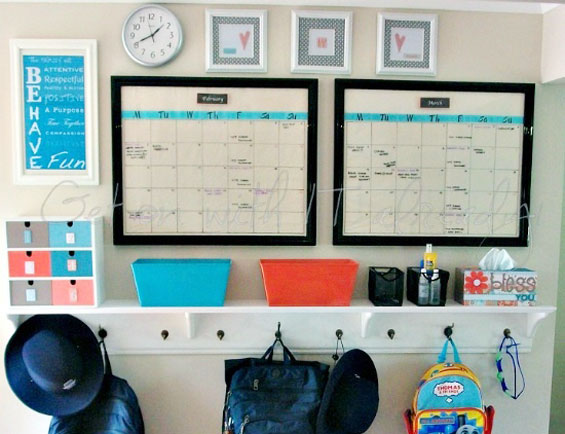
In general, there are a lot of original solutions in creating calendars. You can embroider the calendar on canvas or fabric and leave it in a large frame. You can make a calendar and put it in a frame with glass, on which you can write reminders, notes, mark important dates with a marker. 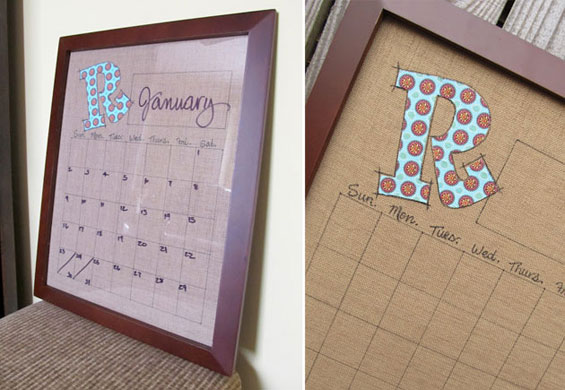
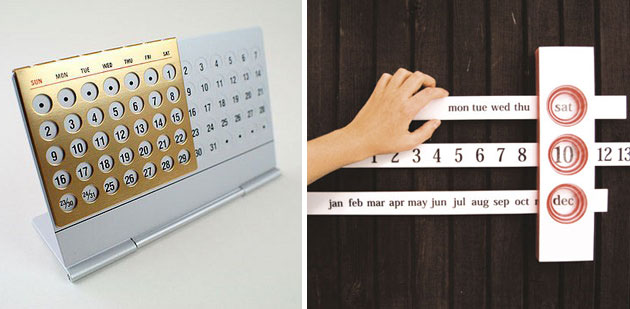
You can come up with an office version of the calendar. To do this, it is necessary to make several round holes in a dense album sheet, and print the necessary numbers, names of months, weeks and days of the week. Looks very original!
The main thing to remember is that joint creative work with children brings them together better than any movie or rides on attractions. Every mother can make a calendar with her own hands, as well as make a calendar of nature with her children, it’s worth turning on the fantasy, remembering distant childhood and not rushing anywhere.
The New Year holidays are approaching. And this means that you need to slowly start thinking about how you can please your loved ones and friends. A calendar can be a great gift. Only not purchased in a store or kiosk, but made independently. From the article you will learn how to make a calendar on a computer quickly and easily in the special Calendar Design program, which can be downloaded from the link.
Getting started with the program
With a good internet connection, installing the program will take you no more than five minutes. Once completed, you can launch Calendar Design and get to work by selecting start menu option " New project».
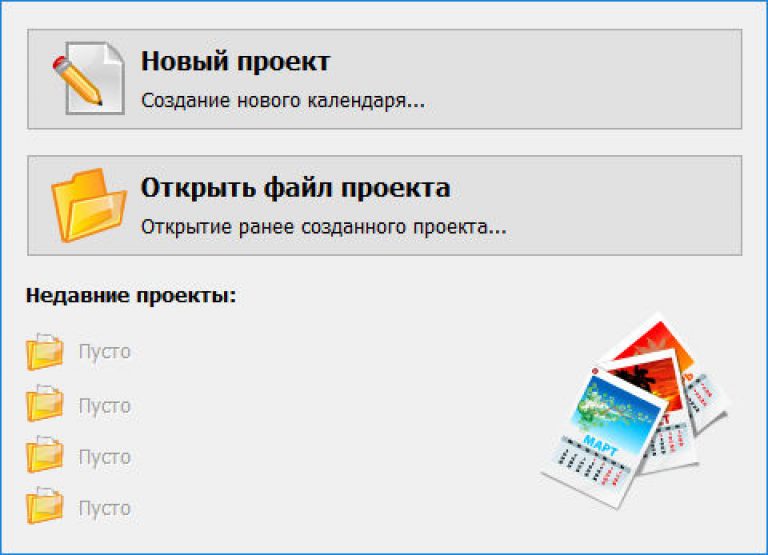
Option One: Create a Calendar Based on a Template
Immediately the software will prompt you to select the type of the future calendar. Literally in a few clicks of the mouse, you can "design" a wall, desktop or pocket calendar, as well as calendars, where each month will be placed on a separate page. 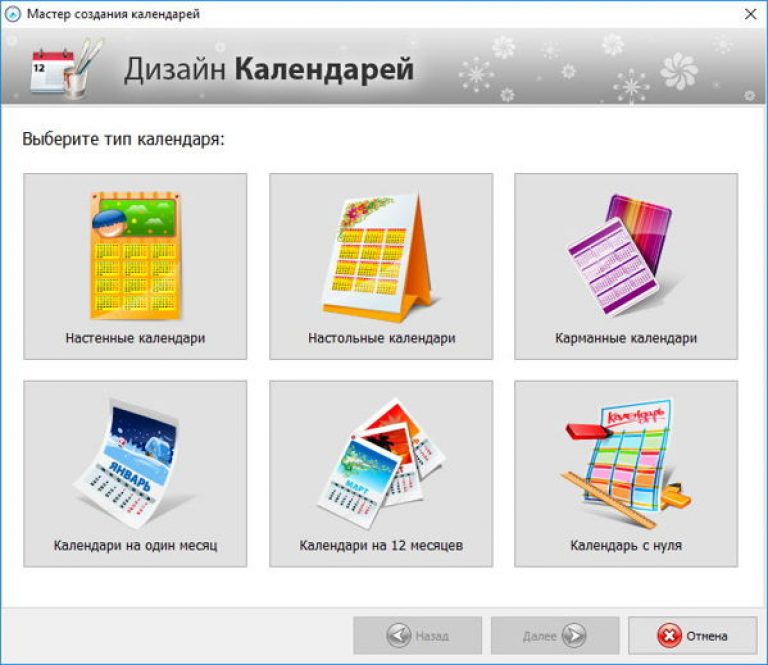
After selecting the type of calendar, the program will offer to download one of the templates from the built-in directory for work. Click on the option that best suits your idea, in the next menu, set the year, start month and size of the future calendar.
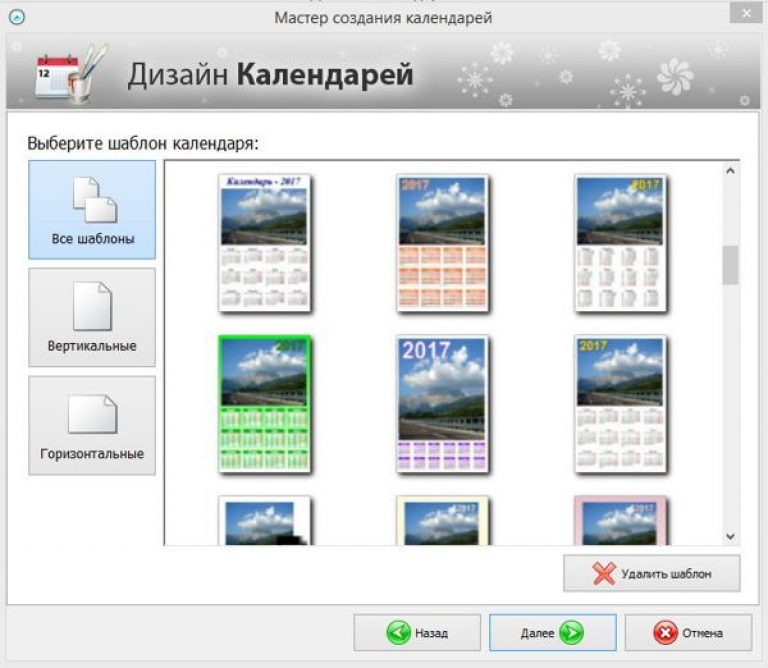
Option two: preparing a calendar from scratch
When this option is selected, the software will offer to define the composition of the printed product. For example, it can be a calendar in the form of a poster for one or more years, a flip calendar, a calendar in the form of a book, etc.
In the next step, specify the location and type of the calendar grid and other components, as well as the path to the images that you want to decorate your calendar with.
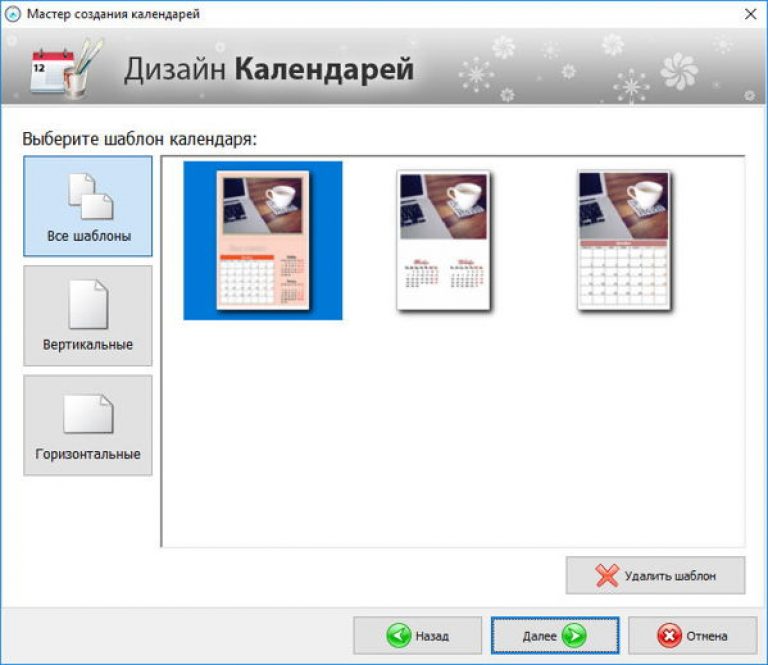
Editing a calendar
In fact, immediately after that, the calendar can be printed. But if something doesn’t suit you in its appearance, then you shouldn’t rush - it’s better to continue working and improve the 2017 calendar on your computer in the editor. Let's take a look at exactly what can be done.
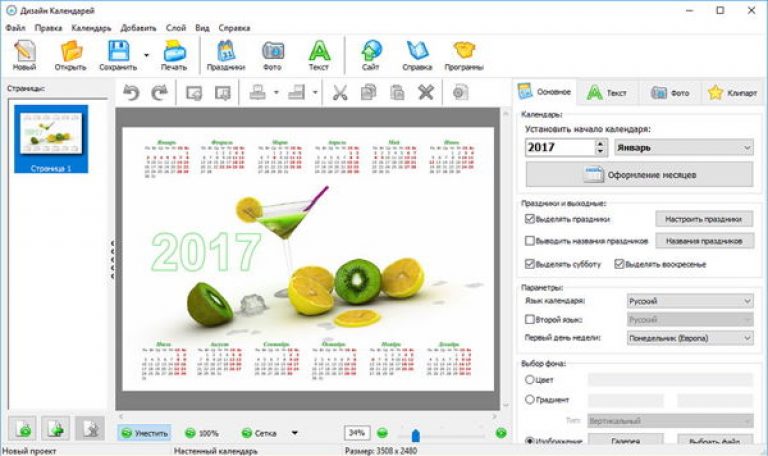
First, available replacement background. As a new background, you can use any color from the standard palette, gradient, texture or picture from the program collections or from PC folders.

Secondly, the calendar can add an inscription. For example, an explanation for an image, a quote, or useful information. Appearance text can also be customized: choose the type of font, its size, color, etc.
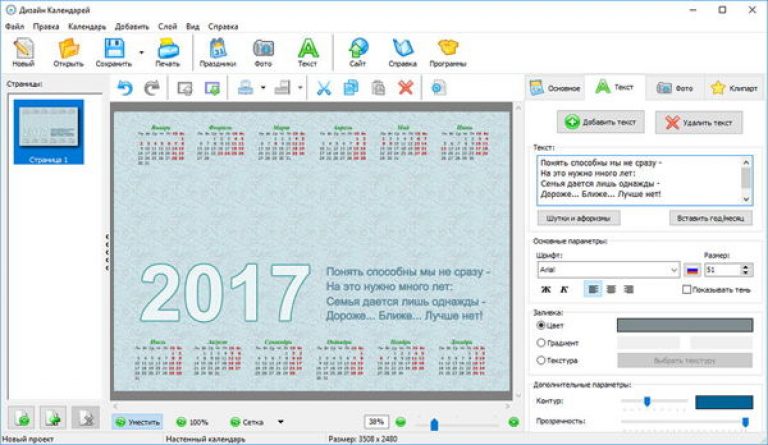
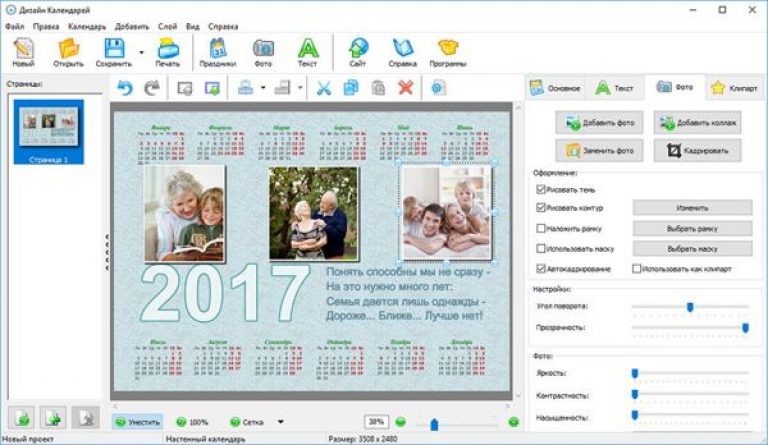
Third, you can complement the composition with photos or pictures and even make a collage of them. If necessary, the quality and size of each image can be adjusted directly in the program.
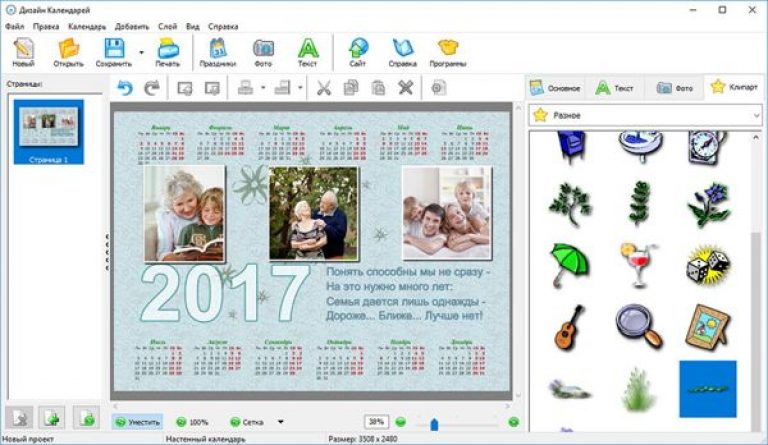
The calendar can also decorate with clipart from software directories. All elements in the collection are divided into several thematic groups: flowers, animals, romance, cars, etc., thanks to which it will be quite easy to find suitable options.
Making a calendar grid
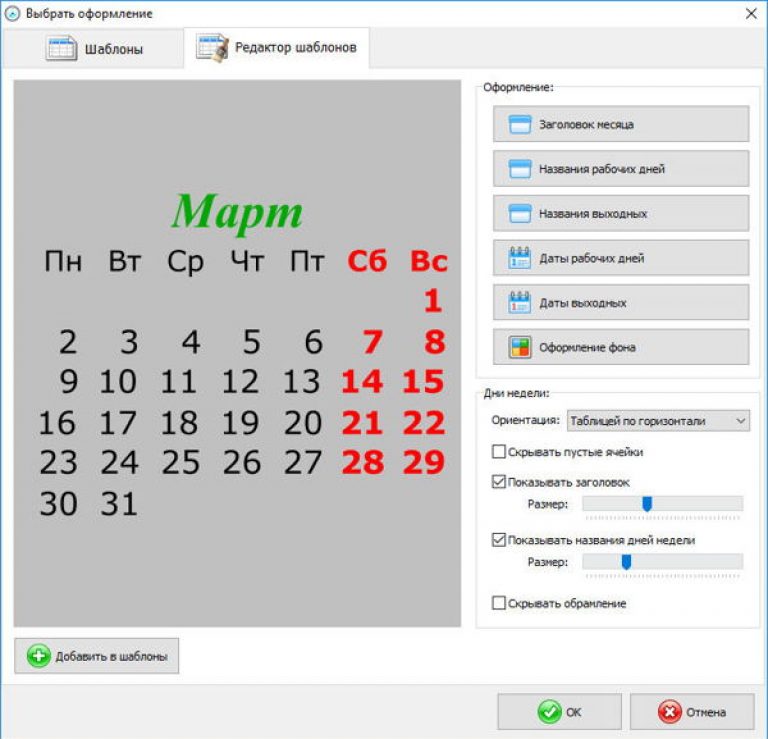
If we make a calendar on a computer and want to get really high-quality work as a result, then we should not forget about the design of the calendar grid. For example, you can use one of the templates from the software collection. The catalog contains blanks for different tastes.
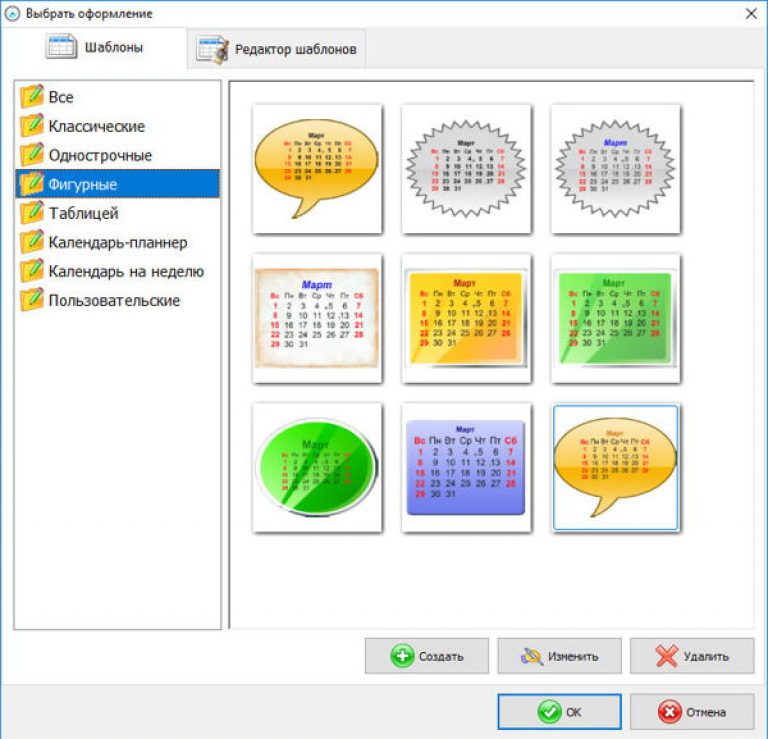
If none of the proposed options suits you, go to the editor and set everything up manually. You can change every component: the names of months, working days and holidays, the design of dates, and also add a background for the blocks so that all numbers are clearly visible.
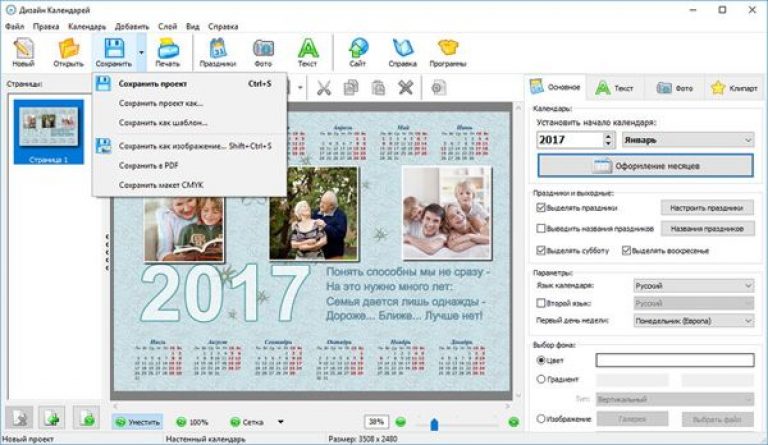
Export calendar and totals
When all settings are completed, save your work as an image, PDF file or a CMYK layout for subsequent printing in a printing house.
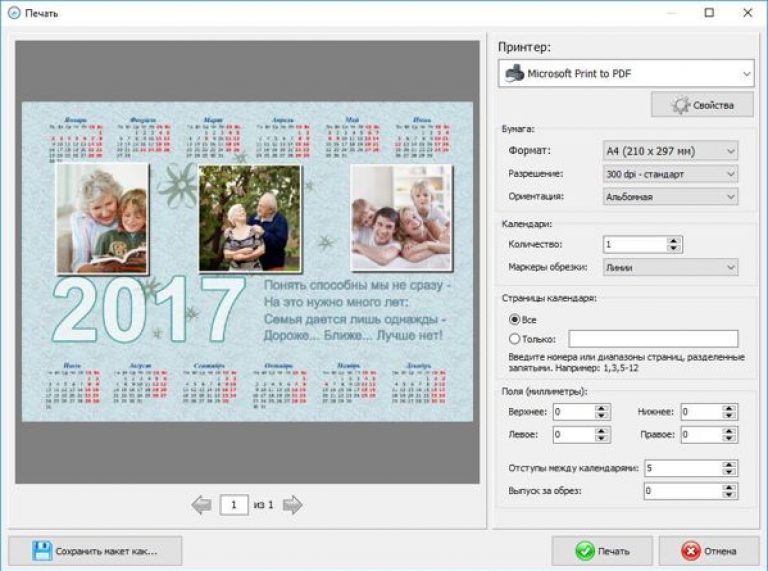
The calendar can also be printed on home printer. It is enough to specify the format and orientation of the sheet, indents and the number of copies.
Now you know how to make a calendar on your computer in the Calendar Design program and you can quickly prepare high-quality calendars for yourself and your loved ones.
Video on working with the program:
Today I’ll tell you how you can quickly make yourself a desktop flip calendar out of paper and cardboard with your own hands. Empty windows for future sketches are left on the pages of my calendar, but you can easily decorate such a blank to your taste by pasting your favorite photos or any beautiful pictures. This handmade calendar can be a great gift for a friend on New Year or February 14, especially if you beat it with thematic photos, dilute it with funny inscriptions or wishes for each month. The flip calendar is done very quickly, in 1-2 free evenings, and then pleases the whole year!
Necessary materials
- 6 sheets of A4 watercolor paper or any other thick cardboard - for pages with the names of the months
- dummy knife
- Paints and ink if you write the names of the months and dates by hand (or a printer to print the finished layout)
- Soutache, satin or any other decorative ribbon - 20 cm (or 2 small rings for the album: you can disassemble finished notebook on rings or buy rings at a scrapbooking store)
- 1 sheet of scrapbooking paper 30.5 x 30.5 cm (or any other beautiful paper for the cover)
- Cardboard 23x42 cm. (I cut out from a sheet of ordinary Whatman paper)
- PVA glue or glue stick
- Stationery punch for 2 round holes
- Ruler
- simple pencil
If everything is ready, then you can proceed. The scheme of work is very simple:
- making page blanks
- I create the basis for a calendar made of cardboard,
- I paint the pages
- I collect all the elements into a single whole.
Pages with months
I cut six sheets of A4 watercolor cardboard in half, I get the future 12 pages. 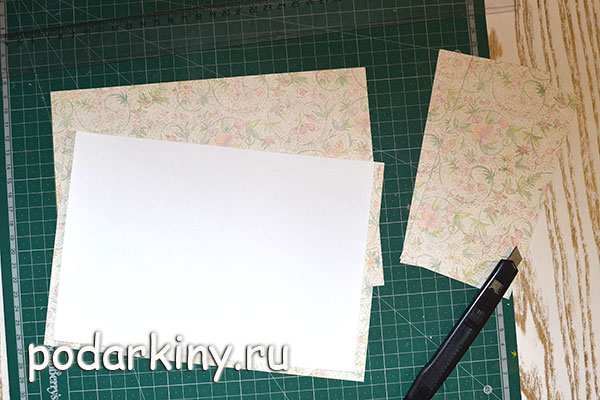 I mark the middle of the sheet with a pencil and draw a line along it. Combining the middle line with the mark in the middle of the hole punch, I make holes on 3 sheets at once.
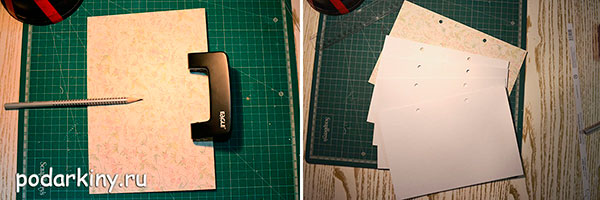 I repeat the operation 3 more times and get 12 leaves with exactly matching holes.
basis for the calendar
I cut out 2 rectangles of 22x15 cm from scrapbooking paper. These are the future endpapers of the calendar. 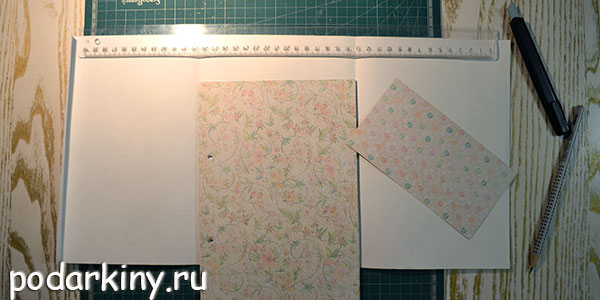 From whatman paper I cut out a sheet measuring 23 x 42 cm. From one edge I glue both rectangles of scrap paper to it one after another. After drying, I crease the folds and fold the triangle, not forgetting to leave 1-2 cm for gluing from the bottom to the side wall. In the upper part of the triangle, I also mark the middle and make two holes with a hole punch. After that, I glue the bottom with the side wall and get a rather rigid structure, which will be the basis for our desktop calendar.
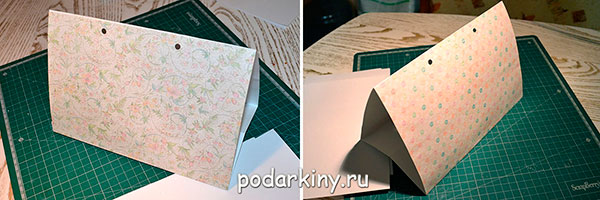
A little lettering wouldn't hurt!
Pages with months can be arranged in a thousand different ways, who has enough imagination for anything, starting from a banal printout of ready-made templates and ending with colorful drawings for each page. 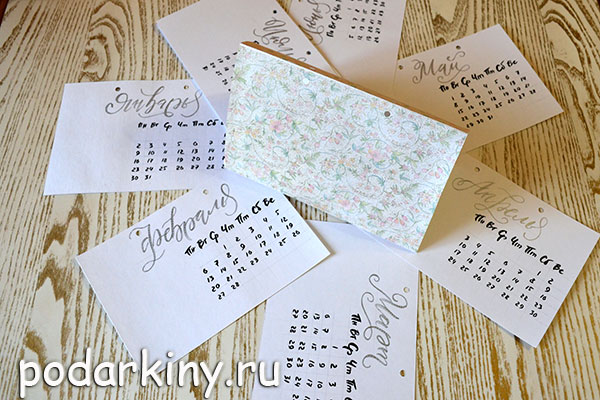 You can make free lines for planning or notes. Since I make my calendar for sketches, it is important for me to leave a little free space for future drawings. Therefore, I write the names of the months with silver acrylic paint, the days and dates with black ink, and draw a window in the center in the form of a stamp. Here's what happens in the end.
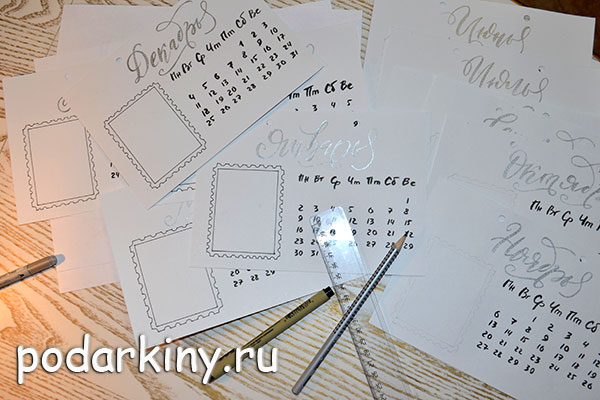
Assembling a calendar
I cut 20 cm of soutache tape in half. I thread each segment from under the triangular base, stretch it through the leaves with months and again wind it back, inside the base of the calendar, where I tie a knot.  It is important not to tighten the tapes too much, leaving enough freedom to easily turn the pages. I cut off the ends of the tape. Calendar is ready! If you need to draw something on it, then at any time you can fold it in half, and then spread it again into a triangle. It is very comfortable!
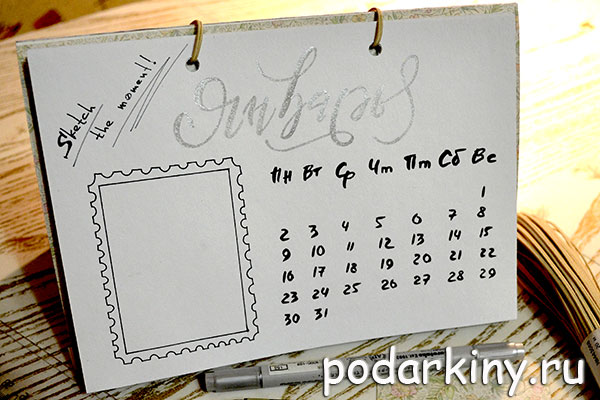
If you want to add a note block to your calendar, make it brighter, or just practice scrapbooking once again, then you can be inspired by this wonderful video tutorial from Lena Pol on creating a desk calendar with a fluffy fox.
Creative mood to you, great inspiration and the most interesting and beautiful calendars!
From cardboard on the site there are still excellent master classes on creating postcards, postcards, and paper!
