Updated – 2017-02-16
How to setup general access to the printer? Until you know what a local network is, you don’t seem to really feel the inconvenience of working without it. But when you already know its advantages, you want to use them to the fullest. And it is right!
It’s stupid to rush around with a flash drive from computer to computer, which are located a couple of meters from each other. And in order to go online, wait your turn while other household members have had enough of playing there. Try touching them during the game.
They will hiss so much that you will forget why you needed the Internet. Here you won’t regret a couple of hundred rubles just to have your own personal access to the open spaces World Wide Web, and go about your business without disturbing anyone.
We have already configured and created a network common to all computers, now it’s time to set up a shared printer.
How to set up printer sharing
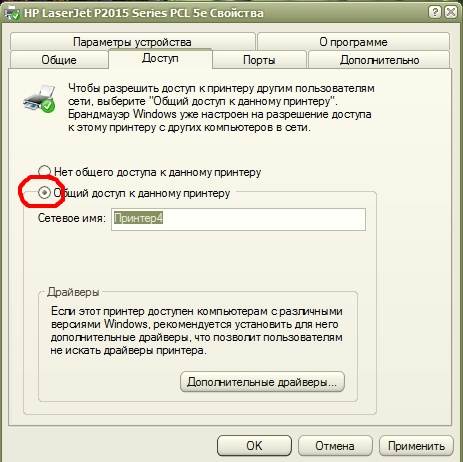
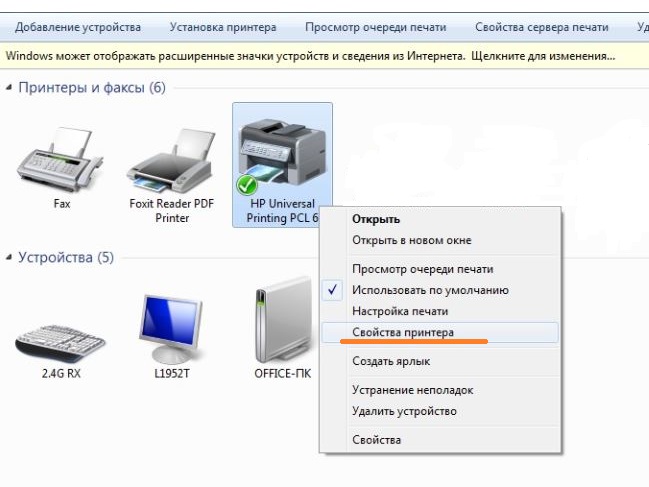
On the computer to which the printer is connected, open a window Printers and faxes (Start - Settings - Printers and Faxes) . A window will open Printers and faxes . Click right click mouse on the icon of the connected printer. From the drop down menu select General access… .
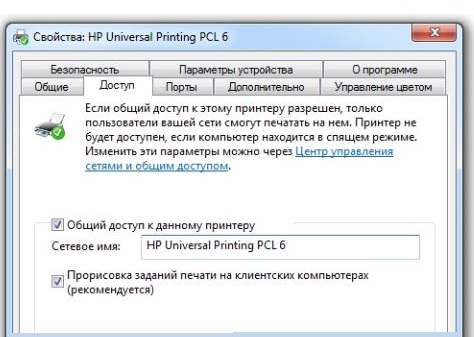
In the newly opened window on the tab Access set the switch to the inscription Share this printer . Don't touch anything else. Click on the button Apply And OK .
Now your printer icon will look like this. A small shared image will appear on it.
- We go to another computer to which we need to connect the printer via the network.
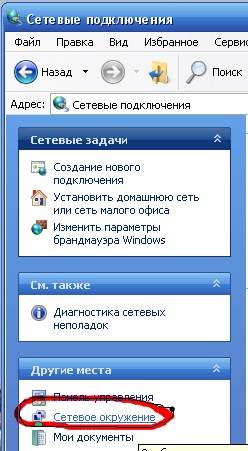
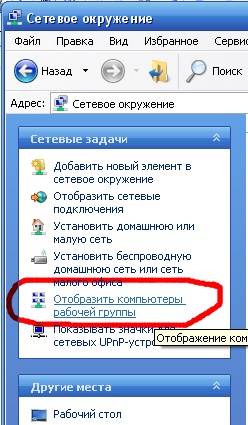
- Open the folder network (or by icon network on the desktop, or through Start – Settings – Control Panel – Network connections– Network Neighborhood – Display workgroup computers.
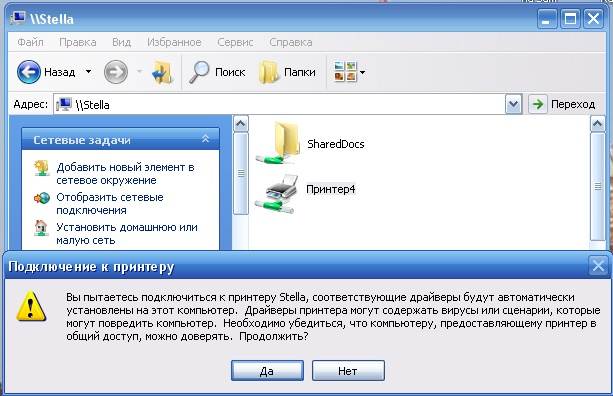
- In the next window, select the icon of the computer on which the printer is installed and open it by double-clicking.
- In the new window, click on the printer icon again.

An entry like this will appear asking you whether to install the necessary drivers. Feel free to press the button Yes .
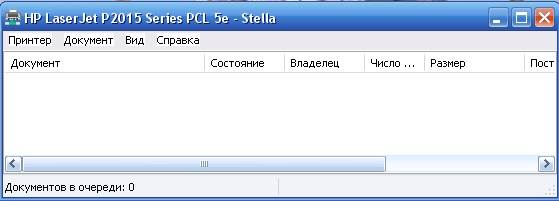
Eventually this window will appear.
In the age of digital technology, every apartment has a computer or laptop, and more than one. The time comes when a user thinks about purchasing a printer. A very useful thing that saves time and money; having bought a printer, you no longer need to go to the post office or ask friends to print documents or photographs.
Having two devices, all that remains is to connect the printer over the network, which makes it possible to print from different devices independently. In this article we will tell how to access the printer By local network. To connect a printer over a network, you need to configure the devices to which the printer is connected.
Setting up the computer to which the printer is connected
The printer always comes with a disk containing software, to put it simply, drivers. Having installed the printer in a convenient place, one wire is connected to the power supply, and the other to the computer (to a free USB port). After turning on and connecting the printer to the computer, the device is initialized, after which it is necessary to install drivers from the disk.
It is worth paying attention to the installed operating system and its bit depth. Not all drivers that come with the printer may work with your windows. Included with a modern printer, drivers are suitable for OS windows 7, 8, 10 but for more old version There is no Windows like XP. You'll have to change Windows or look for drivers on the Internet.
We open access to the printer on the local network
So the printer is connected to the computer and configured, printing occurs according to the standard scheme. To make the printer accessible over the network, you must do the following.
Go to Start \\ Control Panel \\ Network and Internet \\ Network and Sharing Center \\ Advanced sharing settings.
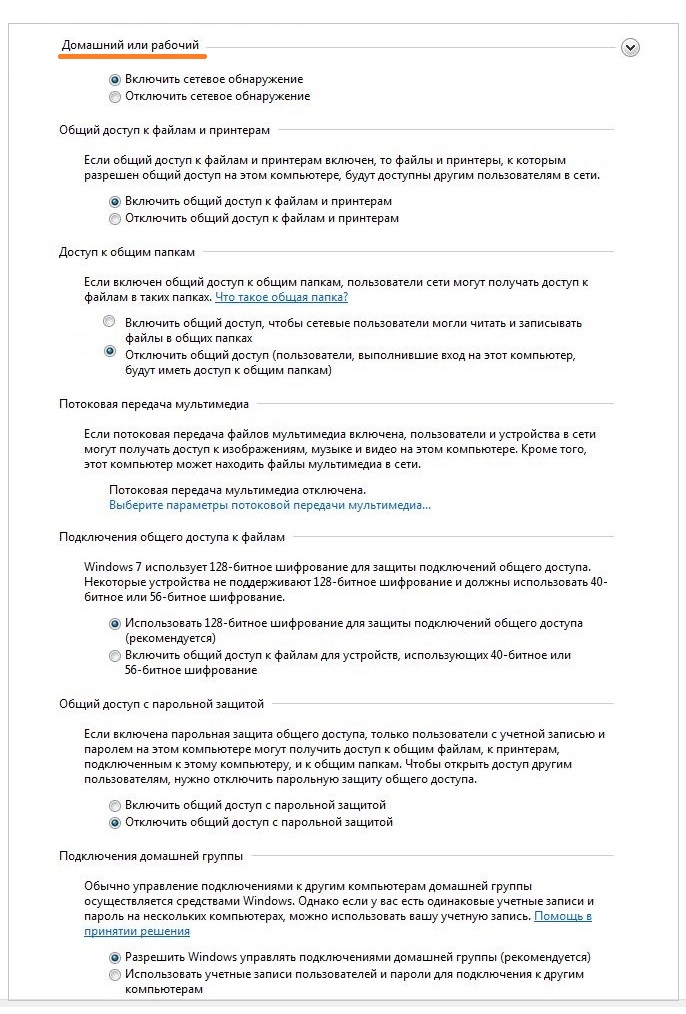
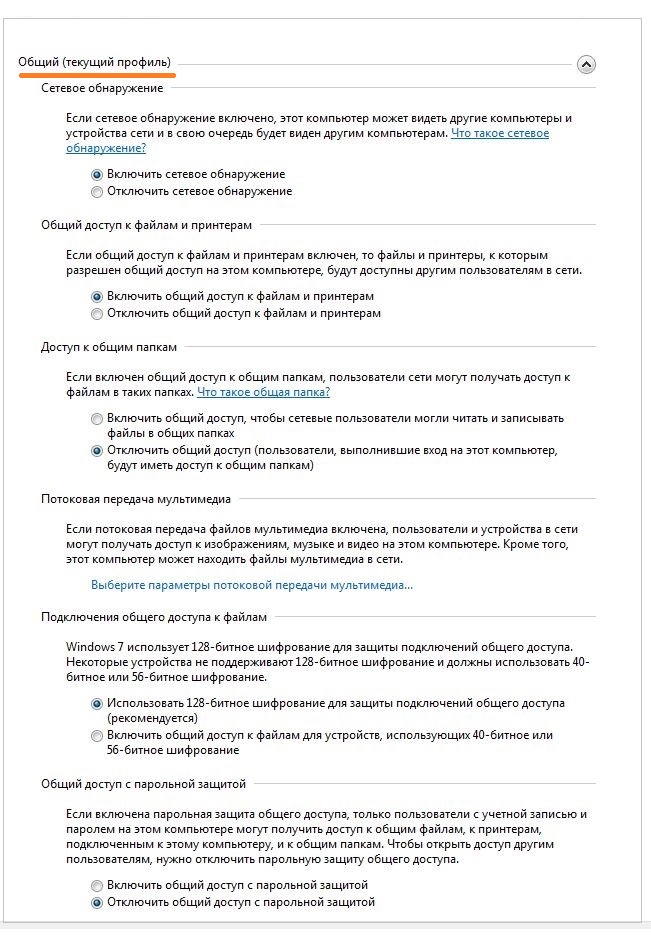
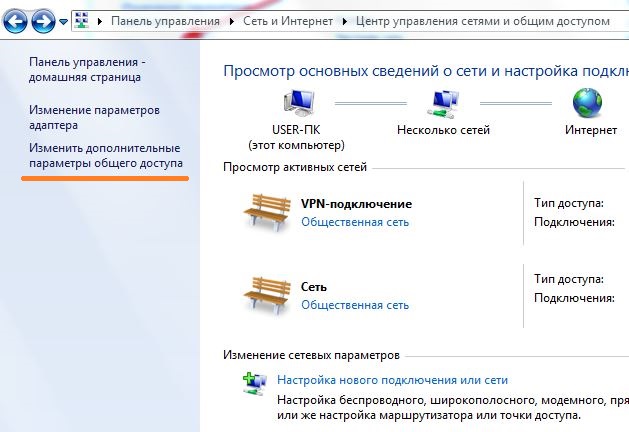 Here we set everything up as in the pictures below.
After all the parameters are set according to the pictures, go to another section. Start \\ Control Panel \\ Hardware and Sound \\ Devices and Printers
Select your printer and select “ Printer properties»
 In the " Access"Put a check mark next to the line " Share this printer»
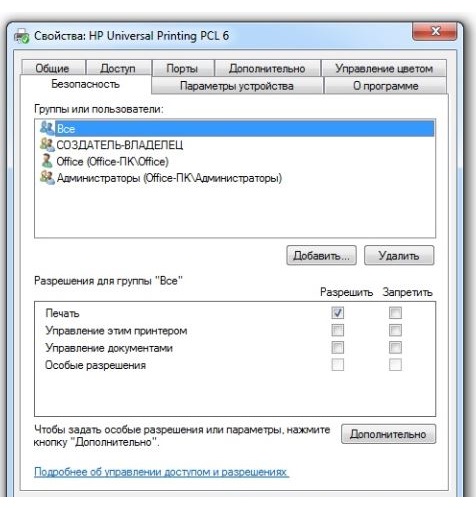
Be sure to go to the “Security” tab, select the “Everyone” user group and allow printing.
 All settings on the computer to which the printer is connected are completed. We recommend that you restart your computer.
We set up the computer from which we will print.
The computer to which the printer is connected is turned on and configured, and the printer is shared over the network. Now we set up another computer from which we will print.
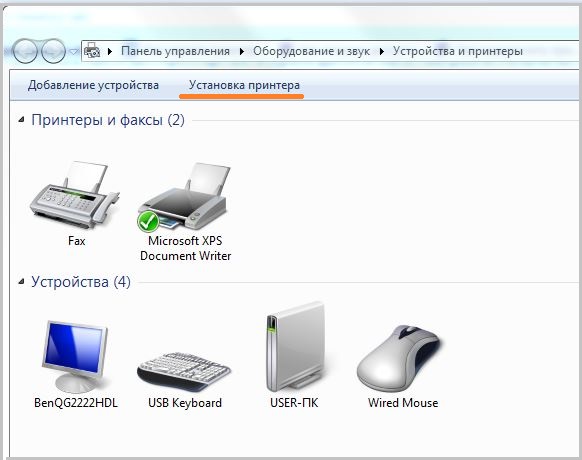
Go to Start\\Control Panel\\Hardware and Sound\\Devices and Printers.
Click on the “Install a printer” button.
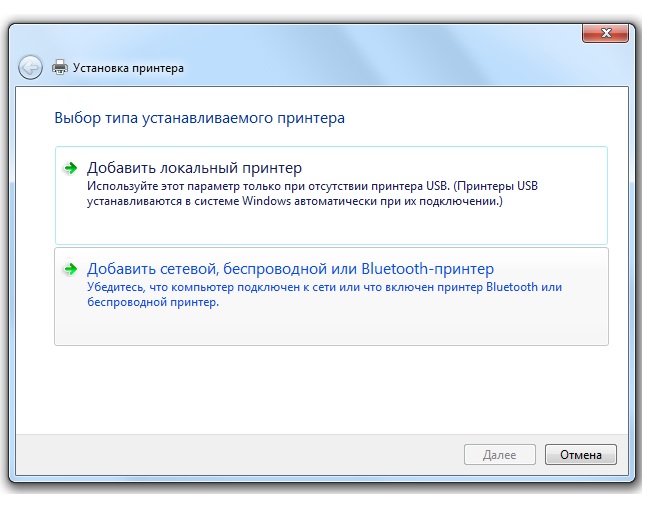
After clicking the “Add a printer” button, a window will appear in which we select “Add a network, wireless or Bluetooth printer.”
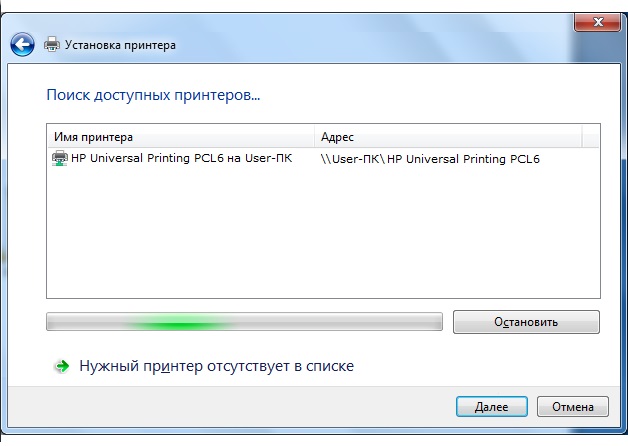
After Windows system will automatically begin searching for all available printers on your local network. If the system finds several devices (printers), select the one to which you need to connect. If the computer does not see the printer, check the local network wires and restart the computer to which the printer is connected.
During connection, the system will ask several times about trust in the device and offer to install drivers for it. We agree with everything suggested and click “Next”.
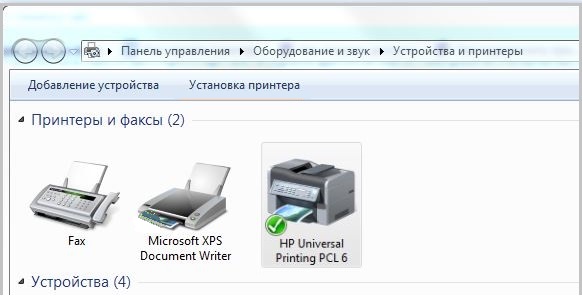
Then the added remote printer will appear in the list from which you can print without any problems.
In this article, we described in detail and step by step how to connect a printer over a network.
There are two main ways to do printer available for computers home network :
- connect it directly to one computer and provide access to it to other computers on the network;
- connect the printer as a stand-alone network device.
This section describes the steps for both cases in Windows. However, you should always first review the model's documentation for specific installation and setup instructions.
Setting up access to a shared printer
Traditionally, the most common way to access a printer on a home network is to connect it to one of the computers and define Windows actions for sharing. This is called a shared printer.
Advantage sharing printer is that it is suitable for any USB printer. What are the disadvantages? Main computer must always be turned on, otherwise other computers on the network will not have access to the shared printer.
In previous versions Windows setup Accessing a shared printer seems a bit complicated. But the new home network feature in Windows 7, called HomeGroup, makes the process much easier.
When the network is configured as home group, printers and certain files access is automatically granted.
If you have already set up a homegroup and want to access the shared printer from another computer in your homegroup, follow these steps:
Manually connecting to a HomeGroup printer
- On the computer to which the printer is connected, click the Start button, select Control Panel, enter home group in the search field and select Home group.
- Make sure the Printers checkbox is checked. (If not, install it and click Save changes)
- Go to the computer from which you want to print.
- Open the HomeGroup folder.
- Click the button Install printer.
- If the printer driver is not yet installed, select Install driver.
Note: After installing the printer, it is accessed through the dialog box Seal in any program, as if the printer was directly connected to the computer. To use the printer, the computer it is connected to must be turned on.
Setting up a network printer
Network printers are devices that connect directly to a network as a standalone device. They were mainly used in large organizations. This is no longer the case.
Printer manufacturers often offer inexpensive inkjet and laser printers that serve as network printers on a home network. Network printers have one big advantage over shared printers: They are always available.
There are two main types network printers: wired And wireless.
- Wired printers have an Ethernet port that connects to your router or hub via an Ethernet cable.
- Wireless printers typically connect to your home network using Wi-Fi or Bluetooth technology.
Some printers offer both features. The instructions included with the model provide information on how to install them.
Installing a network, Wi-Fi or Bluetooth printer
- Open the Devices and Printers window.
- Click the button Installing the Printer.
- In the Add Printer Wizard, select Add a network, wireless or Bluetooth printer.
- From the list of available printers, select the one you need and click Next.
If necessary, install the printer driver on your computer by clicking Install driver. When prompted, enter your administrator password or confirm.
- Execute additional instructions wizard and click Finish.
Adviсe:
- Make sure you have permission to use these printers before connecting them to your computer.
- To make sure the printer is working correctly, print a test page.