Sometimes rundll.exe errors and others system errors EXE could be related to problems in the Windows registry. Several programs can use the rundll.exe file, but when those programs are uninstalled or changed, sometimes "orphaned" (invalid) EXE registry entries are left behind.
Basically, this means that while the actual path to the file may have been changed, its incorrect former location is still recorded in the Windows registry. When Windows tries looking up these incorrect file references (file locations on your PC), rundll.exe errors can occur. In addition, malware infection may have corrupted the registry entries associated with SharePoint Portal Server. Thus, these invalid EXE registry entries need to be repaired in order to fix the root of the problem.
Manually editing the Windows registry to remove invalid rundll.exe keys is not recommended unless you are PC service professional. Mistakes made while editing the registry can render your PC unusable and cause irreparable damage to your operating system. In fact, even a single comma in the wrong place can prevent your computer from booting up!
Because of this risk, we highly recommend using a trusted registry cleaner such as WinThruster (Developed by Microsoft Gold Certified Partner) to scan and repair any rundll.exe-related registry problems. Using a registry cleaner automates the process of finding invalid registry entries, missing file references (like the one causing your rundll.exe error), and broken links within the registry. Before each scan, an automatically created backup copy, which allows you to undo any changes with a single click and protects you from possible damage to your computer. The best part is that fixing registry errors can drastically improve system speed and performance.
A warning: Unless you are an advanced PC user, we do NOT recommend manually editing the Windows Registry. Incorrect use of the Registry Editor can lead to serious problems and require you to reinstall Windows. We do not guarantee that problems resulting from misuse of Registry Editor can be resolved. You use the Registry Editor at your own risk.
To manually repair your Windows registry, first you need to create a backup by exporting a portion of the registry related to rundll.exe (eg. SharePoint Portal Server):
- Click on the button To begin.
- Enter " command" in search bar... DO NOT PRESS YET ENTER!
- Holding keys CTRL-Shift on the keyboard, press ENTER.
- An access dialog will be displayed.
- Click Yes.
- The black box opens with a blinking cursor.
- Enter " regedit" and press ENTER.
- In the Registry Editor, select the rundll.exe-related key (eg. SharePoint Portal Server) you want to back up.
- On the menu File select Export.
- Listed Save to select the folder where you want to save the SharePoint Portal Server key backup.
- In field File name enter a name for the backup file, such as "SharePoint Portal Server Backup".
- Make sure the field Export Range value selected Selected branch.
- Click Save.
- The file will be saved with .reg extension.
- You now have a backup of your rundll.exe-related registry entry.
The next steps for manually editing the registry will not be covered in this article, as they are likely to damage your system. If you would like more information on editing the registry manually, please see the links below.
While loading operating system You may get the error "An error occurred while starting ...dll. The specified module was not found." The error can be found on the operating system Windows 7, Windows 8 and 8.1 (about Windows 10 is still unknown).
Here's what the error might look like:
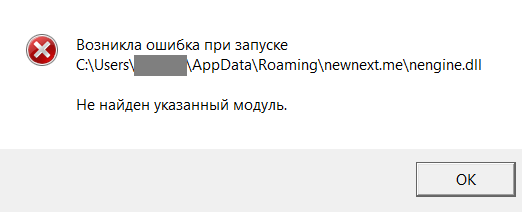
Interestingly, in some cases it does not cause problems for the user, but not in all. So, some users complain that when they try to start any application, the same error appears and the application does not start. Sometimes the problem is further complicated by the fact that the error number is not shown, so the user does not know what to do.
How to fix the error? Decision
There are several types of problem solving.
First is a reinstallation of the operating system. Of course, there is little good in this method, since pen Windows installation takes a lot of time, besides, the programs will have to be re-installed.
Second- system update. Some users claim that the banal helped them windows update. Although how this can help if the updates have nothing to do with the appearance of the error, I honestly do not understand. But you can still try.
Finally, third the kind of solution I recommend using. It was actively discussed by the Russian-speaking community of Windows lovers, but, as far as I know, it came from abroad. Be that as it may, you need to use a utility called Autoruns from Sysinternals (you can even find it on the official Microsoft website). Just before you start using the program - just in case.
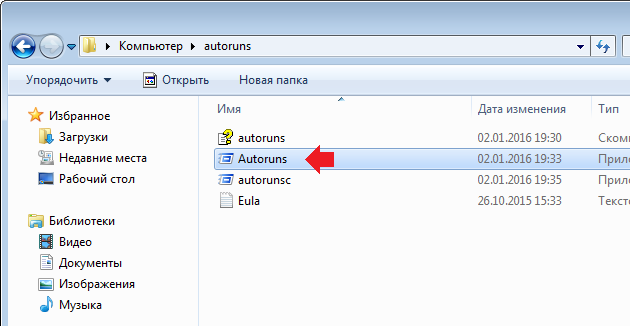
So, download the program to your computer in the form of an archive, unpack it and go to the folder. Here you can see several files. Select the Autoruns file and double-click on it with the left mouse button to run it.

Yes, yes, you need to remove these processes. After removing them, you need to restart your computer and look at the effect - it should help. Most importantly, do not remove other processes that may affect the operation of the operating system.
That's all. If you have a different solution for this error, be sure to share it with the users of the site.
If you receive a "RunDLL - The specified module could not be found" error every time you start the operating system Windows systems 8.1 that was upgraded from Windows 8, here you can find a solution to the problem.
While a clean install of modern Windows versions only takes a few minutes, you will have to spend anyway Extra time for the subsequent installation of all the programs you need.
The main advantage of a clean install is that during this process, unlike an upgrade, no corrupted or incorrect entries are guaranteed to remain inside the system. Thus, it is clear that a clean install of Windows is a better option than an upgrade. old version to a newer one.
It is quite common to see posts on the official Microsoft support forum from users who, after upgrading from Windows 8 to 8.1, receive the following error message after booting their computer:
An error occurred while starting
C:\PROGRA~1\COMMON~1\System\SYSPLA~2.DLL
The specified module was not found.
As you can see in the screenshot above, the message does not contain any error code that could help you understand which way to dig. However, users may see up to three of these dialogs when starting their updated system.
To get started, you can try running the SFC /SCANNOW command in command line running with administrator rights. If that doesn't fix the problem, try the next method, but create a system restore point first, just in case.
Download the Autoruns tool from Sysinternals from the following link. This tool is recommended by IT professionals from Microsoft themselves to analyze the system and various processes. You can read more about him on TechNet. After downloading, unpack the archive using any program for working with compressed files.
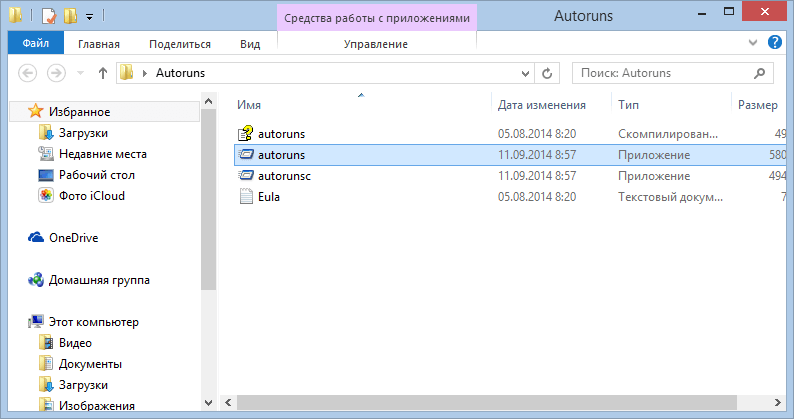
After unpacking the downloaded file, in the "Autoruns" folder you will see two executable files, namely "autoruns" and "autorunsc". Run the first one.
In the program window, on the "Everything" tab, find the entries highlighted in yellow. All you have to do is delete individually. To do this, use the keyboard shortcut Ctrl + D, or just click right click click on the entry, and then select "Delete".
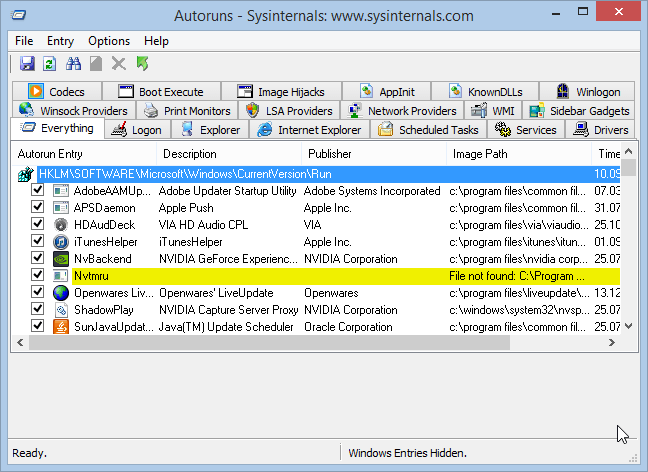
Once all these entries are removed, close Autoruns and restart the machine. The problem should be fixed.
Have a great day!
When you see such a rather unpleasant thing on your screen as the nvspcap64.dll error, you should know that the problem relates directly to your video card, and to be more precise, it lies in faulty drivers for it.
This problem manifests itself in most cases when the Windows operating system is started, i. you turn on your computer calmly, the system boots up, and the first thing that appears on the screen is the nvspcap64.dll error. Although sometimes it can also appear when launching various applications or video games.
The file itself is a component of such a program as GeForce Experience and it is essential for its launch, and, apparently, if there are problems with this file, an error occurs.
The error message might say the following:
C:\Windows\system32\nvspcap64.dll" or not designed to run under Windows control or contains an error. Try reinstalling the program using the original installation media, or contact system administrator or supplier software for support.
or a slightly different option:
An error occurred while starting C:\Windows\system32\nvspcap64.dll. The specified module was not found.
The reasons for the appearance of this problem are exactly the same as for all files of the DLL type - something happened to nvspcap64.dll and, as a result, neither GeForce Experience nor the system can access it. It is because of this that you see this error in front of you.
To resolve this problem, you do not have to do anything super complicated or protracted. Let's look at the methods by which you can save yourself from an error with the file.
- First, try a clean install of your graphics card drivers. Plus, also don't forget to reinstall GeForce Experience along with them, as we have already said that we need the file to refer to it. In most cases, such a simple reinstallation helps.
- You can also try downloading it, which you can do at the very end of this article, and place it inside your system. It is this method that we now consider a little closer.
How to install nvspcap64.dll on a computer?
- As mentioned earlier, download nvspcap64.dll from the link below.
Then put this file in system directories C\Windows\system32 and C\Windows\sysWOW64.
Then press the key combination Win+R and write regsvr32 nvspcap64.dll. - Restart your computer and check for the problem.