Ctrl+Alt+N - create a new project
Ctrl+Alt+Shift+P - open last edited project
Ctrl+/ - put sources into composition
Ctrl+Alt+Shift+K - project properties
Ctrl + W - close the project
Ctrl+Q - exit the program
TAB - hide all palettes
CapsLock - prevent updating the composition window
Ctrl+I - import files
Ctrl+F - interpret source
Ctrl+Alt+C - copy interpretation
Ctrl+Alt+V - paste interpretation
Ctrl+Shift+G - find
Ctrl+Alt+G - find next
Alt+doubleclick on animation file - open animation file in footage window
Drag footage to selected layer while holding Alt - replacing footage for layer
Ctrl+G - open "go to time" dialog
Ctrl+A - select all
Ctrl+Shift+A - deselect all
Ctrl+Y - create new layer
Ctrl+Z - undo
Ctrl+Shift+Z - Redo
Ctrl+E - edit original
Ctrl+R - show/hide rulers
Shift +’, Shift+ click on safe margins - show
Alt+', Alt+click on safe margins - show pro
Ctrl+ ; - show guides
PageDown, Ctrl+→ - one frame forward
PageUp, Ctrl+← - one frame back
Ctrl+D - duplicate
Ctrl+ Shift +D - cut layer
Keys on the numeric keypad - select layer by number
0 - preview(RAM)
. - listen to audio
Alt+. - listen to audio throughout the comp
Ctrl+ - selection one layer up
Ctrl +↓ - selection one layer below
Ctrl+[ - move layer one level down
Ctrl+] - move the layer one level up
Ctrl+ Shift +[ - move layer back
Ctrl+ Shift+] - move layer forward
Alt+[ - move to point
Alt+] - move out point
Shift+F5(F6,F7,F8) - composition snapshot
Shift+Ctrl+F5(F6,F7,F8) - Erase Snapshot
F5(F6,F7,F8) - view snapshot 1(2,3,4)
F4 - switches\modes panel
F3, Ctrl+SHIFT+T - show the layer effects control palette
- - decrease time scale
+ - increase the time scale
Ctrl+- - zoom out the composition
Ctrl++ - zoom in composition
[ - align entry point with current time
] - align the exit point with the current time
Shift+0(1,2,3,4,5,6,7,8,9) - add composition marker
0 (1,2,3,4,5,6,7,8,9) - go to composition marker
* (on the numeric keypad) - put a layer marker
. (on numeric keypad) - Preview audio only
View layer properties
A - anchor point
P - position
S - scale
R - rotation
T - opacity
M - mask shape
F - mask borders
TT - mask opacity
E - effects
L - audio levels
AA - material properties of the 3D layer
EE - view expressions
Shift+ hot key properties - add\remove from structure
U - all animated properties
Properties Dialogs
Ctrl+Alt+Shift+A - anchor point dialog
Ctrl+Shift+O - layer opacity dialog
Ctrl+ Shift+property hotkey - other properties dialog
Drag property values
With SHIFT held down - move through the tens
With Ctrl held down - move through decimal fractions
With Alt pressed - no changes in the composition window
With SHIFT held down - limiting along the axes and snapping at an angle of 90
Changing layer properties
←,→,,↓ - Position change
+ on the numeric keypad - change the angle by + 1 degree
- on the numeric keypad - change the angle by - 1 degree
Alt++ on numeric keypad - Zoom +1%
Alt + - on the numeric keypad - change the scale by - 1%
SHIFT + keyboard shortcut change - change * 10
Scrolling the current time marker with Ctrl held down - scrolling the sound
B - define the start of the workspace
N - define the end of the workspace
Home - to the beginning of the composition
End - to the end of the composition
I - to the beginning of the selected layer
O - to the end of the selected layer
Preview
SHIFT+left click on RAM preview - preview with SHIFT+left settings
Ctrl+left click on RAM preview - save RAM preview to hard drive
Toolbar
V - selection
W - rotation
G-pen
Q-masks
C - orbit camera
Y-pan behind
H - hand
Z-zoom
Ctrl+B - drawing tools (brush, eraser, stamp)
Ctrl+T - text
Ctrl+Shift+C - precompose
Alt+Ctrl+O - auto-orientation of the layer along the path
SHIFT+Ctrl+K - tempo or property speed
Alt+Ctrl+K - change interpolation dialog
Alt+Ctrl+O - switch between hold and linear interpolations
J - to the previous key frame, to the beginning of the working area
K - to the next keyframe, to the end of the working area
Alt+SHIFT+= - add expression
Working with 3D compositions
SHIFT+F10(F11,F12) - assign a hotkey to the view
F10(F11,F12) - display the view assigned to the hotkey
Alt+click on rotation tool - switch between rotation and orientation setting
Ctrl+Alt+Shift+L - create light source
Ctrl+Alt+Shift+C - create camera
rendering
Ctrl+M - make movie
SHIFT+Ctrl+\ - to composition queue
Alt+Ctrl+V - paste layer at current time
List of terms
Adjustment layer (Adjustment layer) - a layer that automatically determines the effects applied to it for all layers located below it.
Anchor control (Management of a binding) - the installation of the composition defining a binding of the image of frames at scaling of layers (to a corner or to the center).
Anchor point - a selected point of the composition frame, rigidly attached to the layer, which does not affect it appearance, but plays a decisive role in some operations with the layer (during rotation and reflection, it is its center, etc.).
Alpha Channel (Alpha channel) - additional information about the transparency of each pixel of the image, stored in files of appropriate formats, along with information about the color of each pixel.
Alpha Mask (Alpha mask) - an additional mask image put on the layer image and showing how transparent each pixel is.
Animation (Animation) - a technique that consists in moving within the frame of the film some layers against the background of others.
Aspect Ratio - The ratio of the frame size horizontally and vertically.
Audio (Audio) - a sound clip or layer.
Brush (Brush) - a tool for drawing graphic primitives on layers.
Brush Tips (Brush tips) - an option tool Brush (Brush), which sets the shape and size of the drawn lines.
Camera (Camera) - a tool to control the special effect of the camera.
Camera (Camera) - a three-dimensional special effect that simulates viewing a 3D layer from a certain point in space through the camera.
Capture is the process of converting a video signal from external device connected to a computer (such as a camera or VCR) to a media file.
Clone Stamp (Cloning) - a tool for creating masks of a special kind.
Codec (Codec) - a program for compressing video or audio.
Color - dialog boxes with a color picker to determine the current color in various tools.
Composition (Composition) - a window that serves to (static or dynamic) display a specific frame of the movie;
Compressor (Compressor) - codec (codec, abbreviated as compressor / decompressor), a program for compressing video or audio;
context, pop-up menu (Context or pop-up menus) - menus that appear when clicked right button mice;
Current-time indicator (Indicator of the current frame) - a slider on the timeline, marking the current frame on it;
Data Rate - The number of kilobytes of information per second that encodes a video.
Depth (Depth of a pixel) - the number of colors that characterize each pixel of the video image.
Digital Video - A video signal encoded using digital technology (as opposed to traditional analog media). In particular, you can easily organize the transmission of such a signal from a computer to an external digital device (camera or tape recorder).
Duration - The total duration of the composition.
Effect Controls (Effect Management) - a palette to control all the special effects assigned to the selected layer.
Elliptical Mask (Elliptical mask) - a tool for creating masks of a round and elliptical shape.
Eraser (Eraser) - a tool for erasing fragments on masks.
Extract (Compress) - removes from the movie a fragment of the selected layer (corresponding to the working area of the composition), shifting the rest of the layer to the right by the time interval of the duration of the deleted fragment.
Flow (Fill) - the parameter of the drawn lines that sets the intensity of the color of its fill;
Footage (Source or material) - the original clip, which is actually a link to animation, sound or graphic files.
Footage Window - A window for viewing individual source clips.
Frame Back (Frame back) - the button in the palette Time Controls (Playback control), moves the current frame one frame back.
Frame Blending is an algorithm that improves the quality of animation by smoothing the dynamics of changes from frame to frame.
Frame Forward (Frame forward) - a button in the palette Time Controls (Playback control), moves the current frame one frame forward.
Frame Jog (Stripe broach) - a means of frame-by-frame viewing of the movie in the palette Time Controls (Playback control).
Frame Rate - The number of frames of video shown in one second.
Hand (Hand) - a tool for visually moving the visible area around the frame.
Help - help system Adobe After effects;
History (Journal) - a palette for viewing and possible cancellation recent actions for editing.
Image (Static image) - a graphic clip with a static image.
Import (Import) - the procedure for placing media files in the project in the form of clips.
In Point (Input marker) - the beginning of the layer.
Index (Index) - a system for selecting an article in the After Effects help from an alphabetical index;
Info (Information) - information palette, which displays some information about the selected object.
Key (Transparent overlay or Key transparency) - a kind of assigning a transparency special effect to the layer. Full transparency of any section of the clip, a range of transparent colors, etc. can be assigned. Transparent overlays are implemented as effects.
Keyframe (Key frame) - a frame that defines a certain position in the film in which qualitative changes occur (a special effect is added, etc.).
Lift (Raise) - removes from the movie a fragment (corresponding to the work area) of the selected layer, without changing the total duration of the movie.
Loop - Plays the clip or movie in a loop from the input marker to the output marker, without stopping.
Marker - A user mark that highlights a frame of a movie (movie marker) and is used to make it easier to find individual frames.
Marker Menu - Used to set, navigate, and remove clip markers.
Mask (Mask, or Alpha mask) - an auxiliary image that marks those parts of the clip frame that should be made solid, transparent or partially transparent. Used in transparency special effects.
Matte (Layer mask) - a layer whose image is used to mark the transparency of another layer (located directly below it).
Menu bar (Top menu) - the menu located under the title of the After Effects window;
Mode (Transparency mode) - a column of the Timeline window (Mounting), which allows, depending on certain properties of the layer image, to assign a certain percentage of transparency to pixels.
Motion Blur is a special effect that blurs the outlines of the objects to which the animation is assigned, making it more realistic and similar to watching a standard movie (shot with a shutter-curtain lens).
Multimedia (Multimedia) - a technology for viewing multimedia (ie, video and sound files) on a computer.
Navigator (Navigator) - a control that makes it easier to move through the animation keyframes.
NTSC is the North American broadcast standard.
Offline file (Disabled file) - a clip that replaces a file that is missing for some reason in its original place;
Opacity (Opacity) - a parameter that sets (in percent,%) the degree of opacity of the layer.
Out Marker - A marker that highlights the last frame of the movie.
PAL is the European broadcasting standard.
Palette (Palette) - a set of colors used to encode video.
Palette (Palette) - an element of the After Effects interface, which is a small window and serves for various auxiliary purposes.
Pan Behind (Panorama) - a tool for controlling the location of the anchor point relative to the layer.
Parent (Parent, or Leading layer) - a layer, all settings of which (except for transparency) will automatically be applied to the child layer.
Pen (Pen) - a tool for drawing masks of complex shape.
Pixel Aspect Ratio - The ratio of the pixel dimensions of the image horizontally and vertically.
Play (Play) - evenly plays the movie from the current frame, when pressed again, stops the movie.
Presets - combinations of composition settings available in After Effects, i.e. predefined for creating different types of movies (for TV, multimedia, etc.).
Project (Project window) - the window that manages the source clips.
Project (Project) - a list of clips used for editing a single movie, along with a record of the actions for editing it.
Properties (Properties) - the parameters of the clip or movie.
QuickTime is an Apple software product with a number of multimedia features available for use in After Effects;
RAM Preview (Preview) - the mode of viewing the composition, in which it is first rendered, and then the composition is played in the Composition window (Composition).
Rectangular Mask (Rectangular mask) - a tool for creating masks of a rectangular shape.
Rendering (Rendering) - the process of building an image of each frame according to its description in the program. Rendering is done to preview or export the movie.
Resolution (Resolution) - parameter settings compositions, which allows you to select the resolution of the frame shown in the window Composition (Composition) when editing and rendering a movie.
Rotation (Rotation) - a tool that serves to rotate layers.
Safe Margins - Zones in the composition frame beyond which some television systems may distort or not show the frame field.
Search (Search) - a system for searching articles in the help of Adobe After Effects no keyword.
SECAM is a broadcasting standard in a number of countries (including Russia).
Selection (Selection) - a tool used to select and scale layers and their attributes.
Settings - A combination of movie properties, including frame size, frame rate, sound quality, etc. There are two types of settings: some affect the movie that is edited within the project and viewed in the Composition window (composition settings), and others define the parameters of the final movie (export settings).
Shortcuts (Hot keys) - an effective way for advanced users. If you frequently use certain commands, it is much faster to execute them by pressing keyboard shortcuts than by calling menus or tools.
SMPTE is a timecode (frame counter) format.
Source Name (Source name) - a column with the names of the source clips placed in layers in the Timeline window (Editing).
Stop - Stops playing the clip.
Text (Text) - a tool for creating text titles.
Thumbnail (Miniature) - a small image of a clip or movie frame, available in a number of windows.
Timecode (Timecode) - the frame number in the movie or layer. The numbering format depends on the settings;
Time Controls (Playback control) - a palette designed for dynamic viewing of compositions.
Timeline (Mounting) - a window in which the layers are mounted relative to the timeline of the film.
Time ruler (Time scale) - the scale in the upper right part of the Timeline window (Editing), which determines the place of each frame for each layer of the composition.
Title (Titles) - text titles.
Toolbar (Toolbar) - numerous panels placed on windows and combining various controls.
Transition (Transition) - type of effects for creating transitions between composition plans.
Video (Video) - clip with animation.
Volume (Volume) - the volume of the sound.
Window menu (Menu of windows and palettes) - menus specific to After Effects, which are called up by pressing the button with a triangular arrow in the upper right part of the window or palette.
Work area (Work area) - a fragment of the composition, selected on the timeline of the Timeline window (Mounting), which is processed during rendering and exporting the composition.
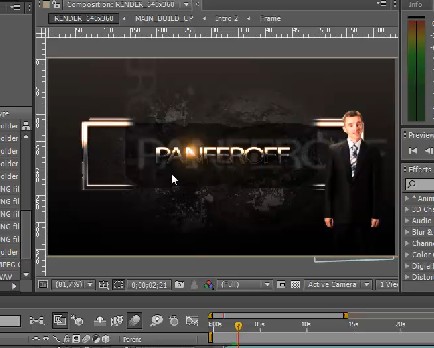
In this lesson, we will analyze the common hot keys of the Adobe After Effects program.
If you have already printed a text document (), which consists of 5 pages, with hot keys and their names, open it.
1. Ctrl + Alt + N - Create a new project
A new project has been created.
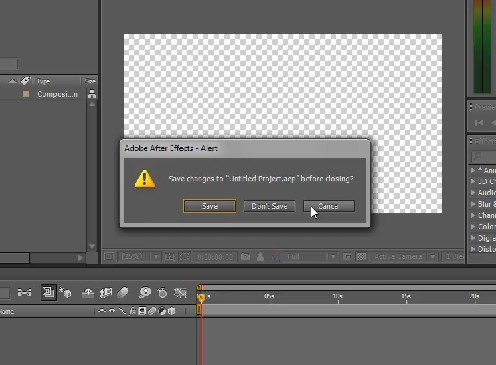
If you made any changes in one of the past projects and pressed Ctrl+Alt+N, a window titled Adobe After Effects - Alert appears, prompting you to either save, cancel the creation of the project, or do not save.
2. Ctrl + N - Create a new composition
In the Composition Settings window that appears, enter necessary settings and click OK.
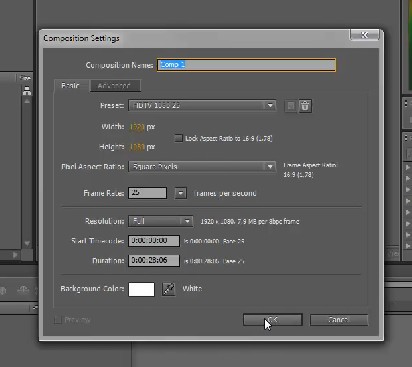
After that, the new composition will appear in the Project window and in the Timeline.

3. Ctrl+Alt+Shift+P
The previous track will open.
4. Ctrl + / - Place sources in composition
To do this, you will need to select the sources in the Project window. You can do this with the Ctrl or Shift key so you don't have to drag and drop files one at a time.

Click Ctrl + /. Sources placed in the Timeline window .

5. Delete - Delete
What you highlight in the Timeline window can be deleted using the Delete key. Make sure that the selection does not remain in the Project window.
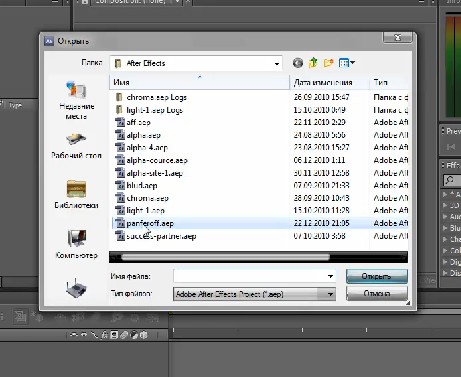
6. Ctrl + O - Open project
You can open any project you see fit.
If you have made any changes to the composition, you will see an asterisk in the title of the program window. This means that the project has not been saved.

Save it by clicking ctrl+s- and the star will disappear.

8. Ctrl + K - Composition Properties
If you have a composition selected and it is active in the Timeline window, press Ctrl + K.
The Composition Settings window opens, where you can view or change something and click OK.

9. Ctrl + Alt + Shift + K - Project Settings
You will see the Project Settings window - the settings of the project itself.

10. Ctrl + W - Close active composition / project
After pressing this combination, the active composition will be closed in the Timeline window.
11. Ctrl + Q - Exit the program
The program will close after you have saved your changes. If you are not going to close the program, click Cancel.
12. Tab - Hide all palettes
There are no noticeable changes in the CS5 version, in earlier versions it is a hotkey for hiding all palettes.
13. Caps Lock - Prevent composition window from updating
As you move the Timeline slider, the images in the composition window change.

When you press Caps Lock, there is no change (pre-calculation) and you can move quickly in the Timeline window. Press Caps Lock again to return to the previous mode.
14. Ctrl + I - Import files
Pressing this combination opens the file import window. Select the desired file and open it.
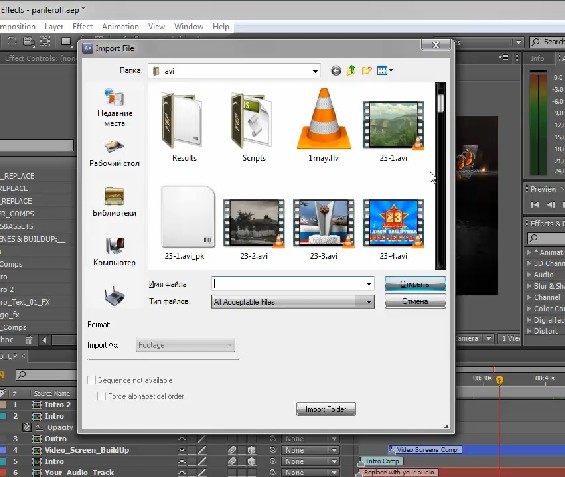
The new file will appear in the Project window.
15. Alt + double click on animation file
You will see a modified layer (Layer).
If you want to view the source (Footage), you need to double-click the left key while holding Alt.
There will no longer be a layer, but the source (Footage). These are useful keys for not looking for sources to view in the Project window.

16. Alt + drag source to layer
![]()
Select the source in the Project window, press Alt and drag it to another layer. The layer will remain the same and will be present in the composition window. When you double-click on this layer, you can see that its properties have not changed, but the source has changed inside the layer. Sometimes this is very helpful.
17. Ctrl + G - Open the Go To Time dialog
18. Ctrl + A - Select all
If you clicked a file in the Project window and then Ctrl + A, all sources are selected.
If you click on any one layer, then Ctrl + A - all layers will be selected.
In the Effect Controls window, you will find overlay effects for a particular layer.
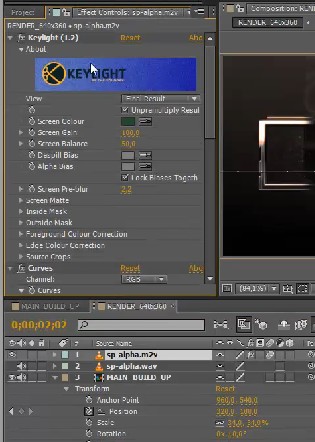
pressing Ctrl+A highlights all effects.
19. Ctrl + Shift + A - Deselect
After using the combination Ctrl+A, Ctrl+Shift+A allows you to deselect.
20. Ctrl + Y - Create a new layer
Pressing this combination creates a new layer - a solid Solid Settings layer. After entering the required parameters, click OK.
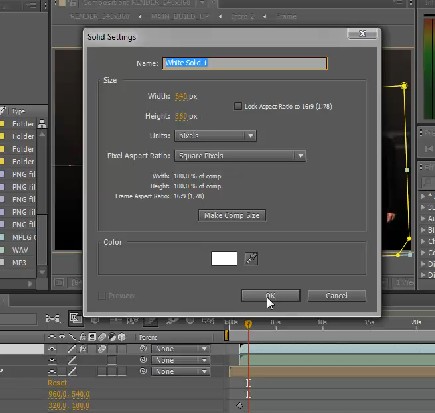
The layer appears in the Timeline and in the composition window.

If necessary, it can be deleted using the Delete key.
30. Ctrl + Z - Return to the previous step, undo the last step
If you did something wrong or deleted the desired file, you can always press this combination.
31. Ctrl + Shift + Z - Redo undone
32. Ctrl + E - View original
You can select, for example, a layer or sound file, press this combination and view this file.
33. Space (space) - Play or stop
You will see playback in the composition window. Use the same key to stop playback.
34. Ctrl + R - Rulers
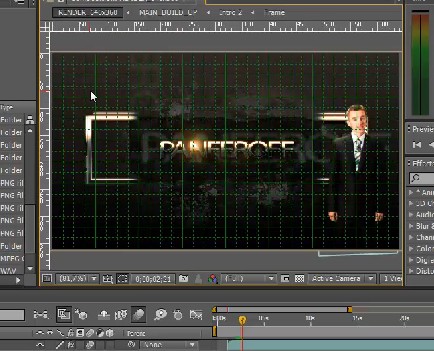
It is used in cases when it is necessary to align objects or inscriptions. You will see rulers around the composition window. Pressing the hotkeys again hides the rulers.
36. Shift + "single quote" (apostrophe) - Adding a fine grid
Tip: keep the English keyboard layout.
You will see a fine grid, which is good for aligning objects by eye. Pressing the hotkeys again hides the grid.
37. Alt + "single quote" (apostrophe) - Add a large grid
The same grid as in the previous case, but larger, is used to align the objects. Pressing the hotkeys again hides the grid.

38. Ctrl + ; - Remove guides
Guides (they can be drawn anywhere in the composition window, starting with the rulers) are a handy tool for alignment. If the guides get in your way, use this keyboard shortcut.

Pressing Ctrl + ; causes the guides to reappear. Remove the guides by dragging them towards the rulers.
We will continue to study hot keys and make work in Adobe After Effects more convenient and comfortable for ourselves.
In this tutorial on Adobe After Effects, we will analyze the keyboard shortcuts for working with layers and compositions.
Activate the composition by selecting it.
Page Down - One frame forward. Or Ctrl + right arrow
The cursor will move one frame forward and will advance as the keys are pressed.
Page Up - One frame back. Or Ctrl + left arrow
The cursor will move back one frame and advance as the keys are pressed.
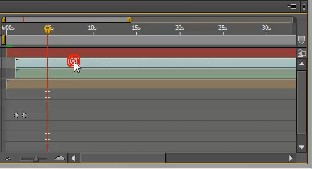
Ctrl + D - Duplicate layer
Select any layer, press keyboard shortcut. The layer will be duplicated, and you can work with it in the same way as with the main one.
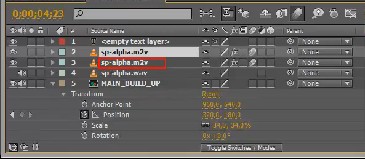
The same can be done in the Project window by duplicating any file. The number 2 is added to the file name.

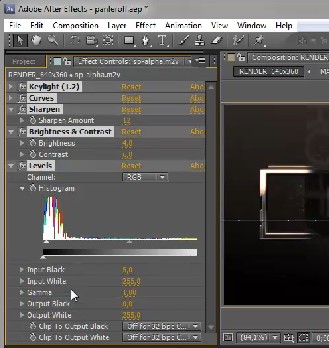
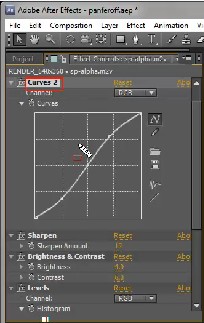
The same in the Effect Controls window. Suppose we need to duplicate the effect Curves (Curves). Click on it, use the combination Ctrl + D, and Curves 2 opens. You can remove it using the Delete key.
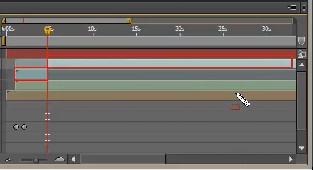
Ctrl + Shift + D - Cut Layer
Select any layer, put the cursor in the right place. Apply a keyboard shortcut - the layer will be cut at the cursor location. This will bring up two layers in the composition window. The first layer is before the cursor, the second one is after the cursor.
The keys on the numeric keypad select the layer number.
For example, if you need to move to the third layer, press the 3 key.
Number 0 - preview. A green bar in the Timeline means a preliminary calculation. As soon as a part of the composition is calculated, we can view the calculated part of the composition. Pressing the 0 key a third time returns the song to its original state.

The "dot" key on the numeric keypad - listen to the audio from the place where the cursor is. Pressing again returns to the original position.
Alt + period - Listen to the audio throughout the song. Pressing again returns to the original position.
Ctrl + Up Arrow - Select a layer above
If you have layer 2 selected, press this combination and go up to the first layer.
Ctrl + Down Arrow - Select one layer below
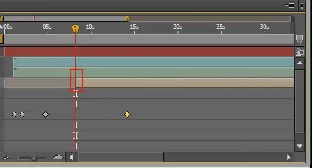
Ctrl + [ (left square bracket) - Shift the selected layer down by 1 position
Ctrl + ] (right square bracket) - Shift the selected layer up 1 position
Ctrl + Shift + [- Move selected layer back

Open page 3.
Ctrl + Shift + ] - Move the selected layer forward
Remember that layers can be moved by holding them with the mouse.
Alt + [ - The layer will automatically start at the cursor (thus clipped).
Alt + ] - The layer is cut off at the end (moving Outpoint)
Shift + F5 (F6, F7, F8) - Composition Snapshot
To view snapshots, press F5 (F6, F7, F8). The pictures will be displayed in the composition window. Thus, you can call up the necessary fragments from the computer's memory, which were removed by pressing a particular key.
Shift + Ctrl + F5 (F6, F7, F8) - Erase Snapshots
F4 - Change Panels Toggle Switches / Modes

F3 or Ctrl + Shift + T - Selected layer effects control palette
Select the layer, press F3 or keyboard shortcut. Pressing again opens the window to the working state.

Minus key on the main keyboard (not on the numeric keypad)
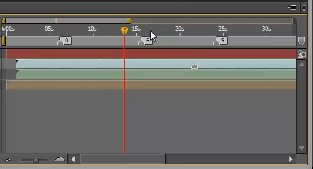
Select the Timeline on the composition and after pressing the key you will see a decrease in the time scale. The minus key duplicates the button and slider at the bottom of the Timeline.
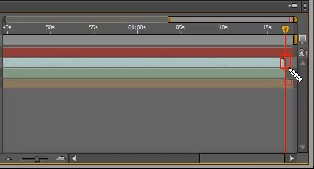
The opposite effect - increasing the time scale - occurs when you press the "plus" key.

Ctrl + "minus" - Decreasing the scale of the composition
Ctrl + "plus" - Zoom in

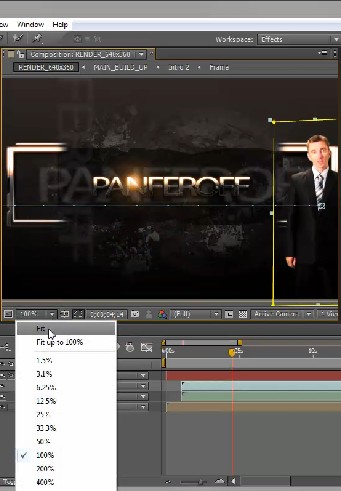
You can return to a comfortable scale by selecting Fit from the drop-down list at the bottom of the composition window.
Let's work with layers. Select any layer.
Left square bracket [- Move the beginning of the layer to the cursor.

Right square bracket ] - Align the out point to the end of the layer.

Shift + number - Add composition markers
When going to layers, press the numbers to put a marker with a specific number: 0, 6, etc.

To get to these markers, press the numbers from 0 to 9 on the main keyboard. This makes it convenient to work with markers.
Asterisk on the numeric keypad
If a layer is selected and the cursor is placed, the asterisk gives a marker on the layer itself at the cursor location. You can align layers by markers and work comfortably with layers.

"Point" on the numeric keypad
Lets you preview the audio from the cursor location.
Ctrl + mouse dragging - scroll through the sound of this song. However, sharp scrolling can significantly overload the program, up to its closing. Don't forget to save the project and don't make sudden movements.
Key B - the beginning of the working area of the composition from the moment where the cursor is. You need to press a key, highlighting the composition in the Timeline window.

If you want to define the end of the work area, press the N key.
Home key - go to the beginning of the song.
End key - to get to the end of the composition.
Key I - move the cursor to the beginning of the selected layer.
The O key moves the cursor to the end of the selected layer.
Key J - move to the previous keyframe, to the beginning of the working area. This will move to the marker of the selected layer.

Pressing J again moves to the beginning of the working song.
K key - move to the next key frame, to the end of the working area.
The lesson on hotkeys for layers and compositions is over. In the next lesson.