One author suggested the simplest way to do this. A satellite dish is used as a basis, because its shape is ideal for focusing solar rays, formally it is intended for focusing waves. In addition, this antenna has an adjustable unit that allows you to change its angle if necessary and conveniently follow the sun.
This solar oven works very simply. When the sun's rays hit the plate, they are reflected from it and then focused at one point. As a result, the temperature increases sharply at this point, the principle is very similar to the operation of a lens.
Materials and tools for manufacturing:
- parabolic satellite antenna;
- board or timber to create a reliable foundation;
- saw for metal;
- wooden plank;
- mirror film;
- glue;
- scissors and other tools.

Solar oven manufacturing process:
Step one. Making a platform for the oven
In order for the stove to stand securely on the ground and still hold the pot, it needs to be well supported. A board is suitable for these purposes, but it is better to use timber, as it is heavier. The platform needs to be made as wide as possible, then the stove will be more stable and will not tip over even with a strong gust of wind. You need to cut two pieces of board and then screw the antenna to it with self-tapping screws as shown in the photo.

Step two. Extending the gander
The thing is that the dish is designed to focus waves in the area of the LNB heads, that is, this is too small a distance for focusing the rays on the bowler. In this regard, the gander needs to be lengthened a little. A wooden block is used for these purposes. It needs to be sharpened at one end and then driven into the antenna pipe. At the end of the gander you need to hammer a hook, the bowler will be hung on it. Instead of a hook on the gander, you can make cuts into which the handle of the pot will simply be inserted. Thus, the distance to the pot from the antenna sheet can be adjusted if necessary.

Step three. Create a reflective surface
In order for the sun's rays to reflect off the antenna, its surface must be made mirror-like. For these purposes, you can use foil, mirror film or small pieces of mirror. It is important to understand here that the efficiency of the furnace will directly depend on the quality of the materials used. The better the material reflects the sun's rays, the higher the temperature at the focused point.

Step four. Final assembly and inspection of the furnace
Now the oven can be assembled and tested in practice. It needs to be turned towards the sun so that the focused rays fall directly on the pot. You may have to experiment with the distance from the antenna to the pot. The better the beam is focused, the higher the temperature will be.
There are several tricks to improve the efficiency of such a furnace. Firstly, the pot must be black, since if it reflects the color of the sun, the efficiency of such a device will be low. Secondly, the pot can be placed in a heat-resistant bag; as a result, a greenhouse effect will be formed in the bag and the efficiency of the stove will increase significantly.


The disadvantage of such a stove is that it needs to be turned towards the sun every half hour. In addition, there is a risk of getting burned if you accidentally get exposed to focused sunlight. Getting such an energy source into your eyes is very dangerous.
According to the author, at the focusing point the temperature reaches several hundred degrees. For example, a stove easily ignites a wooden block, and this requires about 300 degrees. In the photo you can see how a newspaper caught fire from a beam of light, and all this after 15 seconds, although the temperature outside was only +18 degrees.
You need to wear sunglasses when working with such stoves, as there is a risk of burning the cornea of the eye due to glare.
A satellite dish is a common but expensive pleasure. Many of us have often thought about the question: is it possible to make such a multifunctional antenna on our own? Of course, this is entirely possible! Most often, the question of making a satellite dish with your own hands is asked by people in order to save money or by those who like to conduct experiments. Building a homemade TV dish is not as easy as it seems. When installing it, you need to take into account not only the features specific model, but also even the smallest nuances: setting up available satellites, reflection angle and others. Today we will tell you how to make a satellite dish with your own hands from readily available means. Let's look at the most common ways to make such a device.
Method of gluing with a concrete base
When making a homemade satellite dish, do not forget to draw a detailed drawing of the device, taking into account all measurements and calculations of consumables, in order to get the desired result. It is thanks to your accurate calculations and values that you will save yourself from the risk of getting the wrong shape and similar unforeseen troubles.
The entire manufacturing process of such equipment is as follows:
- We draw a parabola in the drawing, which a little later will be transferred to a steel sheet 0.05 cm thick.
- Using a welding machine, we make a frame from metal rods with a diameter of 10 mm. We bend the steel ribs along the knife, and then weld the bearing onto the top of the structure.
- We install the frame on a flat surface. We mount the pipe vertically in the center under the mounted bearing. After securing the part, install the knife on the bearing of the large washer.
- Fill the plate with thick concrete mortar.
- Dry the resulting matrix for 4-5 days (preferably in the open air).
- Now let's glue the antenna. We divide the finished structure into several parts. We got 8 sectors.
Important! This is necessary in order to make the further work process a little easier. Don't forget to ensure equal spacing between matrix elements.
- For the pattern we use special fiberglass fabric, cut into identical strips, and epoxy primer. Apply regular machine oil to the surface of the now dry matrix, and then place the washer in the installed pipe. We lubricate the matrix with resin, onto which we apply a strip of fiberglass. Smooth the applied component with your hands so that bubbles do not appear on the surface of the glued matrix.
- Cover the reflector with aluminum foil.
That's all the work. This satellite dish can be used for its intended purpose.
Do-it-yourself satellite dish at home from foil
It happens that the location of the house does not allow the use of a parabolic dish, so you can build such an antenna with your own hands. It is extremely important to take into account the following basic requirements for this homemade device:
- The need for a TV tower to be 30-50 km away from your home.
- The signal must have sufficient reception from at least several satellites.
- It is advisable that there is a tall structure next to your home - this will make it easier to cope with the task.
Materials and tools:
- Old umbrella.
- A roll of regular foil.
- Antenna cable (preferably copper).
- Can.
- Amplifier with built-in power supply.
Manufacturing:
- We manufacture a satellite array. We measure the interval between all the spokes of the umbrella, the central angle of their attachment and the height of the segment we need.
- We cut out all the parts from the foil, apply them to the triangular parts of the umbrella and sew them with nylon threads to the existing fabric. Using similar manipulations, we cover the entire inside of the umbrella with foil.
- Let's start assembling the signal receiver. We install it at the focus of the satellite array. To do this, you can use a purchased amplifier, or you can make it yourself. To do this, remove 4 cm of braid from the cable, trim the noise-protective layer and leave one central copper core, which will transmit the television signal.
- We cut out an oval part from a beer can, in the center of which we make a small hole. We insert a ready-made cable core into it and solder this contact. We cover the connections with ordinary plasticine to avoid oxidation and corrosion during the operation of the device.
- We attach the resulting receiving apparatus to the handle of the umbrella with ordinary tape, and wind a 10-15 cm cable so that in the future you can adjust the focus of the mirror.
Important! Be careful not to let the receiver come into contact with the metal handle of the umbrella, as this may cause a lot of noise interference. To protect the device from such troubles, we placed plasticine in the area of possible contact, which will serve as a kind of insulator.
- We place a homemade power supply close to the TV, since our amplification device will be powered through an antenna cable.
- We secure the plate with a nylon thread or the upper central tip of the umbrella. We direct it to a nearby source (tower), and then select the focus with the receiver, which was received as a signal on our TV.
Do-it-yourself satellite dish at home from a thin metal sheet
It’s not difficult to make such a satellite dish with your own hands; it’s only important to follow the instructions and purchase one sheet of thin galvanized metal, the thickness of which should be a maximum of 1.5 mm, and the dimensions should be 100x100 mm. From such a sheet you can make a homemade plate with a diameter of 80 mm.
Step-by-step algorithm of actions:
- We take the cardboard of the size we need in our hands, and then divide it into 16 identical round parts.
Important! Please note that each sector must be offset from the previous one by approximately 22 mm.
- We draw 4 circles with the following radii: 75, 254, 400, 538 mm. Due to the fact that the last circle extends beyond the cardboard blank, we simply cut off all the excess parts. We will further bend our template using the resulting circles.
- We make cuts along 16 rays, keeping the same distance - C1, C2, C3 and C4. Size C1 - 0 mm, C 2 - 11 mm, C 3 - 29 mm, C4 - 50 mm.
- We transfer the made cuts to a metal sheet using a metal ruler and a sharp scriber.
- Next, use metal scissors to cut out the previously made blank for the future plate.
- We connect all the metal petals together. This is how we got a ready-made mirror for our satellite dish.
How to make a satellite dish at home from wire?
To make such homemade equipment, you will need a large inflatable ball, which will serve as a model for the frame of our future wire antenna.
The manufacturing technique is as follows:
- We mark on the ball with a pencil the largest radius of our satellite dish. The curved surface will be represented by that part of the ball that is separated by a circle.
- We take in our hands a coil of copper (preferably) wire with a diameter of 3 mm (you can take it from an old transformer), and then make circle No. 1 from it, which we place on our ball.
- Now we make wire circle No. 2 a little larger in size so that the interval between it and the previous one is about 20 mm. So we will gradually reach the required maximum diameter.
- We connect the finished circles with rays so that the places where they intersect are twisted with thick wire and soldered using the tin method.
- Leave empty space inside the smallest circle. This is where the antenna stand will be mounted.
- We cover the finished frame with aluminum mesh (possibly foil), observing the rear curvilinearity of the reflective structure.
DIY satellite dish made of plexiglass
Plexiglas is excellent for making a homemade satellite dish, since with moderate heating this material has excellent ductility, thanks to which it can take absolutely any shape. For work, we took one sheet of plexiglass 3 mm thick and with a larger diameter than the diameter of the factory satellite device.
Step-by-step master class on making a satellite dish with your own hands from plexiglass:
- After softening the material under the influence of heat, we level it on the blank, giving the plexiglass a round shape. Now we wait for the material to cool.
- Cover the concave surface of the material used evenly with thin foil. In our case, the foil will be a reflective element.
Your DIY satellite dish is ready! Now you can tune in channels!
In a modern home, you want to be able to watch TV, preferably without interference, and even better in HD quality. And use the Internet too.
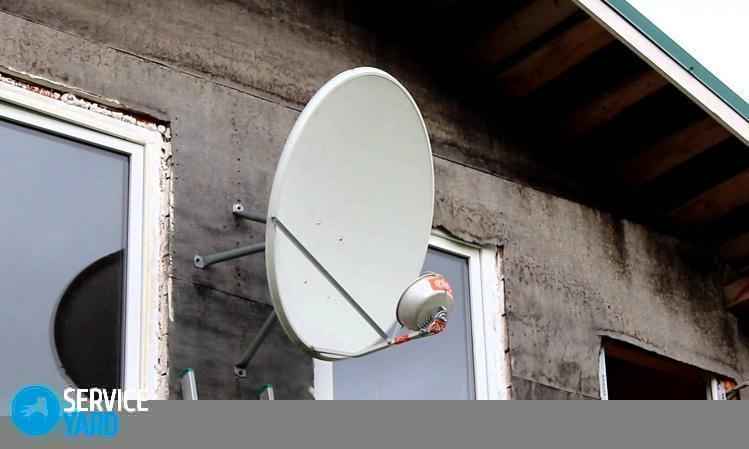
In this photo you see 2 antennas: a satellite dish for the TV and a 4G antenna for the Internet. Let's talk a little more about this.
TV antennas - satellite and terrestrial
Surely many have long known how satellite TV works and what is needed to start watching news in high quality. But there are probably those who have not thought about this before, and this part of the article will be useful for them, where everything will be sorted out in simple and understandable language. In addition, let's talk about digital DVB-T2 television, which can be watched using a regular antenna.
So, if you want to watch hundreds of channels with news, movies and other programs, you will need a satellite dish.

In this photo there is a Lans plate, apparently 80 centimeters in diameter. The range of antennas starts from a diameter of 55cm, if I’m not confused, and the larger the dish, the more reliable the reception of the satellite signal. It is advisable to use 80-90 cm dishes, then even in bad weather (snowfall or heavy rain) the picture on the TV will not “scatter”, that is, there will be no interference.
“Hole” antenna - there are small holes throughout the entire area of the dish. This is necessary in order to reduce wind load. Such an antenna with perforation will not be swayed by the wind and certainly will not be torn off during a squall. It's a little more expensive, but it's justified.

The antenna must be installed so that it is aimed at the satellite. Literally every millimeter is important. For example, the NTV+ satellite is located in the south, so the antenna is hung on the facade that faces that direction. It is not necessary to hang the antenna on the house; it can hang on a fence or on a tree; in some cases, this is generally the only opportunity to “catch” the signal - visibility must be direct, tall trees often interfere. When we install an antenna, we make sure to tune it and check the signal with a special device!
The so-called converter is mounted on a metal stand. It is needed to convert the satellite signal; it is to this little thing with an orange cap that the antenna cable is connected, which will go to the TV. Converters are different, some can connect only one cable (one TV), some can connect two, some can connect four. There may also be models with big amount outputs, but I doubt that anyone needs more than 4 TVs.
What do you need besides a dish antenna?
The satellite dish does not connect directly to any TV. There are 2 options:
- Connecting the cable to a special receiver. This is a separate box with its own control panel that connects to any TV, like a DVD player or VCR. It is used to convert the satellite signal from the antenna into a television signal. Decodes it. A special smart card is inserted into this box, which you buy from an operator (for example, Tricolor or NTV+), this is needed to pay for access to selected TV channel packages.
- There are TVs on sale with a special CL+ slot into which you can buy and insert a CAM module. This TV has an input for a DVB-S2 antenna cable. That is, the cable from the antenna is connected directly to the TV, a module is inserted into the TV, and a smart card is inserted into the module. This option is convenient - there are no extra wires or extra “boxes”, and most importantly, everything is controlled by one remote control. If in the previous version you had to turn on the TV and adjust the sound with one remote control, and switch channels with another, then here all the controls are on one remote control and that’s great.
At the construction stage, it is advisable to limit yourself to purchasing only an antenna with a converter, fix it on the facade or on the roof, adjust the position to receive a reliable signal from the satellite and run the required number of cables into the house. Each TV is connected separately antenna cable and each TV needs its own receiver/module and its own smart card. By the way, each TV is also paid for separately... Therefore, most often the cable from the dish is routed into the living room, where a large TV will appear in the future.
Thus, after finishing the finishing, all that remains is to connect the cable to the TV with the module or receiver; you no longer need to climb onto the roof and touch the antenna.
Digital TV without satellite dish: DVB-T2
Broadcasting started some time ago digital television in DVB-T2 format. Modern TVs already have a built-in receiver for this type of signal. This differs from the good old antenna in that there is no “snow” or interference. If the reception is confident, the picture will be very clear.
 Reception is carried out using a similar antenna. At the time of writing, 20 channels are broadcast in digital format. These are 2 so-called multiplexes, 10 channels each. Multiplex is something like a package of channels that is broadcast at a certain frequency. These are terrestrial channels and they are broadcast for free.
If your TV does not have a built-in digital receiver, separate receivers (“boxes” like those needed for satellite TV) are sold, you can connect such a box to any, even an old TV, and watch TV channels in good quality.
You can read more about digital TV here: http://www.rtrs.ru/dtv/, and you can see the coverage area using this link.
Which is better, satellite or digital TV?
Satellite is better, digital is free, and in general all modern television is junk, but let’s still look at the pros and cons.
So, on the satellite side there is 100% coverage - you can receive a satellite signal anywhere, as long as you have a dish. It can only be difficult in the forest among centuries-old tall trees, but even there you can try to find a “window” and adjust the antenna. The range of TV channels is also on the side of satellite TV - there are hundreds of these channels. Movies, sports, news, educational programs, cartoons - choose what you want, just don’t forget to pay on time. Actually, the need to pay is the main disadvantage, and payment for each connected TV.
And on the side of digital DVB-T2 television there is a lower cost of the antenna, a lower cost of the receiver (or if the TV is a new model, then the receiver is already built in), the absence of a subscription fee and the ability to connect any number of TVs to one antenna. However, you don’t have to pay a subscription fee for over-the-air channels even on a satellite, but on a satellite you have a choice, but here you don’t. The disadvantages include not 100% coverage, somewhere there may be no reception or it will be too weak (see link above) and only 20 channels. Maybe someday there will be more of them.
Many people install both antennas at once. Satellite is connected to a large TV in the living room, where you can watch a movie, and regular or digital antenna to the TV in the kitchen or bedroom so that you can watch news on federal channels, for example.
Internet outside the city or 3G/4G antenna
Nowadays, good and fast Internet is much more important than a TV, so we’ll talk about antennas for the Internet separately.

The photo shows a 3G/4G Proflink antenna. Why is it needed? What's good about it? Before answering these questions, it’s worth delving a little deeper into the problems of the mobile Internet.
If Mobile Internet on your modern smartphone it works quickly, but for a computer a regular USB modem is quite enough and the speed suits you, then you don’t need such an antenna, you don’t need to read further. But if everything works very slowly, even with a good signal, the antenna can already help.
The principle of operation of 3G/4G Internet is quite simple. In your or a neighboring village, a telecom operator (Megafon, MTS, etc.) installs a base station. It's like a big antenna that your devices, like your phone or modem, connect to. Your phone, the phone of the neighbor on the left, the neighbor on the right, the neighbor behind, across the street. They all need the Internet and they all share it with you. The fact is that the base station has a limited resource, bandwidth or “pipe” and it is divided approximately equally between everyone. Equally, but not quite. There is a so-called “radio resource” concept, which is also limited. And the more of this resource is needed, the worse the received signal on the subscriber device. Simply put, if your modem or phone has “bad reception”, there are only “one or two sticks”, the base station needs to spend more “force” to provide you good speed Internet access. If your signal is good or excellent, you need less strength = resources. These resources are also divided approximately equally, and all this is very crude and simplified.
The bottom line is that those devices that have a better signal get better speeds. And this is only one side of the coin. Any mobile device, the phone or modem is quite “weak”. If the operator's base station is a huge antenna on a mast or on the roof of a tall building, it emits a powerful signal, then the transmitter in your phone or modem is extremely small and it is difficult for the base station to “hear” a response signal from it. This is why your mail may be sent slowly, and uploading a video to YouTube can be a real problem.
What's the use of an antenna?
Well, now let's compare, what do you think receives the signal better - your phone or tablet in your hands, or the antenna on the roof of the house? What emits better? Obviously, a large antenna pointed towards the operator's base station will be in better radio conditions and will provide you with better Internet performance.
In addition to better reception, and therefore higher network access speed, the antenna in the photo above boasts built-in WiFi. Those two small antennas on top are just that wireless connection in the house and on the site. You can connect any device with WiFi to such an antenna, and in addition to it there is also a regular Ethernet cable (by the way, it also carries power, this is POE technology).
Therefore, if the Internet in your home is not working well, it makes sense to think about an antenna. This is not a panacea; in case of severe overload of the operator’s network, it will not help much, but even then the Internet will work better, because the signal will be better.
At the request of customers, I install Proflink antennas, which are produced in Krasnodar http://smarten.rf/antenna/ These antennas are built on high-quality components and differ from analogues in a more reliable “filling”.
You don't have to throw away old satellite dishes in a hurry. In stock necessary equipment and tools, you will be able to make a chair and a comfortable chair out of them. They will look very futuristic. How to do everything exactly, see the master class.
Materials
To make an armchair and stool from a satellite dish with your own hands, prepare:
- old satellite dishes, 4 pcs.;
- old office chair;
- a piece of plywood;
- foam rubber for upholstery;
- furniture upholstery material;
- fasteners;
- primer;
- paint;
- grinding machine;
- furniture stapler;
- scissors;
- jigsaw or saw;
- welding machine;
- tool for cutting metal.

Step 1. Your existing satellite dishes must be cleaned and completely disassembled. There is no need to throw away any items. Almost all of them will come in handy, as they are made of durable and high-quality steel.


Step 2. To the parts already received, you should add the base part of the office chair, which allows it to turn and recline. To do this, you will need to completely disassemble the chair, leaving the metal base.

Step 3. Take two antenna dishes. On one of them, cut a small semicircle from the edge, fitting it under another plate. Boil them together. This will be the backrest with a headrest for the future chair.

Step 4. To the seat, which will become a large dish from the antenna, weld the upper part of a part from an office chair with a swivel mechanism. Weld another part, designed to support the back, to a blank of two plates.


Step 5. Attach square steel tubes to the seat to stabilize the chair. Make a cross rack from the pipes and reinforce everything with metal supports. You can see what should happen in the end in the photo.

Step 6. To add support to the backrest, weld flat metal pieces to it. You will find them in the antenna components.

Step 7. Weld a chair footrest to another plate. The resulting piece of furniture will become additional element, on which, when sitting on a chair, you can put your feet for comfort. If necessary, also stabilize it with metal pipes from the antennas.

Step 8. Slightly curved pipes from the antenna will become excellent armrests and further strengthen the entire structure. They should be adjusted in size to the resulting chair and welded.


Step 9. Now the chair needs to add a little softness. To do this, cut out circles from plywood. Upholster them with soft foam rubber, stretching fabric upholstery or material made of natural or artificial leather on top.
At the end of the twentieth century, satellite television quickly burst into our homes and began to improve just as quickly. Not everyone probably remembers the first satellite receivers Soviet-made from the Krosna company! It was a huge unit on which only 8 channels could be configured by rotating the variable resistor wheels. But progress in this area has led to the fact that receiving equipment satellite television began to age rapidly. The analog signal was replaced by a digital signal of the MPEG-2 standard, and now it is already living its last days, after the introduction of the MPEG-4 standard, which MPEG-2 receivers can no longer receive and decode...
Naturally, analogue and digital satellite receivers of early models began to rapidly accumulate in the hands of the population and also in landfills. For ordinary people, this is just garbage, but for us, radio amateurs, it is a rather valuable source of parts, cases in which you can assemble some kind of device, connectors, power cords, transformers and ready-made power supplies.

And strange as it may seem, analogue receivers may be of greater interest to radio amateurs because they were assembled using full-size components and, having a considerable current consumption, had power supplies and transformers of decent power. You can also profit from displays, high-frequency units and ordinary capacitors, resistors, transistors, diodes, etc.

It all depends on what condition the unit is in and what its configuration is, sometimes it can be used as a clock, a timer with an actuator, but some devices can be used in a more interesting way.

We will talk about tuners with a built-in positioner. The positioner is electronic device, designed to rotate a satellite dish along the orbital axis to various satellites with memorization of their positions and subsequent rotation of the dish to these positions by supplying a supply voltage of +/- 48 volts to the actuator. The actuator is a DC electric motor with a gearbox and a retractable rod. They come with a retractable part of various lengths: 8-12-18-24-32 inches and can be quite powerful, for example, I know of cases when, on a jammed rotary mechanism, the motor bent the channel ten! There were also tuners with a dual positioner designed to orient the antenna along both the horizontal and vertical axis.

What is the main idea of this review: what can be learned from these devices and how they can be used if they remain functional. If the tuner with a positioner has retained its functionality as a positioner (analog), it can be used for its intended purpose as a positioner, as well as for opening doors, gates, orienting a solar panel, etc. If all the electronics are burned out and cannot be restored, but the transformer remains intact, a transformer-motor pair can be used for the same processes, but with your electronic filling.

The article contained photographs of 2 old receivers and you yourself will evaluate their contents. One of them is an analog Mirage 2200 with a double positioner. I inserted a 3-position toggle switch into it so that I could supply power from it to the motor, without the participation of a positioner.