Let's take a look at how your application can use the new Realtime Scan API.
Why is it necessary to enable scanning?
Good apps allow you to be more productive: users can archive, modify, and share content with the functionality you provide to transform tools mass media from physical condition into digital.
Users can upload "printed" photos to your application. Without the ability to scan, they are unable to do so.
Support for document scanning will help users integrate existing "paper" documents into your application, thereby increasing its value.
Whether it's an app for quickly sketching creative projects, high-resolution photos, or document processing, you can easily organize it with Windows.Devices.Scanners .
Identification of scanners and drivers in your application
Most consumer scanners connected to Windows are multifunction scanners (MFPs). These types of devices don't just scan, they also print, copy and fax. There are also standalone scanners that do not have printer features.
In order for users to scan with your application, scanners must be WIA (Windows Image Acquisition) compliant, which use WIA driver 2.0 (WIA 2.0 is a requirement for all locally connected scanning devices as of June 2010). The installed device should appear in Device Manager, Devices and Printers, Scanners and Cameras, etc. Fast way to check if the system is properly configured to use the scanner is to run a test scan using the Scan application.
Windows provides driver support for the vast majority of scanners, providing a single driver for all connected scanners over Wi-Fi and Ethernet that implement the Microsoft WSD (Web Services on Devices) scanning protocol, WS-Scan. This allows scanners connected to the network to work with Windows without installing additional drivers. If the scanner is connected via USB, there is a good chance that the correct WIA driver is available on the user's system. You can be sure that when using the Scan Runtime APIs, most scanners and MFPs will be supported.
How is everything tripled?
The application must not be designed specifically for specific device. The Windows Image Acquisition (WIA) platform standardizes the interaction between applications and scanners. Any application in Windows 8.1 can use the scanner device as long as it is WIA compliant and WIA 2.0 is installed on the device.
WIA provides a framework that allows a device to present its unique capabilities, and applications in turn to reference those capabilities.
How to implement?
Watch this quick start guide and also watch the video that will show you your options.
Scanning is done through APIs that support scanning from three sources: Flatbed, Feeder, and Auto-configured. After selecting a scan source, the rest of the options become available or your application can scan right away using the default settings.
Here are some general settings you might want to set in your application.
Note: To keep your application as simple as possible for users, you may want to hide advanced settings so that users can quickly get what they need.
Permission: The user can scan photographs at very high resolution, documents at much lower resolutions for faster scanning. Your application can specify the resolution using the DesiredResolution property. The device provides a range of supported values, providing a minimum and maximum resolution. You can get this information by setting the DesiredResolution property, it picks the nearest value that will be set to ActualResolution. In this example, the flatbed scanner is set to scan at 100 dpi, assuming that the resolution is supported by the scanner.
ImageScannerResolution resolution = new ImageScannerResolution(); Resolution.DpiX = resolution.DpiY = 100; myScanner.FlatbedConfiguration.DesiredResoltuion = resolution;
File type: When using the ImageScannerFormat enumeration, your application can directly scan to the following file types, as long as they are supported by the device: Bitmap, JPEG, PNG, XPS, OXPS, PDF, TIFF.
MyScanner.FlatbedConfiguration.Format = ImageScannerFormat.Jpeg;
If a device cannot support a particular format, you can augment the functionality by making it available. Your application can use the file conversion APIs (see the BitmapEncoder and BitmapDecoder classes in the Windows.Grapics.Imaging namespace) to convert the scanner's native file type to the desired one. You can also add OCR features. You can provide filters or other enhancements so that the user can play around with the scanned image.
Suggested gadlines
Make scanning functionality simple and consistent for users. If the consumer needs to quickly scan a lot of documents, the clutter of the interface should be avoided.
How to handle device errors
Your application may encounter an error with a WIA HRESULT that is already in the WIA error list. These include errors such as device busy, paper jams, and other device-specific situations. If some unspecified error has occurred, it is necessary to present an error message that something went wrong during the scanning process. You can get codes based on the Microsoft Platform SDK, file: /Include/WiaDef.h.
Apps that scan can do more
Now, in Windows 8.1, scanning functionality is available in Metro applications. Windows has a hardware ecosystem and you have a great opportunity to create applications that provide more options for the user. Your applications can merge user documents based on business logic. They can provide users with new options for their physical data. Scanning technology has the potential to make your applications more feature rich.
A long time IT colleague of mine told me over lunch that he had discovered the context menu of the Start button on the last tour, even though he had been using Windows 8 since the RTM days. It immediately became clear that he also did not know about the Win + X key combination. Who would have thought:)
A starwars32 reader admitted in the comments that he was unaware of the "-" button at the bottom of the apps screen. Apparently, it will be the same surprise for him as in modern interface and applications semantic rescaling works. In other words, you can almost anywhere change the view with your fingers or turn the mouse wheel while holding down the Ctrl key, just like in File Explorer folders and on the desktop.
And at the same time, in the last round, despite the thick hint, some readers continued to mutter in the comments that these were not chips. Out of spite, right?

photo credit: bark
Then it’s better to go out into the cold right now and to spite your grandmother freeze your ears :) But I don’t see any reason to deprive other readers of the opportunity to learn something new. Constructive criticism is always welcome, of course, but the best argument will be your own trick - non-standard and not lying in plain sight! There is only one round left.

ESET will present the winner with a choice of a license for NOD32 Antivirus or NOD32 Smart Security.
Jury
According to the format of the competition, the jury of each round includes two experts and readers. As I already wrote, I invite only those experts with whom I know personally, and today I am pleased to introduce two more specialists to you.
- Pavel Nagaev(MVP Exchange Server). Previously, Pavel often wrote about Exchange in his blog, but now he removes more painful questions on the ExchangeFAQ.ru website. He has also spoken at TechEd conferences, including a joint talk with Stanislav.
- Stanislav Buldakov(MVP Exchange Server). Stanislav shares his secret knowledge about Exchange on his blog. And lately I've got the feeling that he manages Exchange exclusively through PowerShell :)
- You- choose the best chip by voting at the end of the record!
I will also contribute with my comments at the end of each chip. Let's get started!
Participating in the tour
How to get to the library
I “stole” this title from the story about libraries in this blog. I remembered it when I installed Windows 8.1 and did not find the libraries! Personal folders appeared in the "This PC" window, but now the explorer button pinned to the taskbar also led there, and libraries disappeared even from the navigation area.
Thoughtfully moving the cursor over it, I right-clicked on an empty space and ... found the libraries in the menu!
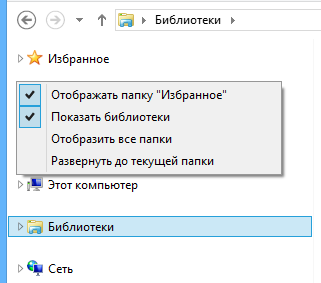
The most interesting thing is that after that, the explorer button on the taskbar began to open libraries, and not “This PC”.
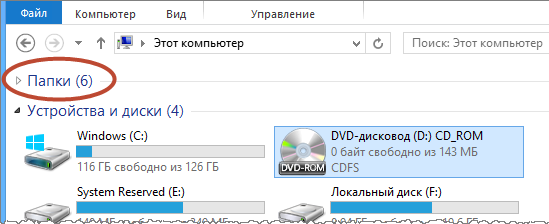
Bonus. If you're using libraries, you're probably getting in the way of personal folders in the This PC window. See, they can be folded:
And also in context menu there are windows different types grouping and sorting, play with them for complete happiness!
Vadim. The menu of the transition area already somehow appeared in one of the quizzes, and then less than half of the participants knew about it;) It's also curious that it had the opportunity to remove the chosen conductor so kind to me. It has come an interesting way - it appeared in a fixed form in Vista, learned how to fold in Windows 7, and now ... here's how progress has stepped! :)
Personal folders - yes, they interfere, especially on virtual machines and in PE. In general, the creators of Windows made a terrible mess with personal folders in 8.1. Let's take Documents as an example. They are in:
- window "This computer" and the root of the profile, and it may not be obvious to everyone that these are the same folders, as Artem Pronichkin noted
- SkyDrive folder, because it creates them on the web
- on the SD card of the tablet, if you chose it as the main place to save files in the settings - there they look like “Documents (First Name Last Name)”
- in the form of libraries, and personal folders are included with the same name
Something needs to be done about it :)
Alarm clock app
The Alarm Clock app, introduced with Windows 8.1, includes three elements: alarms, timers, and a stopwatch.
It opens on the page of alarms, and to add a new one, just click the "+" in the upper right corner of the screen.
In order for the alarm to work, your PC must have InstantGo technology (formerly called "connected standby"), which is supported by all modern Windows tablets.
Otherwise, the message "Notifications will be displayed only when awake" will appear, i.e. the application will not wake up a sleepy standard PC, nor you.
alarm clocks
By default, each signal will be named Alarm. But it is logical to rename it to indicate the cause of the signal. To do this, click on the name Alarm and enter your signal name from the keyboard.
The outer circle on the dial allows you to select minutes, and the inner one - hours. Turn them around to set the desired time.
The alarm clock can be set to one-time operation or select the days when it will turn on. From the drop-down menu, you can listen to and select the sound that will be played when the alarm goes off.
After setting the alarm, save it by pressing the floppy disk button. As a result, all settings are perfectly displayed on the screen. Alarm:
When triggered, the alarm will sound the selected alarm, and a notification will be displayed on the desktop (the alarm lasts less than half a minute, and the notification disappears from the monitor screen immediately after it stops).
You can change the alarm settings by clicking on it, and there is a button in the upper right corner of the screen to delete the selected alarm.
Timers
Timers are added in the same way as alarms. However, the timer can be set to a maximum of 12 hours 59 minutes and 59 seconds.
To add hours to the timer, scroll the inner circle (minute dial) a few turns - one hour will be added with each turn. The outer circle allows you to set the seconds. If desired, you can start all configured timers, and they will work simultaneously.
Stopwatch
In addition to the standard countdown, the stopwatch can detect lap time and cut-off time. To keep track of lap times and cutoffs, click the flag button. In this case, the list of lap times and cutoff times populates with each click to this button.
It is noteworthy that the results can be copied from the context menu.
Vadim. Basically, Windows owners phone app familiar, although there are only alarms, and the interface for setting the time is different. However, the application in Windows 8.1 is clearly missing two features:
- Assigning your alarm ringtones
- Repeating the signal at specified (and customizable) time intervals - in half a minute it may not wake you up!
And yes, I delivered it to Microsoft when I was asked for feedback :)
Scanning and OCR text in OneNote
In November, Microsoft introduced an update to its notebook OneNote for Windows 8.1.
To install OneNote, follow this link and click Install.
Scanning
Scanning in the application means taking a photo or inserting any image and automatically processing it.
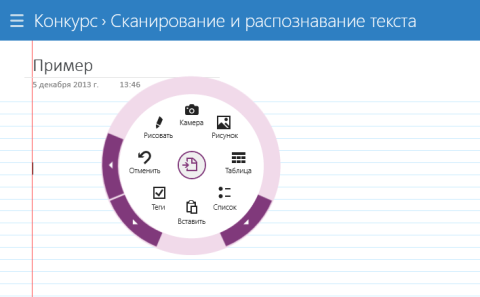
- Photo - insert photo as is, do not process
- Document - an imitation of a scanned document. We get a contrast image with distinct records
- Board - this mode removes unnecessary small details and makes the photo even more contrasting.
Now let's move on to the most interesting - the process of text recognition.
Text recognising
When I first decided to try scanning to OneNote, it took me a long time to find the OCR button itself. It turned out that she was simply not here! After adding a photo, it is automatically checked for text and recognized in the cloud. No additional movements are required.
Most likely, this feature was not made to extract text from the image, but to search through it. In other words, you can open a search, enter a query, and OneNote will show not only search results in posts, but also text in images!
But now we are not interested in this, namely the possibility of using OneNote as OCR.
You can copy the entire text of the image with the command Copy text in the image menu:
The text will be copied to the clipboard and can be pasted into OneNote or any external text editor:
As an example for this article, I took the first magazine that came to hand and scanned its page at 300 dpi.
Advice. Windows 8.1 uses the new Scanner app to scan, which has all the necessary settings and user-friendly interface.
In this "ideal" case, all characters were recognized correctly. Photos from the phone are recognized a little worse, but at a fairly high level. Also, the text is well read from the screenshots (a vital thing, in my opinion, when it is impossible to copy the text from the window).
Struggling with line breaks
Based on the scan results, the program determined that the article had two columns and arranged the text in the correct order. Unfortunately, she did not combine line breaks. But this can be done manually with Word and character replacement. For small texts, it will only take a couple of minutes.
With this algorithm, we erased all hyphens and combined all lines into one. Now it remains to break the text into paragraphs manually.
Russian text recognition
A little more needs to be said about recognition languages. I tried Russian and English texts. As it turned out, if "Russia" is not specified in the system settings, then the Russian text is not read at all. That is, the quality of recognition and vocabulary depends primarily on the region. You can find this setting by searching for "Regional and Language Options" in the search or PC settings.
Conclusion
In addition to its main purpose, OneNote is perfect as a program for quick OCR. It is always at hand, unlike heavyweight OCR alternatives, and has the necessary minimum of features:
- Russian language support
- column recognition
- spelling highlight
The disadvantage is the lack of understanding of hyphenation, but most likely this issue will not be left without attention. Now, for more complex and voluminous work, of course, it is better to use full-fledged OCR.
Vadim. In principle, classic OneNote also has OCR, and image text search works. But you need to install a paid and cumbersome Microsoft office. And although I have it on my tablet for the sake of Word, on it I use the modern OneNote (and yes, it's free). By the way, one of the innovations has become very convenient in the presence of several books "Recent Pages", which are not in Office. In general, the entry about OneNote has been in my drafts for the second year.
Do you want to take part in the competition?
Submit your chip to the next round of the competition and join the fight for software licenses and Nokia Lumia 625!
Debate and vote
I'm interested in your opinion on all those chips! Please, answer these questions in the comments:
- Are you pleased with the appearance of personal folders in the This PC window, or are they bothering you there?
- What is your alarm clock? There are many options - from FitBit to mechanical :) How many alarms do you set in the morning?
- Do you use OneNote and want to learn more about it? Should I dust off a draft? :)
And be sure tell us which feature you voted for!
Tour results
Connecting a cell phone, mp3 player, camera.Thus, in the fifth round won Vladislav with a OneNote chip. He gets an ESET license and earns an extra place in the final - congratulations!
Sometimes it becomes necessary to transfer data from other devices to a computer and vice versa. There are several options for cell phones:
Transfer of information through Bluetooth, if it is installed on the computer and on the device;
Transfer of information using the cord connecting the device and the computer. Currently, manufacturers are switching to one type of cord, which at one end has a USB connector that connects to a computer, and at the other mini USB connected to the device. When connected to a computer, one or two new devices will appear in the list of logical devices. This is due to the fact that, as a rule, the device itself (for example, a cell phone) has its own memory and, in addition, memory on the card. To navigate to a folder that containsnecessary information, for example, photos or video files, you can use Explorer and find a folder on one of the volumes that appears, which will have a name like Foto or Video and transfer or copy the necessary files to a computer (from a computer);
You can remove the card from the device and use the card reader. A card reader is a device that allows you to read data from / to a card. The card reader can be built into a laptop, can be built into a device, for example, an MFP, can be a separate device that connects to the connector USB;
For cell phones, there is another possibility. You can use the Internet and download files via the Internet. If there is a mailbox on Yandex, enter it, then go to People mode and upload your files there from cell phone. Then also log in to your mailbox on your computer, then to People mode and download files from there.
Scanning issues.
The scanner can be a single device or be part of a composite device (MFP). As a rule, the MFP has its own software, and it allows you to scan and convert data from graphic to text form, since they have a program for translating information from one type to another. Meanwhile, there are free programs that allow such a translation. We will discuss them further in the Free Software Tutorial.
Windows Fax and Scan
This mode is called in the application list ( right button on the home screen, then All Apps in the lower right corner). Let's find the iconWindows Fax and Scanand double click on it with the left mouse button.
In order to work with a fax, you need to install a modem, which will be connected with one wire to the computer, and the second to the telephone network. To work with the scanner, click on the button Scan located at the bottom left of the window.
![]()
Since the scanner is not installed, when you try to scan (press the buttonNew scan - )a warning window will appear.
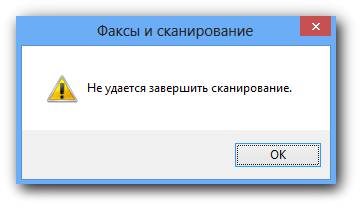
Let's connect the scanner. After installing the scanner, in our case the MFP, it should appear in the list of devices. In order to view this list, you need to click on the button to safely remove devices (), which is located at the bottom right of the screen and select the mode in the panel that appears.Open devices and printers.
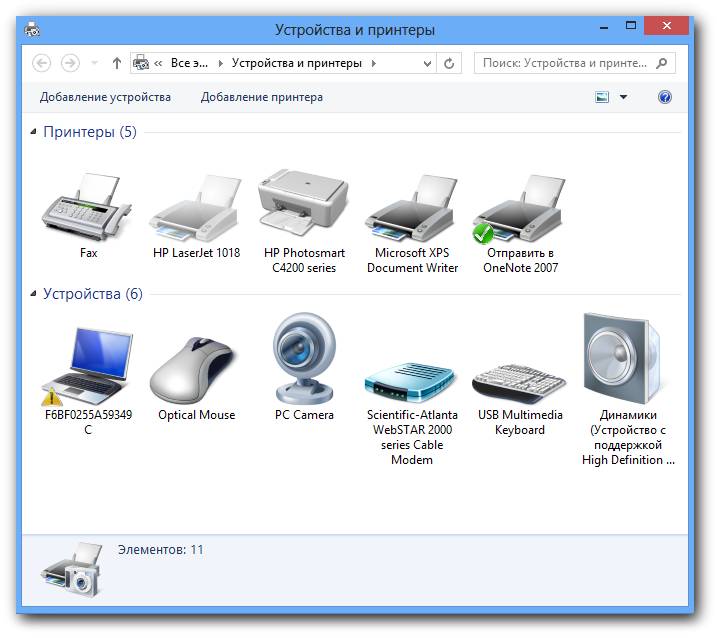
A device with a check mark on a green background appeared ( HP Photosmart C4200 series). Now try to scan again by clicking on the buttonnew scan(). A window will appear on the screen as shown below.
![]()
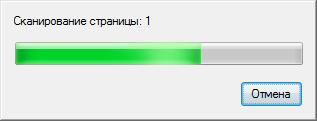
Let's press the button Scan . The pattern will start scanning. Note that different MFPs have a different view of this window.
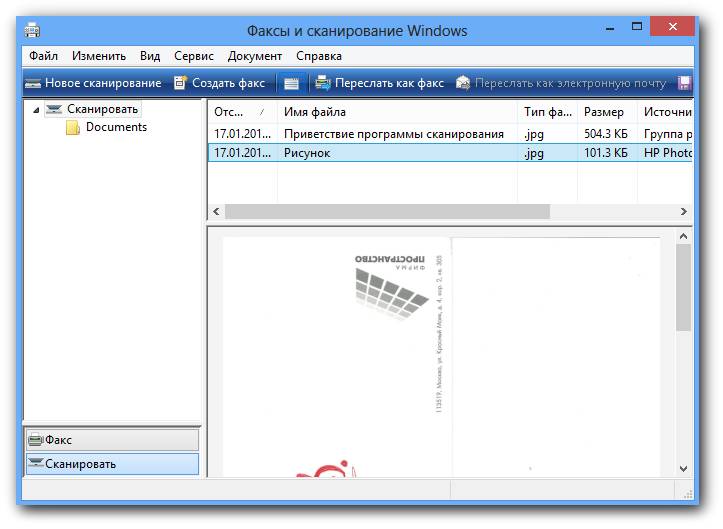
The scanned document will appear in the main window. A line will appear above indicating the date of scanning, the type of document ( Picture), extensions ( .jpg), its size ( 101.3 KB) and the device that scanned it ( HP Photosmart C4200). this image can be saved as or printed on the printer using blue stitching modes. If the document is saved, then it can then be corrected using graphic programs, which we will discuss in the Free Software Tutorial.