Due to the approach important holidays, especially New Year's, every PC owner wants to install on his screen beautiful wallpaper or screensaver. Therefore, my today's post does not quite resonate with the topic of the blog: but it is approaching New Year and to my readers, I want to give a brief information about...
What are screensavers?
Screensavers , or as they are also called - screensavers , all kinds of static, animated or 3D pictures that appear after a certain time of inactivity of the computer system. Their number is huge! The choice is only up to users - whether to enjoy natural landscapes, abstract 3D graphics or geometric shapes.
Though modern computers and tablets are equipped with LCD monitors and do not need screensavers, as a way to protect the monitor from overheating, they remain relevant and have moved into the category of decorations for displays.
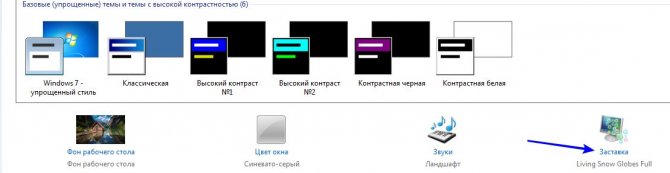
Surely your operating system has prepared standard screensavers (screensavers). For example, for Windows7 they are easy to find and install by selecting the appropriate one by making the following transition: Control Panel\All Control Panel Items\Personalization.
At the bottom of the screen that opens, you need to find the corresponding function and configure the desired screensaver:
But if you want to install a screensaver that is different from the stock of the installed OS, then you will have to
a) find and download a suitable one on the Internet (there are a lot of good things);
b) create it yourself
To find and download screensavers you like, just enter the word “screensaver” in the PS system and a lot of sites will open in front of you, where you can find all kinds of sites offering their products, among which are mostly free. Unfortunately, among the very attractive materials, there are those infected with viruses (be sure to have licensed antivirus!). I recommend this site - personally verified!
After downloading and saving the file, in the appropriate and configured folder (I have it "Downloads"), approximately the following boot files will appear:
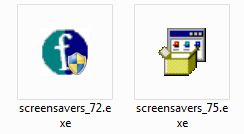
I chose two, you can install them as much as you like and change them just in case. Run them and install these mini-programs. And now customize the splash screen by choosing the appropriate one:
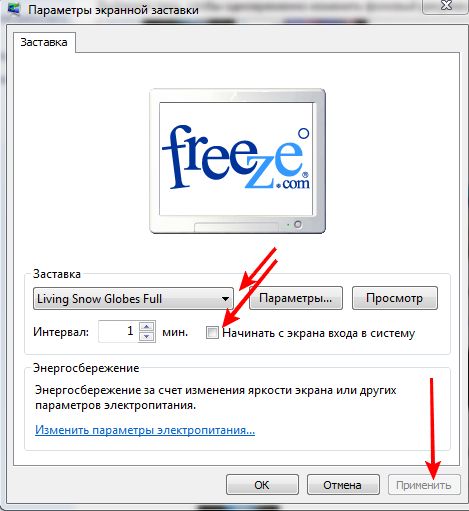
As you can see, in the settings you can set the interval, preview it, if necessary, start the login screen. But before installing the desired screen saver, be sure to click the "Apply" button (it should become active if you check the "start login screen" checkbox.
How to create a screensaver yourself?
To do this, you will need a special program, such as PhotoSHOW:
Where to download it for free, I do not know yet. I will find a suitable and proven site - I will definitely leave a link in this message. There are a lot of paid options. For those who find this free option or for those who already have PhotoSHOW software, below is a short tutorial video on how to create your own screensavers with it:
Beautiful screenservers to you, friends!
The desktop of the computer and the background image that is set to us, users see more often than anything else on their computer. Therefore, it is not surprising that over time you want to change the boring background and put your own picture on your desktop. Fortunately, now there is just a huge selection of background images and desktop wallpapers of excellent quality on a variety of topics. You can at least every day put a new one, without fear that it will soon get bored.
It will not be difficult for you to find numerous sites with wallpapers for your desktop if you use any search engine in it, enter “desktop wallpaper” or something similar as a request. We will not dwell on this issue in detail. Instead, we'll talk about how to put a picture on your desktop. different ways in major versions of operating systems of the Windows family.
Simple method for operating systems Windows Vista and Windows 7
Click on the image you want to be set as your desktop background right click mouse and in the context menu that appears, select "Set as desktop background".
Installing from the Control Panel in Windows XP
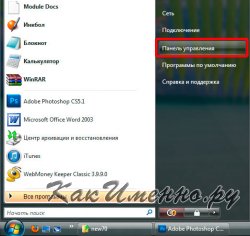
- Click the "Start" button.
- In the menu that appears, select "Control Panel" and then "Display".
- In the window that opens, go to the "Desktop" tab.
- Select a new one from the list of available standard images.
- If you need to install your own image saved on the computer's hard drive, then in this window click the "Browse" button and select the place where it was placed.
Installing a picture directly from the desktop in Windows Vista and Windows 7
For desktop pictures that are not sized to match your computer's screen resolution, you can try adjusting the placement. There are three placement options available: stretch image, tile, and center. If they don't help and installed image looks ugly, then crop it exactly to the size of your screen using any suitable graphics editor. For example, Photoshop.
When you turn on the computer, the very first thing that appears on the screen is the desktop, which plays an important role for many users. Some put their favorite image of nature, and someone enjoys a screensaver that displays an interesting photo. But some time passes and there is a desire to change it. Choosing a picture for the desktop, as a rule, does not cause any difficulties, but far from everyone knows how to install it. In our article, we will consider how to put a photo on the desktop.
Windows XP
There are several ways to set a photo as a background in the Windows XP operating system. This action can be performed using the control panel or display properties.
Setting via display properties
How to put a photo on the desktop in the Windows XP operating system:
- Right click computer mouse to any free space in the main window.
- Select the "Properties" item, which is located in the context menu. It is here that you can configure the main number of external parameters of the system.
- Go to the "Background Image" tab.
- Click on the "Browse" button to upload your file.
- Click on the window that appears indicating the location of the desired file.
- When all the parameters are configured, you need to click on the “Apply” button, after such a procedure, all new changes appear.
- If the file is too large or slightly smaller than the parameters of the main window, then the picture can be placed in the center or slightly stretched. To perform such actions, you need to use the "Location" tab.
- To change the color, you need to go to the "Color" tab. The required color will be seen behind the photo, and it will be possible to see it in the names of shortcuts and icons located on the main screen.
In order to put a photo on the desktop through the control panel, you have to perform the following actions:
- Click on the "Start" button.
- In the window that opens, select the “Control Panel” tab and then “Display”.
- Next, go to the "Desktop" section.
- Select a new one from the list of available standard photos.
- When installing your picture, which is saved on the computer's hard drive, you must click the "Browse" button and select the place where it was placed.
Windows 7 and Vista
Windows 7 and Vista operating systems provide several options for setting the Home screen background image. To do this, you can use the control panel or personalization.
Installation through personalization
Consider how to install a photo in Windows 7:
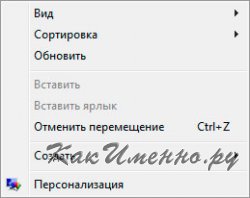
- Right-click anywhere in the main window.
- Select the "Personalization" item, which is located in the context menu.
Important! In the initial versions of the Windows 7 operating system, there is no “Personalization” tab, so there is no way to change the default picture to another one.
- In the window that opens, you can configure the photo settings and thus set the picture on the main screen, specifying the file for the splash screen.
- You need to go to the “Location” item, and configure the screensaver settings.
- Choose a value for the background of the main screen: a solid color or a colorful picture.
- Press the "Browse" button, set the photo on the display.
- In the window that appears, select the path to the corresponding file, click on it.
- To specify the filling option, go to the “Filling” item. Where the value for the picture is selected - you can place it in the center or stretch the photo.
Important! The Windows 7 operating system has a lot more features than the XP version.
Installation from the control panel
In order to put a photo on the desktop in Windows 7 and Vista in this way, you need to do the following:
- Click on the "Start" button.
- In the window that opens, select the "Control Panel" tab.
- In the control panel menu that appears, in the “Management and personalization” section, launch the “Change background picture desktop".
- Select a new photo from standard background images located in the C:\Windows\Web\Wallpaper directory.
Important! In the case of installation from another directory, for example, your own photos or pictures for the display that are saved from the Internet, you need to click the "Browse" button and specify the path to the image.
Windows 8-10
Installing a photo on the desktop in Windows 8-10 is not such a big problem. Consider the order of sequential actions:
- Click on the Start button (Windows logo).
- Select the "Parameters" tab.
- Click on the "Personalization" tab. In this item, you can adjust the photo settings, as well as change the color tone of all elements of the device.
Important! As you make changes, you can follow them using the preview window.
- Go to the “Background” tab, specify a solid color or a colorful image for the background of the main display. There is also the ability to create a slideshow of several photos.
- In the present “Colors” section, you can independently determine the color scheme for a photo on a computer or laptop, or you can apply an automatically selected version of the operating system.
- After choosing the color scheme of the photo, you need to decide on the placement.
- You also need to determine the theme of the background - dark or light.
Through the Windows registry
In order to change the picture on the desktop using the Windows registry, you will have to perform the following steps:
- Click on the "Start" button.
- In the search bar, create a regedit query and click on the Enter button.
- If a User Account Control (UAC) prompt appears, click Yes.
- In the registry window that opens, perform the following actions in sequence: HKEY_CURRENT_USER\Control Panel\Desktop.
- Press twice on left button mouse on the right side of the window on the "Wallpaper" key.
- Specify the full path to the corresponding photo (with the extension .bmp or .jpg).
Important! The file name must not contain spaces. If they are, then you need to rename the name of the photo. If you do not use this recommendation, then only a black image will appear as a result.
- Click on the “OK” button.
- Close the opened Registry Editor window.
Through the context menu
Changing a photo on the desktop through the context menu of the picture is easy. How to install image:
- Find the corresponding picture.
- Click on the file with the right mouse button.
- Select tab from context menu"Do background image desktop”, click on this item.
Done, the device has a new background for the main display!
Important! Applying these actions, you can only set the picture. For full customization all parameters, you must go to the section called “Personalization”.
Create a photo slideshow
So that the photo does not bother and constantly brings pleasure, you can design a slide show of several pictures. They will automatically change after a certain period of time. To create a slideshow on the desktop, you need to do the following:
- Right-click on any free space in the main window.
- Select the section called “Personalization” from the context menu.
- Go to the "Location" item to adjust the image parameters.
- Select the appropriate value for the photo.
- Click on the “Browse” button to set the desired set of photos as the main screen saver.
- In the window that appears, select the path to the required images.
- Select all photos for the splash screen of the main display window.
Important! Quick image selection method:
- If you need to select all the files in the specified folder, then just use the key combination Ctrl + A.
- If the files are not located side by side, they can be selected by holding down the Ctrl key.
- When placing files one after another, you can select the first image, and then, while holding down the Shift key, click the last image from the list. With this procedure, all files that are located between the first and last image are selected.
- Click on the "OK" button.
- Set the time interval for changing background images in the “Change image every…” section.
- In order for the photos to be changed not in order, but in a chaotic mode, you must check the box “In random order”.
- Click on "Save Changes".
Important! In Windows XP, there is no option to set a slideshow for the main screen. This feature is available only for the Windows operating system, starting with the seventh version.
MacOS
For the functioning of laptops and tablets, not only the operating Windows system— computer devices can be equipped with other operating systems. For example, Apple Corporation for its devices uses operating system MacOS. Consider how to install a photo on your desktop in Mac OS:
- Using double-tap, click on the touchpad.
Important! If the mouse is not factory, you must simultaneously hold down the Ctrl key and press the touchpad, or right-click.
- Go to the context menu section and select the "Change desktop background" tab.
- In the opened tab “Desktop and screensaver” specify the picture option.
Important! If on the left side in the “Apple” item you check “solid color”, then the main screen will be filled with one color. When you specify the "Pictures" section, the system prompts you to select the appropriate photo.
- If the required photo is in the “Image” folder, then it is enough to find it in the list that is present. If it is missing, then you need to click on the “+” sign indicating the corresponding folder.
Important! When you specify desired folder from external media - a USB flash drive, external hard disk or SD card, after the procedure for disconnecting them from computer device, the photo of the main screen will be automatically replaced with the default one. That is why it must be transferred to the internal HDD devices.
- If you need to change in automatic mode after a certain time interval, you must tick the box “Change image” and specify the desired interval.
Important! In the second section of the "Desktop and Screen Saver" window, you can set the image parameters. There you can also specify ways to display photos, the time after which they will appear, the source of the screensaver.
In this article, we told you how to put a photo on your desktop. And how now to do it in a way - choose for yourself.