Quite often, while working with tables, users need to resize cells. Sometimes data does not fit into elements of the current size and they have to be expanded. The opposite situation often occurs when, in order to save space on the sheet and ensure compact placement of information, it is necessary to reduce the size of the cells. Let's define actions that can be used to change the size of cells in Excel.
When you release the mouse button, you can define several options.
- The number of rows and columns in the table.
- Whether the cells will contain text or images.
- Table cell tab order.
- Whether text cells are references to each other.
- Whether to link the table to an external data file.
How to make a template for creating sheets and books
One way to solve this problem is to use the Find dialog box to replace all column and paragraph backspace characters with New Text Box characters to move subsequent text in the text chain. But depending on the complexity of your tables, this can be a tedious and time-consuming process.
It should be noted right away that for natural reasons it will not be possible to change the value of just one cell. By changing the height of one sheet element, we thereby change the height of the entire row where it is located. By changing its width, we change the width of the column where it is located. By and large, there are not many options for changing cell size in Excel. This can be done either by manually dragging the borders, or by specifying a specific size in numerical terms using a special form. Let's learn about each of these options in more detail.
How to set horizontal range spacing via formatting
If this is your situation, try a different approach. The Convert Text to Table option may be just the spoon of sugar needed to sweeten the table creation process. The Convert Text to Table dialog box determines how text is imported based on the delimiters in the selected text.
The table has the same height and width as the text field from which the text was converted. Two of the most common problems are superscript text and text inserts. But at least you can format the text, cells, grids, and table attributes any way you like. In addition to the complexity of the data, your job can be even more difficult if the client heavily formats the file. If you select the External Data Link checkbox when drawing a new table, the other options in the Table Properties dialog box will be grayed out.
Method 1: Drag Borders
Changing the cell size by dragging the borders is the simplest and most intuitive option.

After selecting the External Data Link option and identifying the file and sheet to import, you can select specific cell ranges. The Usage dialog box includes a Tables tab that displays the status of all tables associated with the layout. If you apply advanced formatting, you will have to repeat your work when the table is updated.
Automatic change based on element content
You can update the table, but this is not necessary; Unlike images, modified tables do not cause printing problems. The version of the table that exists in your layout is the version that will be printed when the file is output. You must use the Contents tool to work with individual cells or the contents of cells. The Element tool always selects the entire table. . Polishing Silver and a Little Tarnish. Various table construction options have their own advantages and disadvantages. If you're building a table from scratch, you can use the Table tool, formatting options, and design.
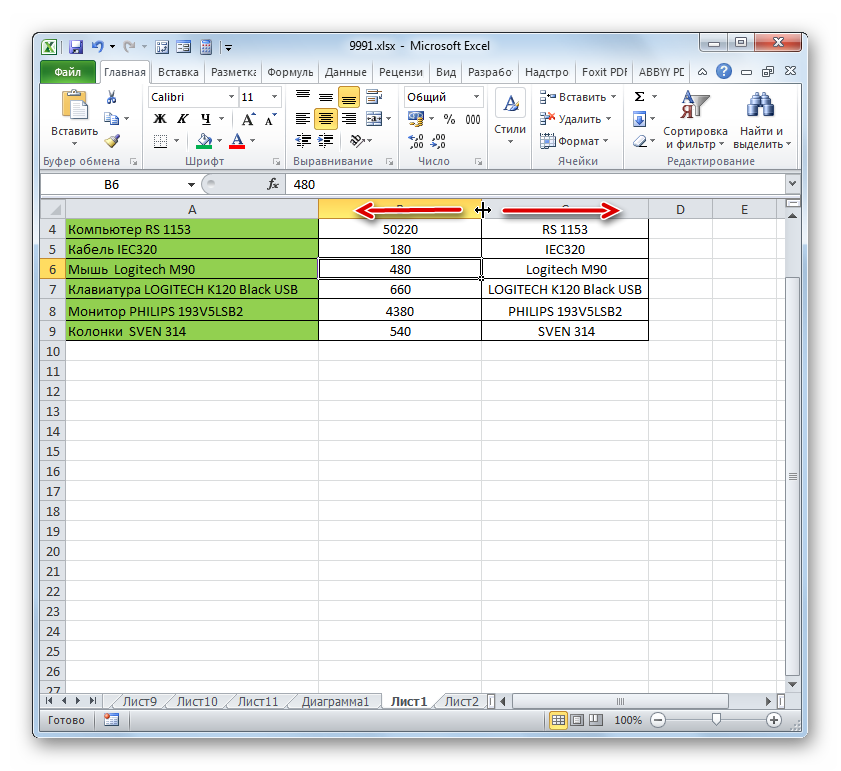
Changing the width of sheet elements by dragging the borders follows the same principle.

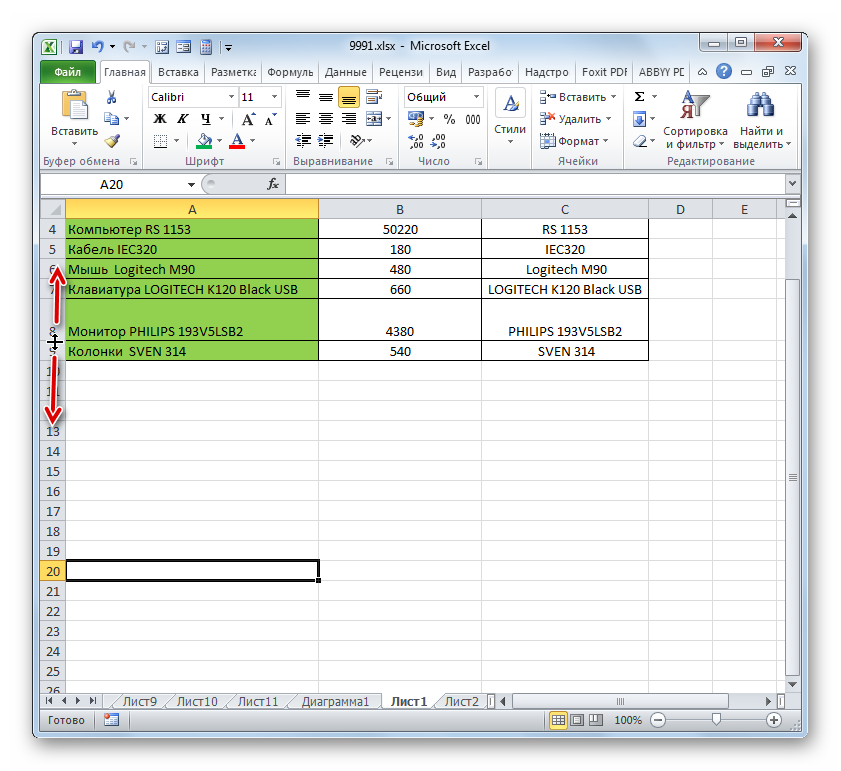
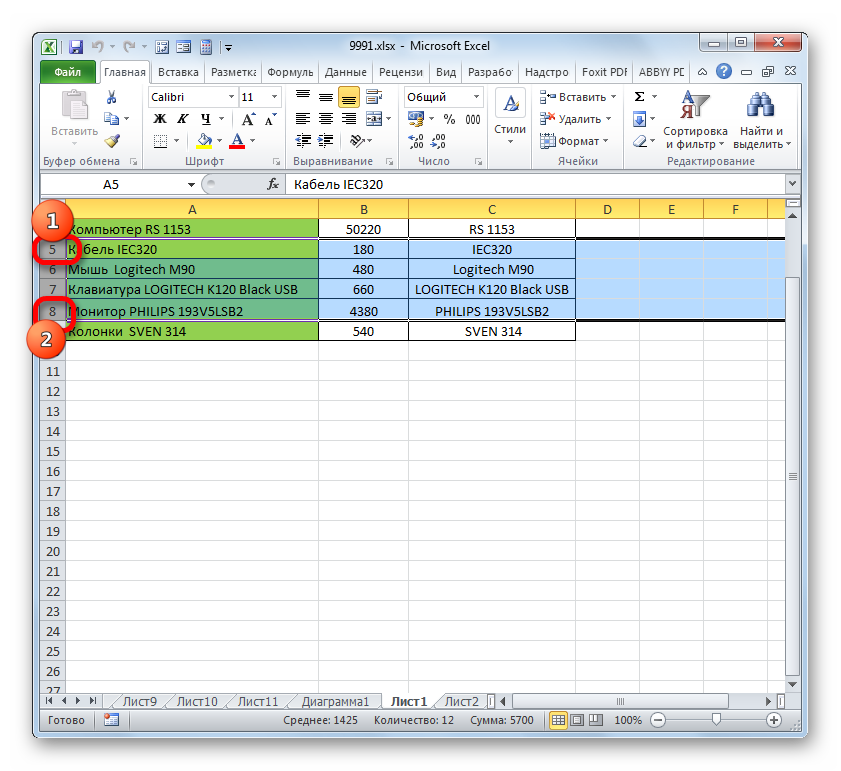
If you want to change the size of several objects at the same time, then in this case you must first select the sectors corresponding to them on the vertical or horizontal coordinate panel, depending on what you need to change in a particular case: width or height.
If you're sending data from a database, a good starting point is to convert the tabbed text into a table. The key to being a powerful user is not only knowing what works, but also knowing what doesn't work and knowing how to overcome limitations. Dean is wondering how to change the column width and row height from pixels to inches.
In fact, row height is calculated completely differently than column width. Line height is measured not in pixels, but in points. A pixel is a relative unit of measurement associated primarily with display devices such as monitors and printers. If something is 50 pixels wide, that size by itself means nothing without knowing how many pixels the device can display vertically.
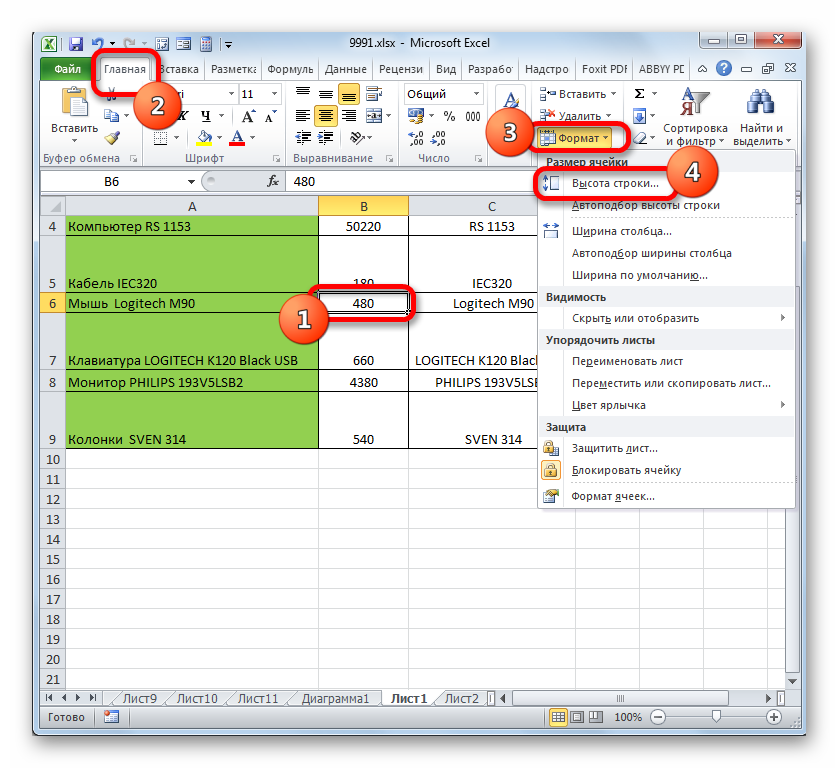
Method 2: changing the value in numerical terms
Now let's find out how you can change the size of the sheet elements by setting it with a specific numeric expression in a field specially designed for this purpose.
The dots, however, are well defined - approximately 72 dots per inch, so a line height of 72 would be a height in inches. Now consider the column width, which is not specified by either pixels or dots. Instead, it is specified in the character widths of whatever font you are using. Change the font you use and suddenly your column width changes so that it can still display 12 characters. Yes, this approach is really stupid. You might get something designed that works on your system, but if you then move the workbook to a friend, there's a good chance he won't work on his system.
In Excel, by default, the size of sheet elements is specified in special units of measurement. One such unit is equal to one character. The default cell width is 8.43. That is, in the visible part of one sheet element, if you do not expand it, you can enter a little more than 8 characters. The maximum width is 255. Large quantity You won't be able to fit characters into a cell. The minimum width is zero. An element with this size is hidden.
Because the way the font renders on their system may be completely different than how it renders on you. This displays horizontal and vertical rulers on the screen that you can use as a guide to help set the row height and column width. Another interesting side effect of working in the Page Layout view is that if you display the Home tab on the Ribbon and use the commands to set the column height and width, you'll notice that both are in inches.
They revert back to the width of the absurd character column if you go back to normal. Remember that the width of columns is determined by the number of digits that can be set horizontally in a cell. The heart of this macro defines the width of a single digit in dots. This value is then used to calculate the number of characters in the column width to be the desired width.
The default line height is 15 points. Its size can vary from 0 to 409 points.
Setting Column Width and Row Height
One of the first steps is usually to resize the table, rows, and columns. However, you can also decide from the beginning what size they should be. The table width and height are automatically adjusted and need to be edited most of the time. Move the mouse pointer to a row or column boundary. The mouse pointer turns into a double arrow. Left-click, hold down the mouse button, and drag the mouse in the desired direction. A column or row is increased or decreased.
You can change the column width in much the same way.

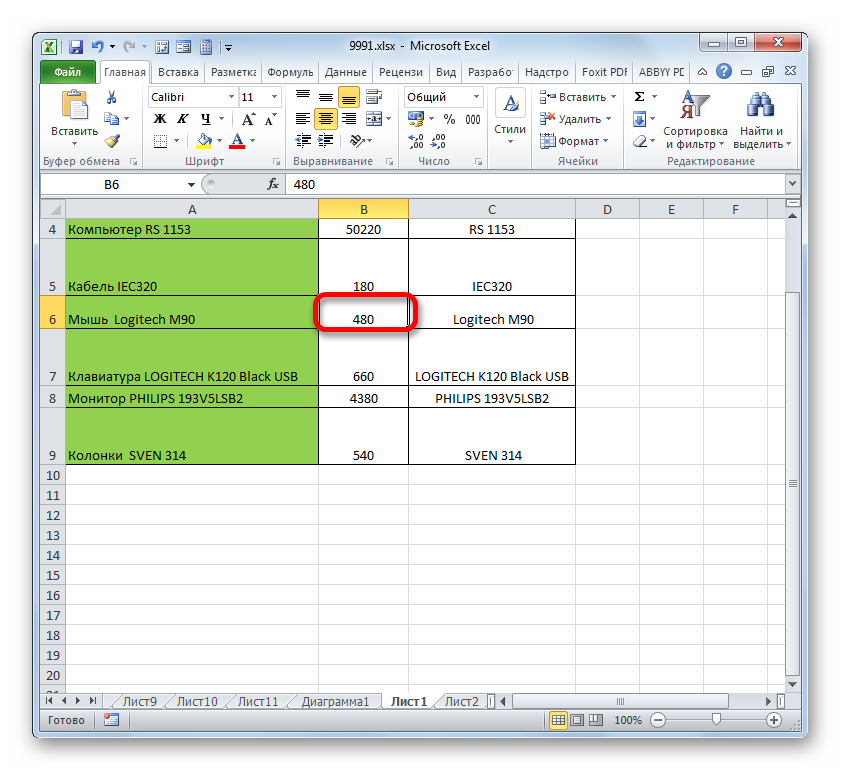
There is another option to change the size of sheet elements by specifying the specified value in numerical terms.
Accurate display of column width and row height
Depending on which direction you move the mouse. At the same time, you can move the grid while moving and move the mouse pointer freely.
Resize the entire table
If you want to resize the table as a whole, move your mouse to the lower right corner of the table.If you make the table smaller, the line height can only be reduced to a certain height. This is because the cells are formatted with the font size. AND smaller size font doesn't work. If you want the lines to be smaller than the font size, you must explicitly specify the line height.
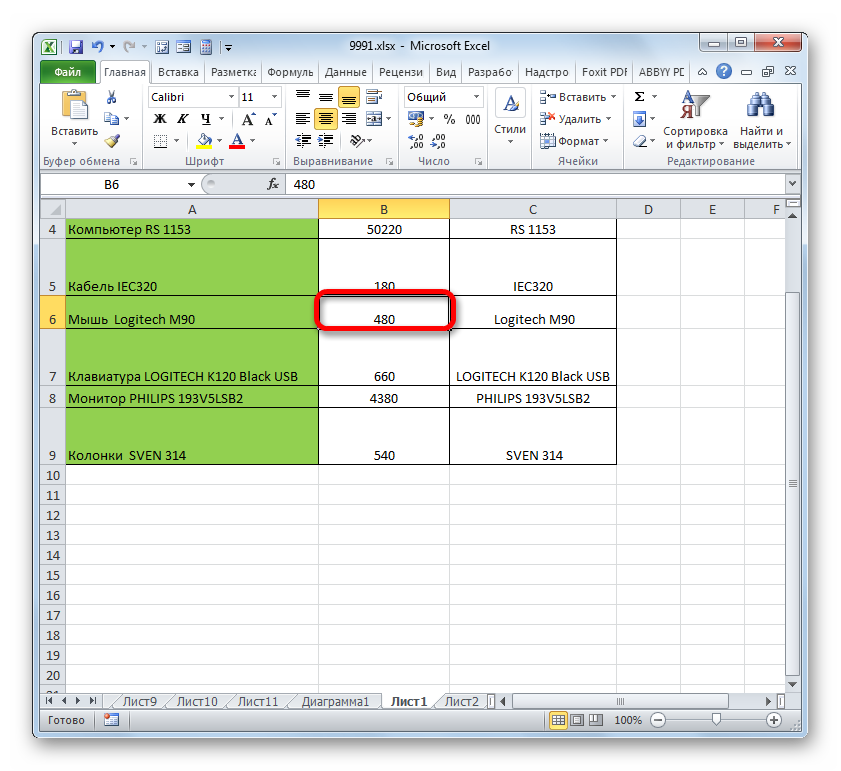
However, some users are still not satisfied with the system adopted in Excel for indicating the size of sheet elements in points, expressed in the number of characters. For these users it is possible to switch to another measurement value.
Bulk cell resizing
Sometimes you need to specify the exact dimensions of a table, row, column, or cell. To do this you must call the tab properties. The easiest way to do this is to click right click mouse on the table. IN context menu select Table Properties. A new dialog box will appear as shown below.
In this window you can specify the dimensions for the table, for the selected row, column or cell. Settings for the entire table. On the Table tab, you can configure settings that apply to the entire table. If the option is Preferred Width, enter a measure and select a unit of measurement, the table will exactly match that width.
![]()
Now you can adjust the change in cell size using the options listed above, operating with the selected unit of measurement.
In the Alignment area, you can specify how the table should be aligned. In addition, you can define the left margin here. The bottom area is where you define the text break. This means that the text is processed around the table. Either under the table or around the table. If you select the Environment option, the Positioning button is activated and you can specify additional options for positioning the table.
Theme frames and shading are handled separately. Additional parameters for the table. The Options button contains additional useful features, which can be configured as an additional window, as shown in the figure. Standard cell borders: You can define default spacing for top, right, bottom and left. This means that the specified distance to the edge of the cell is set inside the cell.
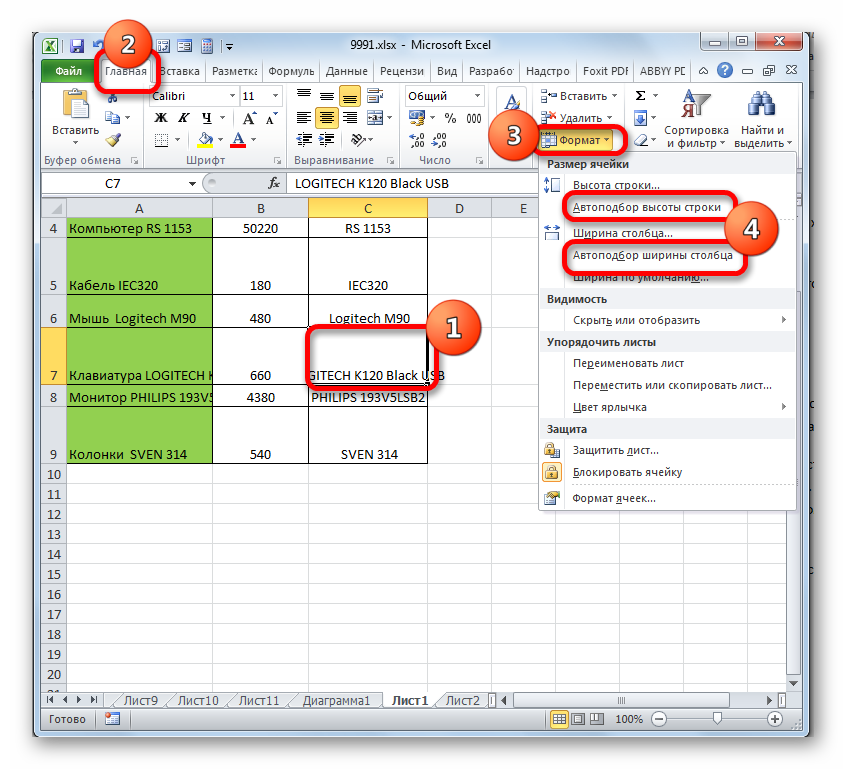
Method 3: Automatic resizing
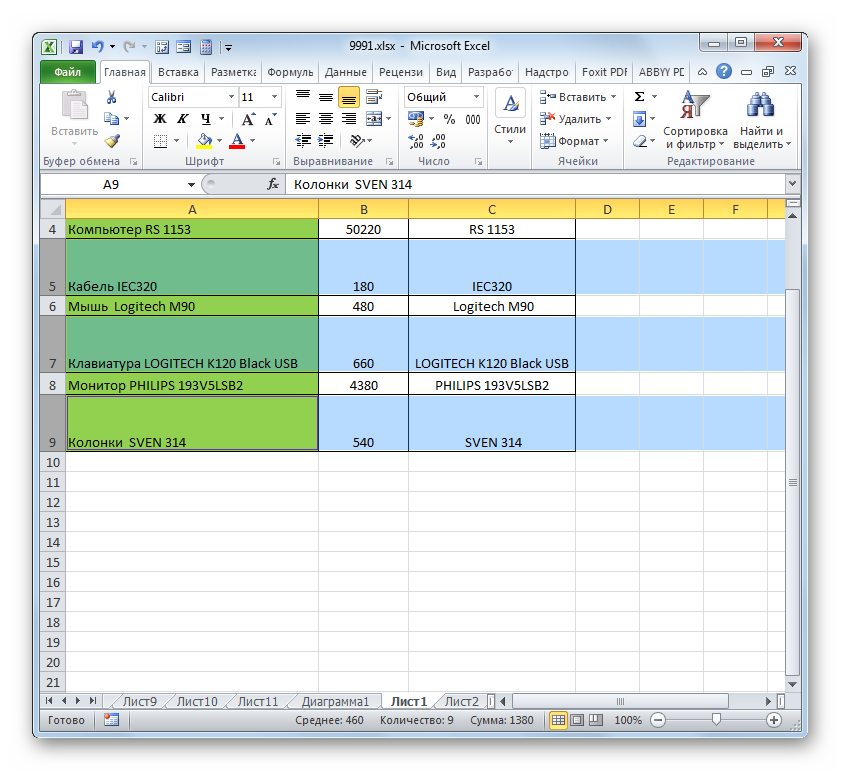
But, you must admit that it is not very convenient to always manually change the cell sizes, adjusting them to specific contents. Fortunately, Excel provides the ability to automatically resize worksheet elements according to the size of the data they contain.
![]()
Allow space between cells: If you enable the option and set a measure, a gap is set between cells. Allow automatic resizing: If the option is activated, the table will automatically adapt to the content. If the option is deactivated, the set dimensions are applied.
If we have a table that changes in size, we are forced to redefine the range of data we want to include in the graph or pivot table. If a table contains multiple rows that change frequently, it is quite tedious to change the data range for a chart and the same with a pivot table. We'll expose a method where you won't have to worry about the size of your table, since both the graph and the pivot table will automatically take on the required size.
As you can see, you can change the size of cells in several ways. They can be divided into two large groups: dragging borders and entering a numerical size in a special field. In addition, you can set the height or width of rows and columns to auto-fit.
How to quickly reduce and set same size cells in Excel. Most often this is necessary when you urgently need to edit some form for the treasury or bank. Anyone who works in accounting often faces the problem of creating and submitting documents for reporting. I rarely have to work in Excel, but if they ask for help, I can’t refuse. Just yesterday a woman from our accounting department came to me and, almost crying, asked me to help edit an Excel document. I don’t understand anything about accounting, but sometimes I’m simply surprised and outraged by the insanity of our treasury’s requirements. They require you to fill out a form using some form, and you can only get this form on the Internet or the Garant system. Naturally, such a form contains either the site logo or a link from “Garant”, and the Treasury does not accept such documents. So our accountants suffer with such documents.
Changing Column Width Using the Mouse
If we want to expand the number of rows in the table, all we have to do is copy the last row down. To reduce its number of lines, we will compress as many as we wish from below. Initially the table has 20 records. We want to create a graph like the following that displays 20 points that correspond to 20 billing data over time. We have added a trend line.
Using the first 3 arguments allows you to retrieve a value from a cell that is in the table. To do this, we must specify which cell we should start counting from, specifying the number of rows we must move and the number of columns to the right we must move. For those who know that Madrid is the zero kilometer of Puerta del Sol rows, this is the number of rows we have to move to get to the cell that marks the top left of the range we want to extract. If the rows are negative we move up, always taking as our starting point the kilometer zero columns is the number of columns to the right, we must move to get to the cell that marks the top left corner of the range you want to extract angular. If the bars are negative, it means we are moving to the left of our zero maximum. This is the number of rows that contains the range we want to extract the width is the number of columns that contains the range we want to extract.
- In this case, the function is a matrix and allows you to retrieve a block of cells.
- You must specify the starting point, the cell in the upper left corner, and the block dimensions.
- This is the starting point.
I just had to select everything that was on the form page and paste it into another excel file. Everything is fine, but all the data on the form is stretched to the original cell size. Initially, the cell size is - 8.43.
Now we need to reduce all the cells so that the document, when printed, fits on one sheet. There are several ways to quickly set the required cell size in Excel, but I will show you two of the easiest.
Method 1.
- Select the required number of cells.
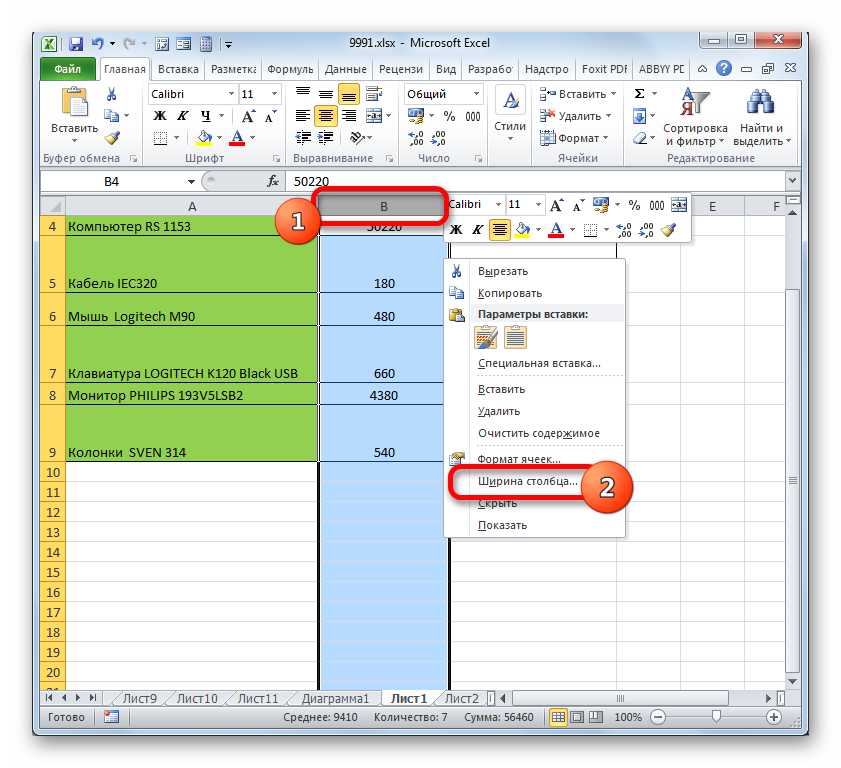
- Right-click on any cell with a Latin letter at the very top of the table column
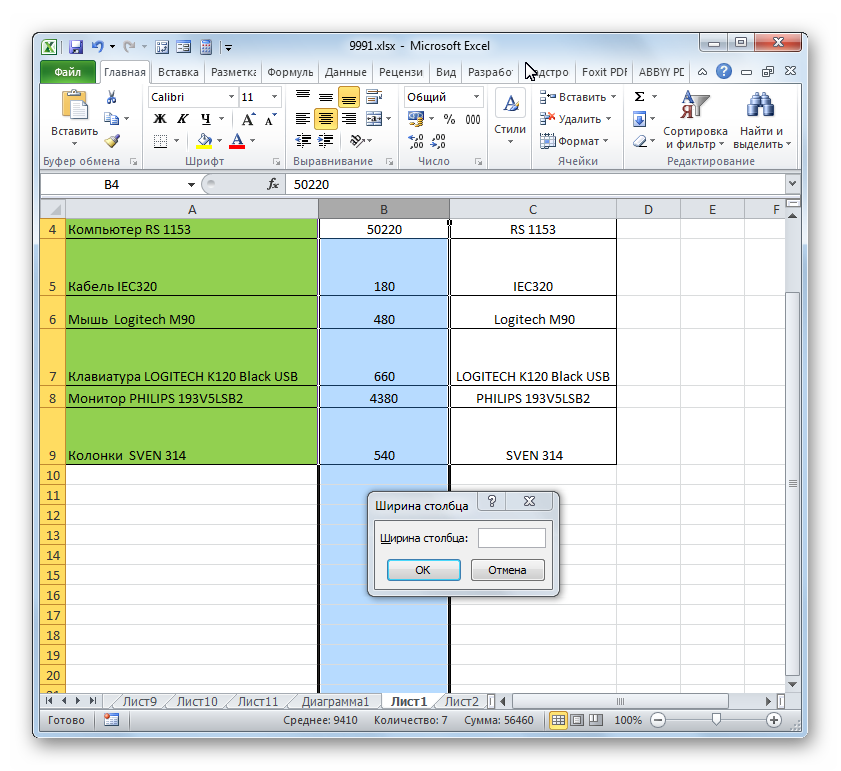
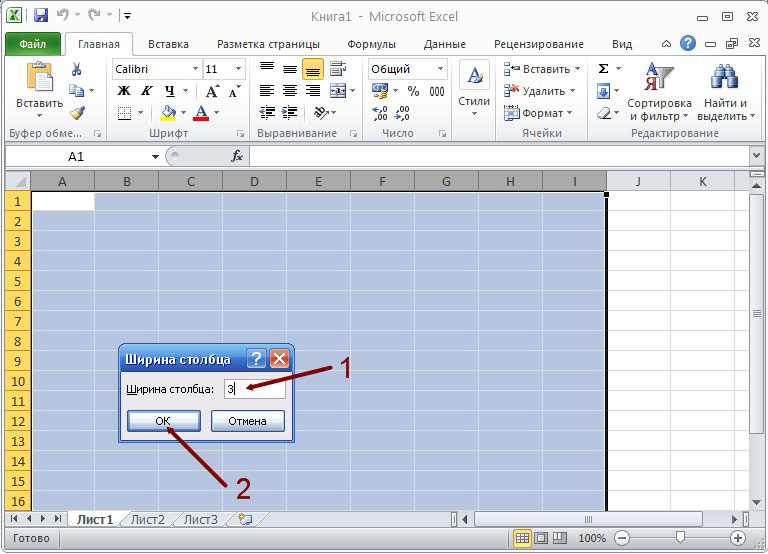
- Select the item from the drop-down menu Column width...
- In the window that opens Column width set your number and press the button OK.
Now cell size in Excel will be the one you specified.
Method 2.
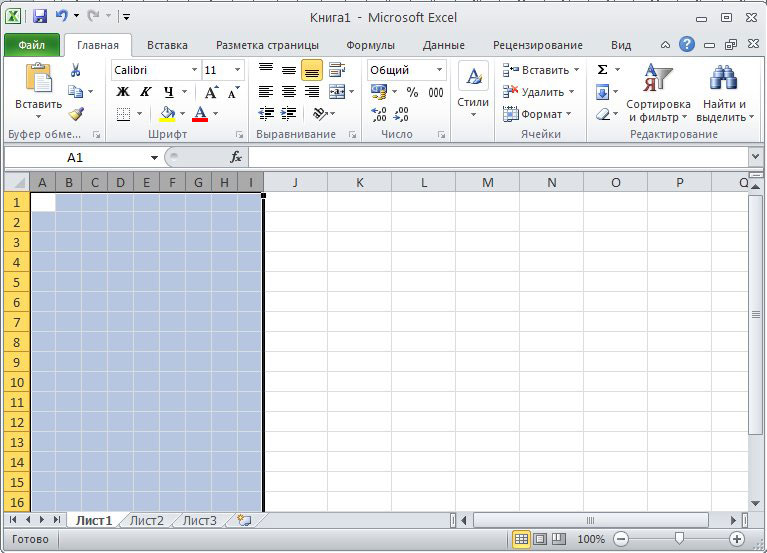
You can not select the required number of cells, but change their size in the entire sheet at once.
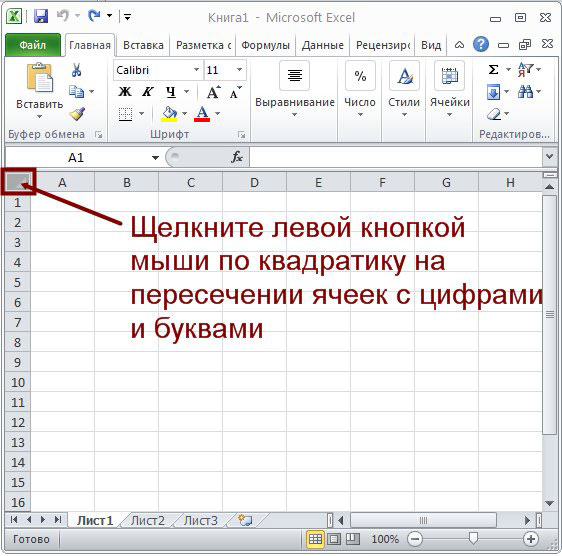
- Left-click on the square in the upper left at the intersection of rows and columns
- The entire sheet of the document should be highlighted.
- Now move the mouse cursor to the intersection of any column (where the Latin letters are written). When the cursor changes to a cross, click left button mouse, and without releasing it, reduce the column size to the size you need, and release the mouse button.
Thus, you have changed the size of the cells in the entire sheet of the Excel document.