Microsoft Word 2007 has several options for inserting a frame into a document. For example, you can use it as background image or add a custom design to a photo inserted into a document. Another option is to use its square shape as a general background. To understand how to insert a frame in Word 2007, you must study the menu on the main menu located at the top of the document and find all these options.
Method number 1 - the most common
- You can insert it as a picture preinstalled in MS Word. Click on the "Insert" tab located at the top of the page, and then click on the "Picture" button. Select the "Frame" type in the search field that opens in the previous step. Select the desired frame by double-clicking it.
- Open photo editing tools to place a frame around a photo in a document by double-clicking on the photo. At the top, you will be able to see several frames to choose from. Click on the one you want to insert around the photo. Change the color of the frame by clicking on "Image Borders" and selecting the desired value.
- Insert the lines that define the shape of the frame using the Shapes tool located on the Insert tab. Click the Forms button to see a selection of options that can be used as a basis. Click on the shape of your choice to insert it into your document. As you can see, this method makes it quite easy to make a frame in Word-2007.
Method number 2 - the fastest
You can add a frame using the Quick Access Tools panel.
- Open " Word options” from the Office button and select “Settings”.
- Find "All commands" under "Select commands from menu". Here you will be able to select a frame, and after you click "OK", the document will be updated.
Method number 3 - how to insert a frame in Word 2007 in web page format

- Select the New tab under the Office button to create a separate document. Click the New Border button above the button on the Quick Access Toolbar. The page will be split horizontally. Grab the separator cursor and move it up to create a narrow top border.
- Right-click at the top to edit the properties of the resulting file. Change the name and enter the border property settings on the dedicated tab. Click OK. This method of how to insert a frame in Word 2007 is most often used to develop a logo and site menu.
Method number 4 - frame in the text
Despite the fact that the above instructions are for the Word-2007 version, they can be used in any edition of the program. The only thing to consider is the location and name of the menu items, which may differ.
In order to make a frame in Word 2003, you need highlight page by clicking on it.
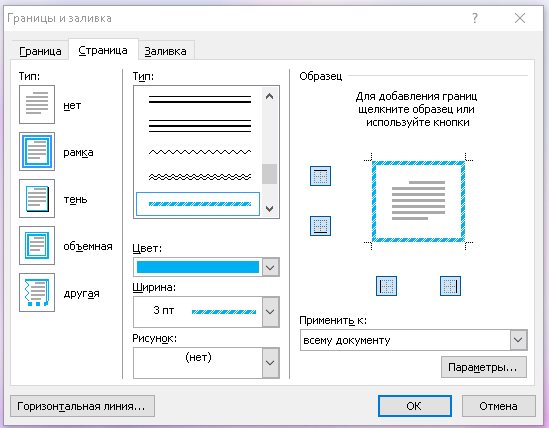
A window with the same title appears. In it, go to the second tab in a row, " Page”, where we select the desired parameters for the frame. 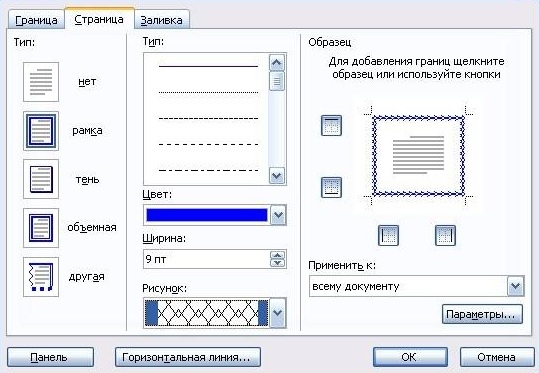
Here you can set Colour and thickness lines. The buttons on the right indicate on which sides of the sheet the frame will be located. In the list " Type of" can choose form lines - double, solid, or dashed. " Picture» allows you to set a border with one of the repeating template patterns.
To move the frame relative to the borders of the sheet, you need to click on the button " Parameters" in law bottom corner. 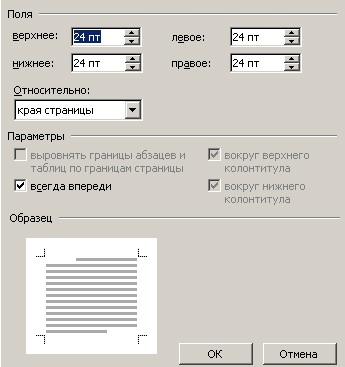
Frames in Word 2007, 10, 13
Since the 2007 version, the program interface has changed significantly. Now, to create a frame, you need to find the section " Page layout» and click on « Page borders». 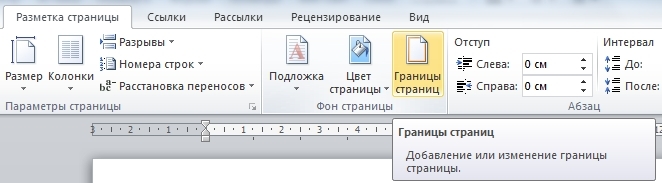
Starting from the 2013 version, this button has been moved to the " Design».
The window that appears does not differ from its previous versions. It displays all available options: Line type, color, line width, repeatable pattern, and sides on which borders will appear. 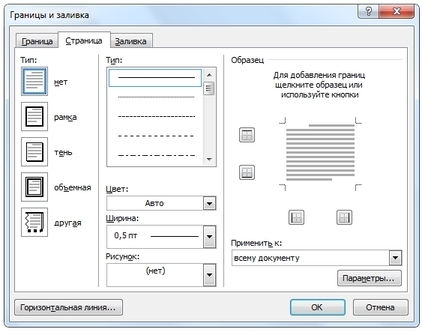
beautiful picture frame
Document framing can be done not only by means intended for this directly, but also by images, which allows you to significantly diversify the design of the document.
To do this, you need to download your favorite image of a suitable format. The larger the image, the clearer and more beautiful it will be when printed.
Next you need insert downloaded image to sheet. You can do this in the menu Insert" by selecting " Picture" or simply by dragging file in the program window. 
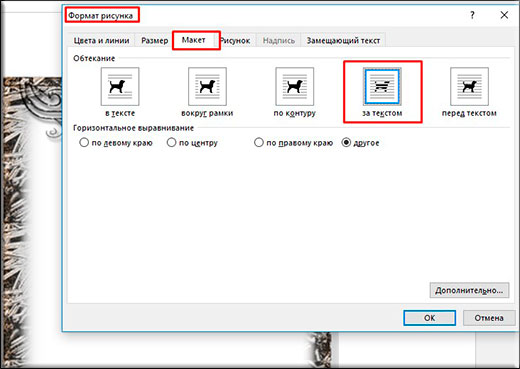
After that you will need highlight image by clicking on it, and right-clicking on it select " Size and Position» from the context menu. 
In the pop-up window, go to the " Wrap text» and select « behind the text». 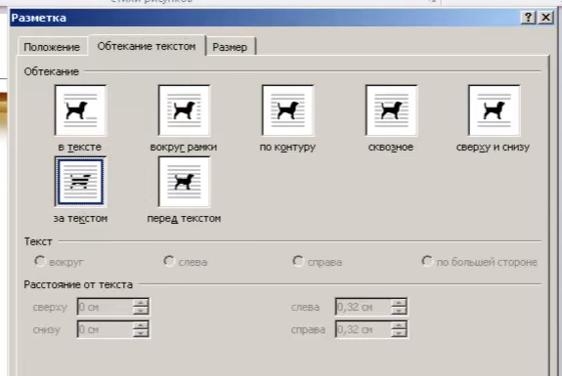
Now the image will not overlap the typed text and will remain on background. In addition, it is not tied to the borders of the sheet, and can move freely to the very edges.
If the picture does not fit, it can be stretch for the "corners" that appeared. Points at the corners are resized while maintaining proportions, and at the sides they are stretched vertically or horizontally.
Word has many tools with which you can format your documents correctly and beautifully. Moreover, a well-designed document design will say a lot about who compiled it. For example, you do not know exactly how to make a frame in word In Word 2007, the frame can be applied when writing a report or writing a letter, a table, and it can also be used by applying it to a single paragraph or to an entire page.
The knowledge about how to make a beautiful frame, will be useful to you when compiling a term paper, abstract, or thesis.
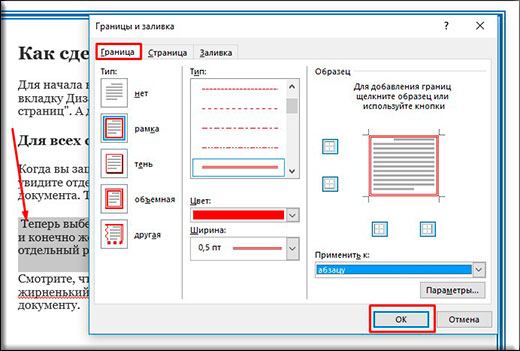
You can decorate the frame in "borders and fills
3. In the window that appears, there are 3 tabs at the top: "border", "page", "fill".
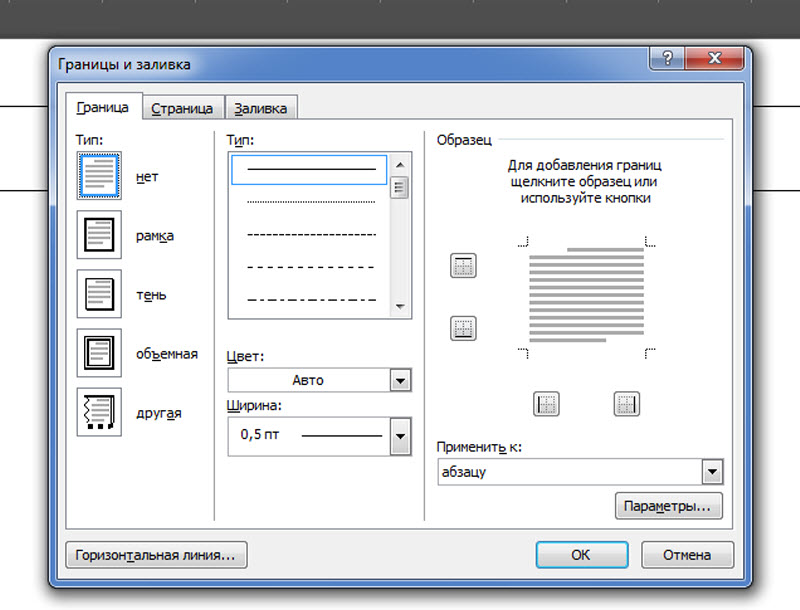
Here we select the line type and frame design.
Paragraph frame
Now we will directly begin to get acquainted with how to make a frame in word. Let's say we need to frame only a paragraph. We select it with the left mouse button and select the "borders" tab. In the first column, select the type of frame: with a shadow or with a volume and click on the selected view. In the second column, select the type of line that will be used to draw the frame, and also click on the selected line type. The third column shows a sample of what the border around the paragraph will be. You can also choose a color for the line. At the bottom it asks "apply to paragraph"? If your paragraph is initially selected, then the border will be on it. If you did not select the paragraph you need, then the frame will be on the last one.
The third tab of this window is called "fill". With this function, you can give any color to the inside surface of the frame. You can also choose a beautiful pattern and use the background for the pattern. If there are different blocks in the text in the frame, you can use the original horizontal lines, for example:

The frame in Word can be designed like this
And you can do this: In this window, in the first column, click "frame", select the line shape, fill and pattern for it. Next, you start typing in it, and the frame, along with the specified color and line shape, will increase as the text increases.
Pay attention to the indents from the printed text. If you make the frame larger, it will be more effective. Click "OK".
Frame for term papers on the whole page.
Now let's get acquainted with how to make a frame on the entire page in Word. Again we go - "lower border" - "borders and fills". Now we enter the second tab "page". In the first column, click on the "frame", you can "with a shadow" or "with volume". In the second column, select the line type of the frame and click on it. We also choose the color and indents from the text. Use the "apply" button. Note that this frame can be applied to all pages or just one. It can be chosen. Also click OK.
How to get a ready-made frame for term papers and abstract, explained in this video.
The Word text editor is so flexible that, if desired, you can create in it, and, and an advertising booklet, and, and even a beautiful one. And with the help of tools and drawing, you can make greeting cards and simple collages. There would be desire and imagination, and in the same Word you can create business cards, letters, and even colorful electronic ones. Many people use Word only as text editor, and nothing more, but just add a frame and the same plain text document will become much more interesting and attractive.
How to add a frame to a document, I will show you with an example of a text Microsoft editor Word 2010. Who has an old Word version 2003 installed on the computer, you can read this. And starting with version 2007, you can follow this article.
Go to the tab Page layout, and select the tool called Page borders.
If you want to make a frame only for a certain paragraph or block of text, then it is better to go to the tab The border.
If you need a frame for the entire sheet or even a document, then stay on the tab Page. The process of creating a frame for a specific paragraph, block, or entire page is exactly the same.
Choose Type of lines of the future frame, Colour, Width and how to apply it (to the entire sheet or just to a paragraph).
In the field where a sample of your future frame is shown, there are squares on the left and bottom, by clicking on which you can add or remove side and top and bottom borders.
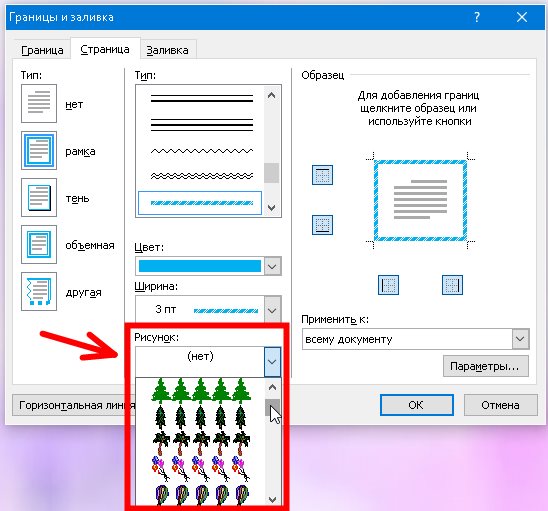
On the tab Page there is another interesting feature Picture. If you click on the small black arrow on the side, a drop-down list with small drawings of Christmas trees, hearts, apples, etc. will appear. Pick a drawing and see what you get.
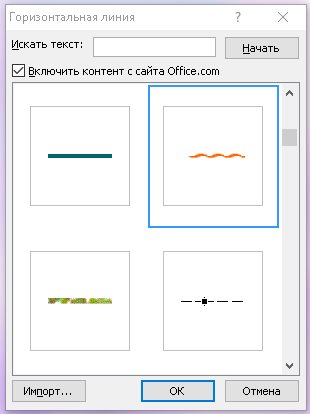
There is also an interesting button at the bottom left Horizontal line, with which you can make a beautiful dividing line at the right place in the document. The main thing before creating it is to put the cursor in the place where it should be.
Well, here we have considered another tool for our creativity. I hope that the framework will be useful to you more than once in your work.
Good day to all, my dear friends and guests of my blog. In my article today, I want to tell you how to insert a frame in Word to transform your document. In fact, this thing is very good, and there is nothing complicated about it, but there are differences in different versions of the office.
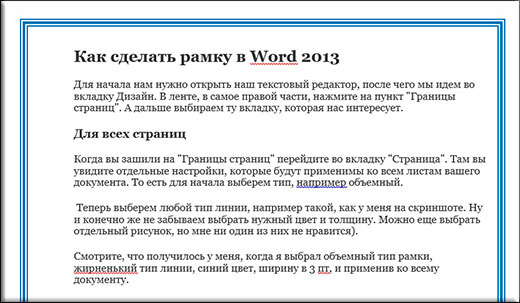
How to make a frame in Word 2013
First we need to open our text editor, after which we go to the Design tab. In the ribbon, in the rightmost part, click on the item "Page Borders". And then select the tab that interests us.
For all pages
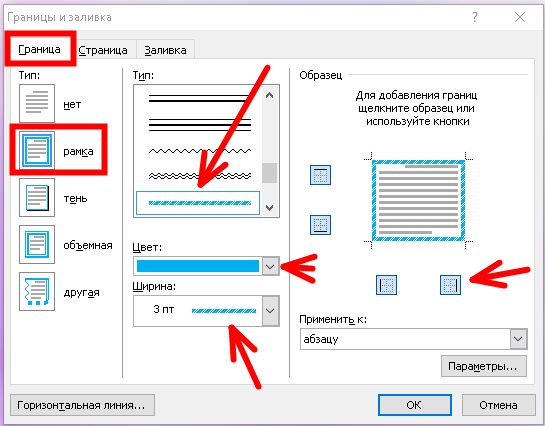
When you sewed on "Page Borders" go to the "Page" tab. There you will see individual settings, which will apply to all sheets in your document. That is, to begin with, we select the type, for example, volumetric. Now let's choose any type of line, for example, the one I have in the screenshot. And of course, do not forget to choose the desired color and thickness. You can also choose a separate picture, but I don’t like any of them).
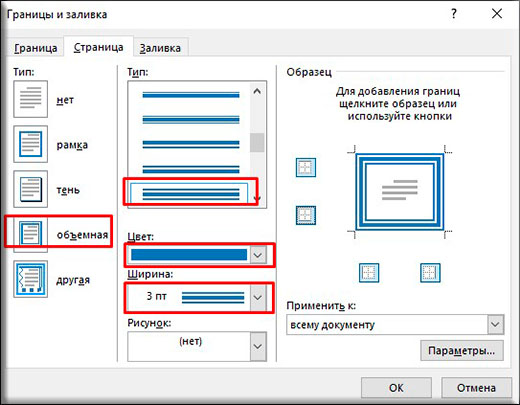
See what I got when I selected a 3D border type, bold linetype, blue color, 3 pt width, and applied it to the entire document.
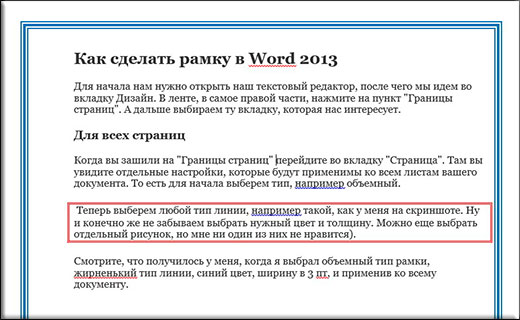
For a specific piece of text
But if you want to frame not the entire document, but only a certain part of the text, then you need to select this part, and then go to the above item, just go to the "Borders" tab. The essence here is exactly the same, but you only apply all this to only part of the document.
See what happened to me when I selected a certain paragraph and applied the border settings with red color to it.
Well, as you already understood, in order to remove the frame, you will simply need to put the type "No". That's all).
Other versions of WORD
If you are happy owners of earlier versions of the office, then you will need to log in a little differently.
In Word 2007 and 2010, everything happens in exactly the same way, you just need to initially open the tab "Page layout", not "Design", as it was in the previous example. Well, then again looking for an item "Page Borders" and do everything the same as before.
In Word 2003, the whole process is exactly the same, except that you need to look for the "Format" menu item at the top of the editor, and select the item from the drop-down menu "Borders and Shading".
Finished frames
In addition to the built-in frame editor, you can use ready-made solutions that can be easily found on the Internet.
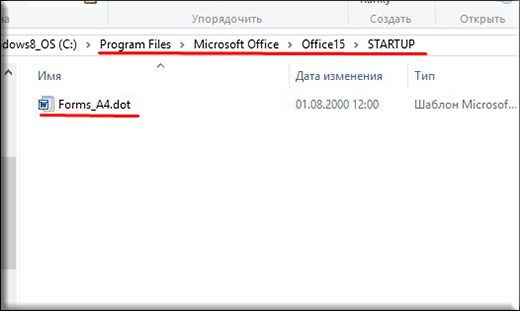
For example, if you need frames according to GOST, then you can download them. When the archive is downloaded, unpack it. There you will see the file Forms_A4.dot. This will be the frame template. But do not rush to open it just like that. Copy it to the folder where you have office installed in the STARTUP folder. Now you have everything installed.
Go to Word. We noticed that when you created a new document, an item appeared "Security Warning". It always does this when connecting external data. This is fine. Just click on "Enable Content".
Now go to the "Add-ons" menu. There you will see our uploaded data that we just copied to the office folder. By clicking on any of the provided templates, you will see how it will immediately fit into the document in accordance with all the rules.
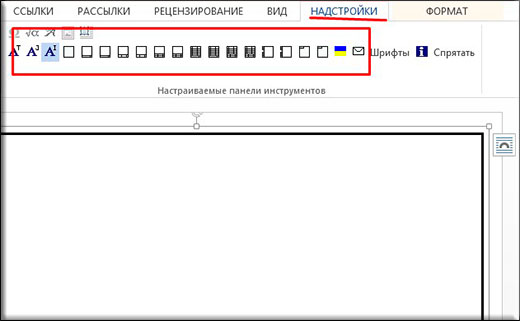
Just in case, I put a special font for forms of this format inside the folder. this font.
Patterned frames
In addition to the above, I suggest you use another way to decorate a document, namely loading external patterned frames. In fact, these are just pictures in the format PNG with transparent background. You can download them.
Now go back to your text editor, look for the menu "Insert", select "Picture", then look for those files that you just downloaded.
Yes, and don't forget to click right button mouse on this frame and select "Picture Format", then go to the tab "Layout", and then put "Behind the text". Well, now you can write anything inside this frame, as well as move it as you see fit.
Of course, they will not fit the entire sheet, but you can always stretch them and move them around as you need.

Well, that seems to be all that I would like to tell you today about how to insert a frame in a Word. I hope that this information will be useful to many of you. So I look forward to seeing you again on my blog. Look more often. Bye Bye!
Sincerely, Dmitry Kostin.