The computer can be configured so that when it is idle, the image on the screen is replaced by a certain dynamic image, which is called − screen saver .
In the past, splash screens were used to prevent the beams of electron guns from shining for a long time at the same points on the screen. This led to a gradual local destruction of the coating phosphor and the formation of brown spots on the screen.
Modern monitors do not face such a problem, but according to the old tradition, screensavers continue to be made dynamic and mostly in dark colors. The role of screen savers has also changed - now they are used not to protect the screen from phosphor burnout, but to protect documents from prying eyes. When a person leaves the workplace for a few minutes, the screen saver hides his work from others. If desired, the screensaver can be configured so that it cannot be turned off without knowing the password.
The selection and configuration of the screen saver is performed on the Screen Saver tab in the dialog box - Properties: Screen - on operating systems prior to Windows 7. For Windows 7, right-click on the screen > Personalization > Screensaver.
Here you can also configure the operation of the computer's energy saving system, but more on that below.
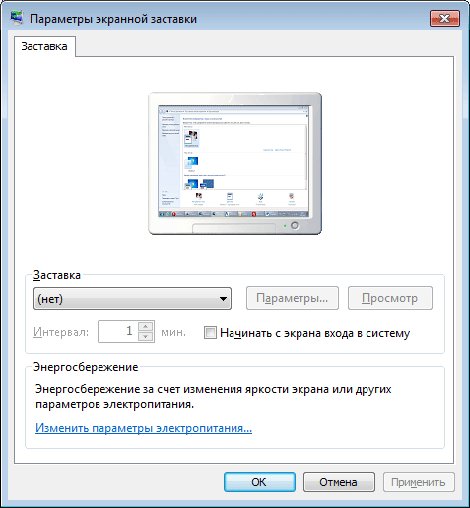
A number of standard screen savers are installed on your computer with operating system. Select a screensaver from the drop-down list - Screensaver.
After that, a small copy of the splash screen is displayed in the area preview. To expand the splash screen to full screen, click the View button. In the Interval field, specify the time after which the screen saver should start playing automatically. If you want to protect the screensaver with a password, check the Password box and set the password using the Change button.
For Windows 7 screen saver password protected, through power settings, to do this, click - change power settings
and get into the following window, where we click - request a password on awakening:
We go to the next window, where we put a tick on the password for our account.
Many screensavers have internal settings. It is pointless to talk about them in general, since each screensaver has its own. Screen saver settings, if customizable, are accessed via the Options button. Will you enjoy screen savers and whether the Screensaver tab is useful to you in future work is a matter of taste.
Energy saving functions can be configured here if necessary. If not needed, turn them off. This procedure is intuitive and does not require detailed explanations.
Controversial point - Why should and should not turn off the energy saving system? Isn't it necessary to conserve electricity?
Firstly, there have not yet been cases where the energy saving system would help the operation of any program, and crashes in programs due to its unexpected interference are by no means uncommon. Secondly, it is necessary to save not electricity, but labors - one's own and others'. It is terribly insulting to approach a computer with a blank monitor and press the power button (for example, in the office, this probability increases). I hope now you understand why it is necessary to install splash screens...? 🙂
It is easy to guess that the computer will, of course, turn off, and the work that was not completed on it will be lost ... One such failure is enough to not rely on automation in the future.
P.S. Be carefull! And remember: - the guarantee of the health of your "computer" and your nervous system. With respect to you, Nikitin Vladislav.
Through which you can contact me and suggest a topic for the article you want to see. Today I am publishing an article specifically at the request of my reader who contacted me through this way and asked me to write an article on how to put a photo on the screensaver.
First of all, after loading the OS (operating system), we see exactly the desktop, so everyone wants to put a background picture. This procedure is carried out in several ways in all operating systems. Today we will look at the example of setting the desktop background under windows control XP, many more use it on their computers, since the hardware of newer systems does not “pull”, just like OS 7 and Windows 10.
A little earlier, a friend asked me to write an article on this topic, thanks to him I wrote various articles before that. I won't refuse this time either.
A photo or picture on the desktop is installed under the guidance of Windows XP in at least two ways:
First way:
*Click right click mouse (RMB) in any free space on the desktop and select "PROPERTIES"
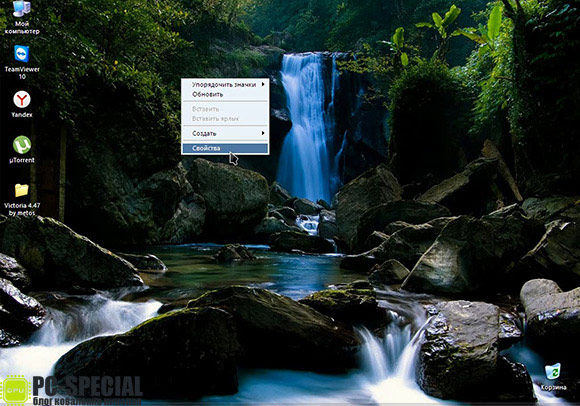
*Display Properties window will open. Go to the "Desktop" tab 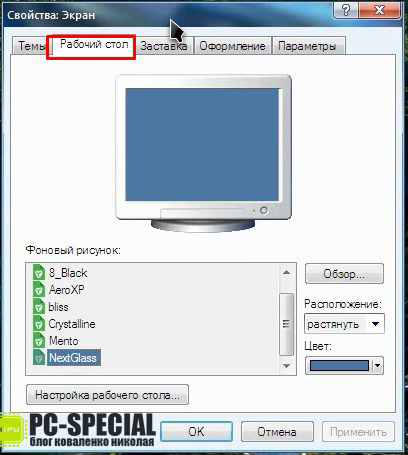
* We find the field "Background Image". It already has different default drawings. 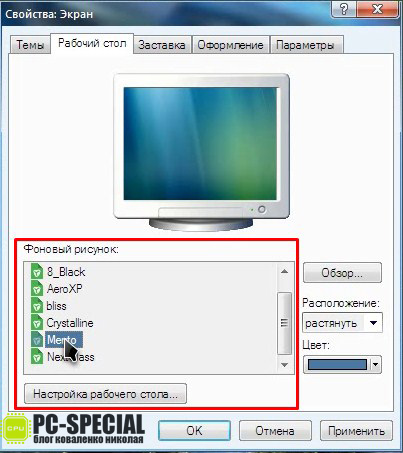
*Having chosen the one you like from the list, you can set its location on the screen in the corresponding "drop-down" menu. 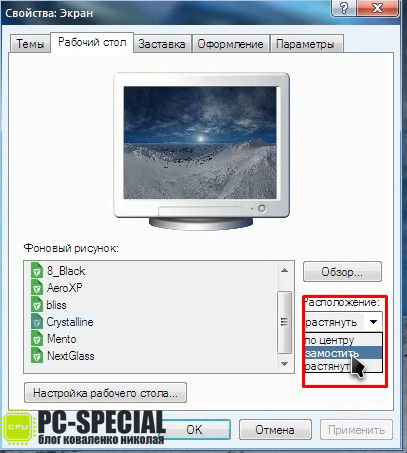
What to do if you want to put your own or downloaded picture? In this case, everything is very simple. Open the picture or photo that you want to see on the splash screen, and anywhere in it, by right-clicking, select the item "Set as desktop background". 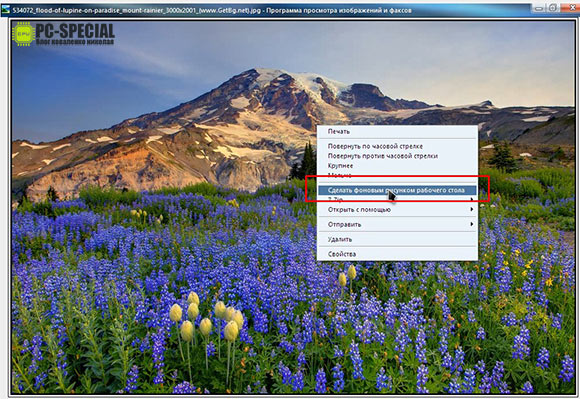
The same procedure under windows 7 is carried out a little differently:
* RMB on the desktop and select "Personalization" 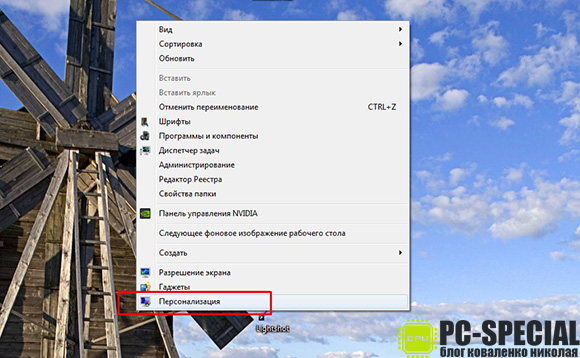
*In the window that opens, you can select the default theme. 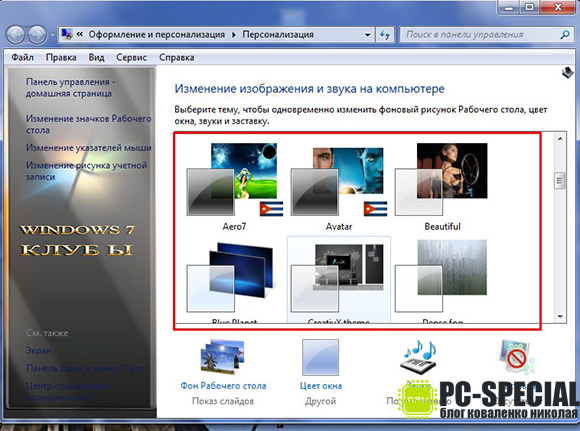
Choosing a theme changes background picture, window color, sounds and screensaver. 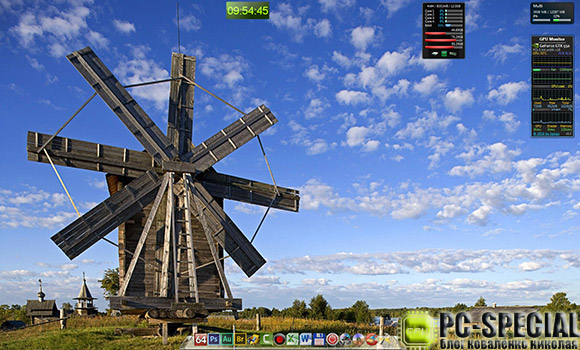
Also, when choosing a theme, the backgrounds change to those that are part of it.
*If you want to choose a permanent desktop background, then for this, below the theme area, there is a menu "Desktop Background". 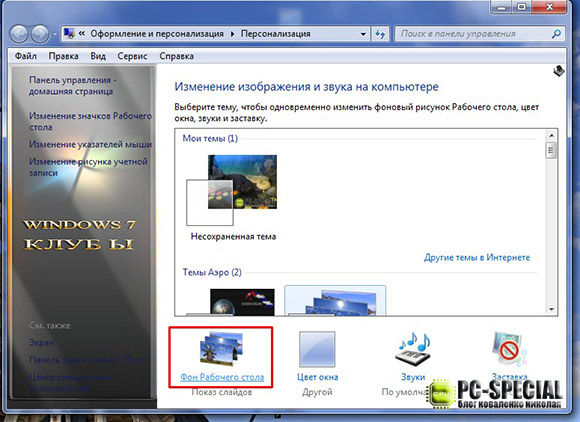
* By going to this menu, we are given the opportunity to select a background image. Click on the "Browse" button in the "Image Location" field and select the path to the picture, then click "Save Changes". 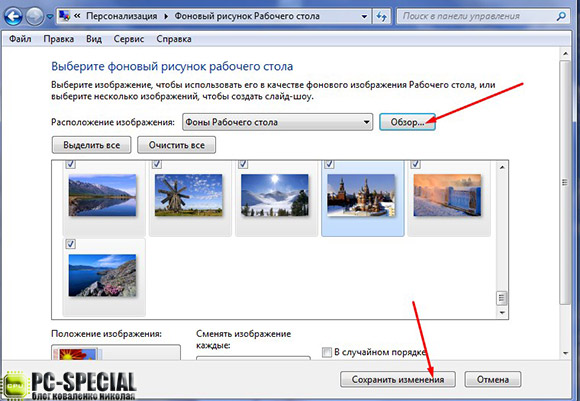
*If you specify a whole folder with selected photos (drawings), then all of them will change after a specified time interval. 
*In addition to choosing the time to change the picture in the "Change image every" drop-down menu, there is also the "Image Position" menu, as in Windows XP.
The way to set your photo as a splash screen in windows 10 is also simple:
*Here, too, there is "personalization". We select it in the same way as in Windows 7: RMB click anywhere on the desktop and find the desired item. 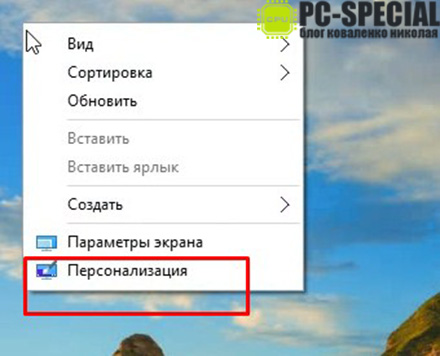
* In the window that opens, select "Background" on the left. 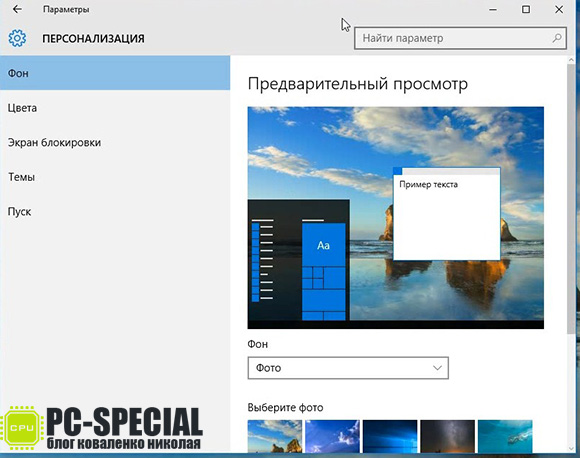
*In the right part of the window, from the drop-down list, choose at your discretion what to use: a photo, a solid color, or a slide show. 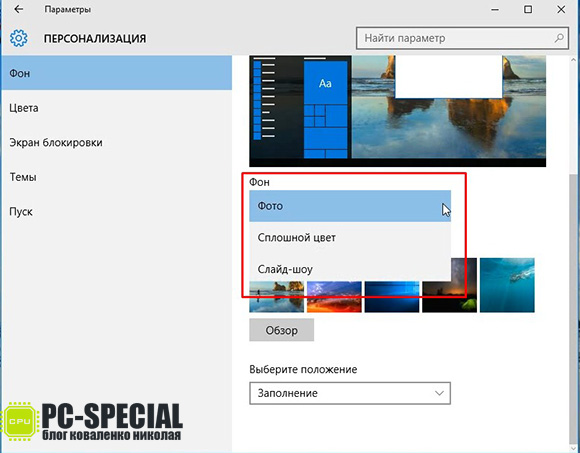
*When choosing “photo”, we are offered some of them by default, or you can use the “Browse” button to set the path to the desired photo. 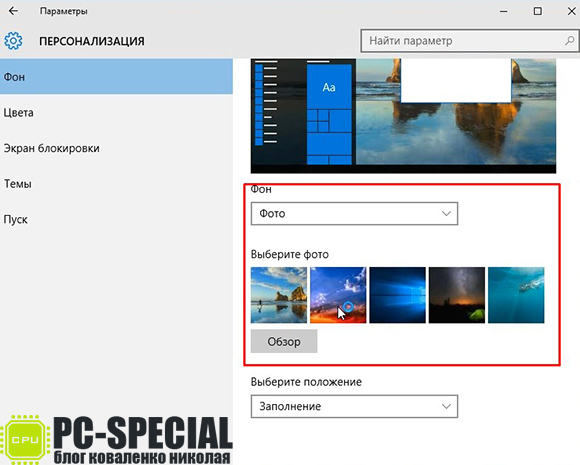
*When viewing a picture on a PC using the standard "Photos" 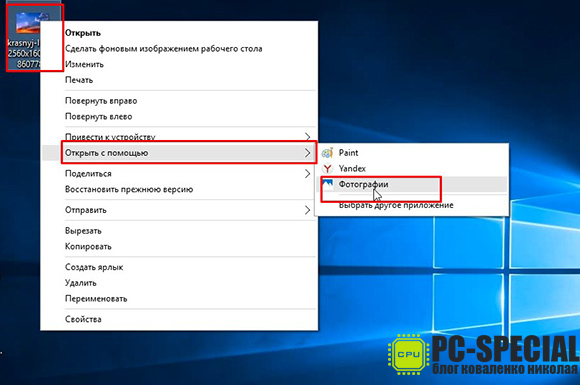
This OS enables the wide use of viewed photos. The control menu is shown in the screenshot below: 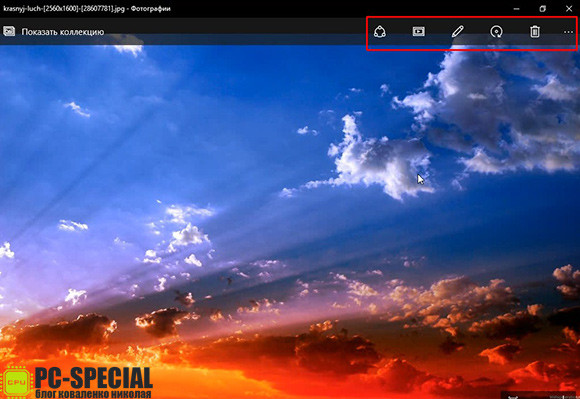
*You can "Share" the picture in the social. networks if you have access to the Internet. 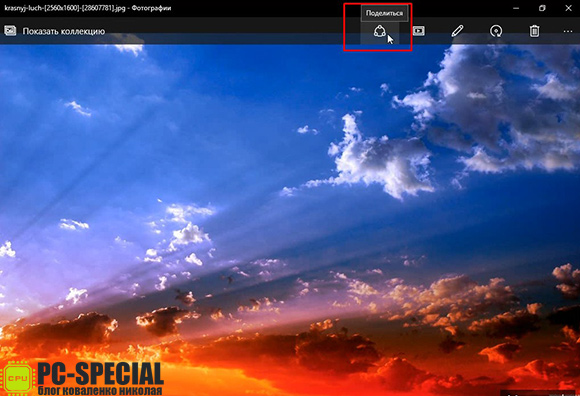
*If there are more pictures (pictures) in the folder with an open photo, you can view them in a “slide show” by clicking on the corresponding icon. 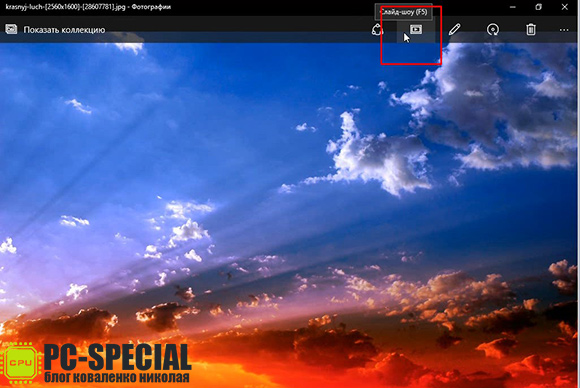
*We are also given the opportunity to make changes using standard editor in OS 10. 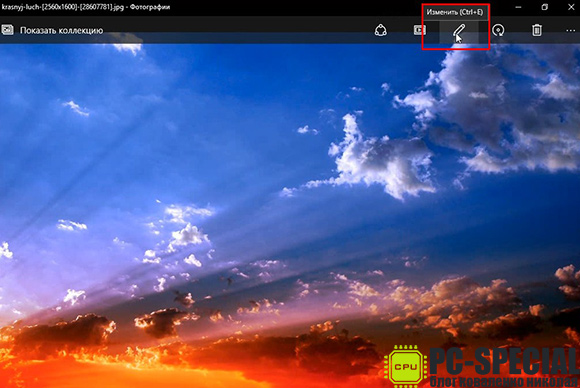
*Would you like to rotate the image? No problems. Click on the rotate icon. 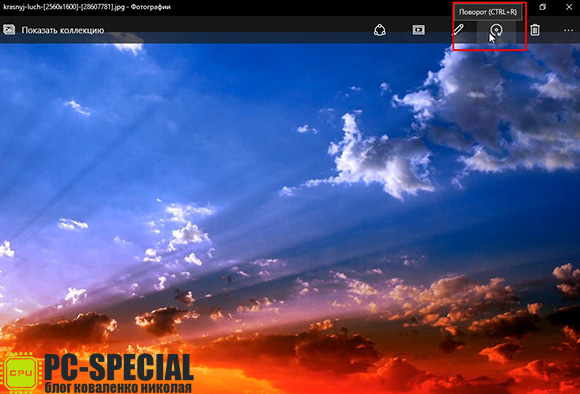
*And it was not without the necessary “delete” function. 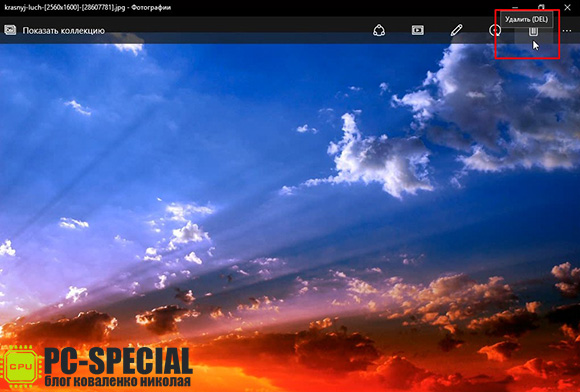
*There is an icon in the form of three dots in the right corner of the "management" menu of the item being viewed. We click on it, and there are several more options for managing it. We see them on the screen below: 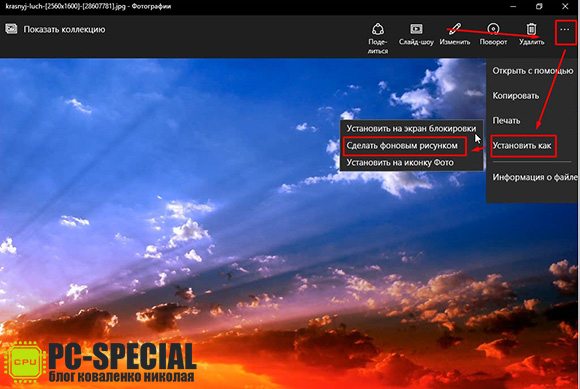
Since we are considering the topic of how to put a photo on the screensaver, we are interested in the “set as” item. By clicking on it, we choose how we will use this photo. Of the proposed options, namely, “Set to lock screen”, “Set as wallpaper”, “Set to photo icon”, select the second one.
After selecting a few seconds, we observe the process of setting the background and we can observe the picture we have chosen as the desktop background. 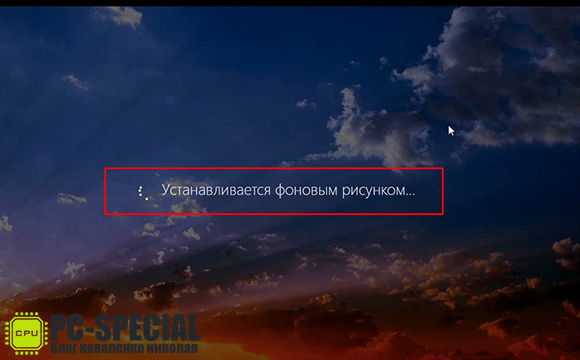 After reading this article, I think many people wondered how in one day I was able to consider how to carry out this operation on three different operating systems. The answer is very simple. I have two virtual machines installed on my working computer on which I installed Windows XP and 10 for such purposes. Do you want to know more about virtual machine? Read
When idle for several minutes, the operating system can automatically hide the contents of the screen, covering it with a colorful splash screen. In the past, splash screens were used to prevent phosphor burn-in in locations subject to constant, long-term exposure to electrons. Therefore, it has long been customary to use a dynamic (transforming) image as screensavers.
Today the role of screensavers is different. Burnout of the phosphor no longer threatens modern monitors, and screen savers protect information from prying eyes.
Self-creation of screensavers requires programming skills. This is not an easy task, so many use ready-made screensavers. A small collection of screensavers is included in the installed Windows 7 system, others can be found on the Internet, for example, at screensavers.ru.
The screensaver usually turns on automatically if the computer has been idle for a set amount of time. It is selected and configured on the Screen Saver tab of the Screen Properties dialog box. All screensavers of the operating system installed on the computer can be seen in the drop-down list. In the list, you need to select the desired screensaver, and set the interval time.
Sometimes you need to force the screen saver to turn on. To do this, you can use the View button on the Screensaver tab. The screensaver can also be run as a program. Screensaver files are stored in the C:\Windows folder and have a name extension of . SCR. To run them, you can use the dialog box Run the program (Start - Run).
In order for the protection of the computer screen from prying eyes to be complete, it is necessary that no outsider can reset the screensaver. This is only possible when Account user is password protected. "Restricting access to the computer." To protect, on the Screen Saver tab in the Display Properties dialog box, select the check box. Start with the welcome screen.
When you leave your computer, turn on the screensaver. If you try to disable it, the welcome screen will open. You must enter a password to access the session.
Instead of using a screensaver, you can lock your computer by pressing a key combination WIN+L
- sound effects assigned to events.
A home computer or laptop is an individual thing, the design of which you want to make in your own taste. Therefore, acquiring new computer or reinstalling Windows 7, we, first of all, select beautiful wallpaper on your desktop and an interesting screensaver. After all, what is offered by the operating system is unlikely to please every user.
How to change wallpaper?
You can change the desktop background image using a chain of simple steps:
- opening the control panel;
- selecting the item “Appearance and personalization” in it;
- mouse click on the sub-item "Personalization".
The following window will open in front of you:
In this window, the main items are marked that allow the user to personalize a computer under Windows 7. The marks in the screenshot indicate:
- Pre-installed themes that can be put instead of the background on the desktop.
- The current picture.
- Opening settings to change the splash screen (this item will be discussed later).
If you are not satisfied with the standard themes for your desktop, you can install on it any picture previously saved to your computer.
Setting your picture
To change the wallpaper, you must click on its icon, marked with the number "2" in the previous screenshot. After that, Windows 7 will give you another settings window:
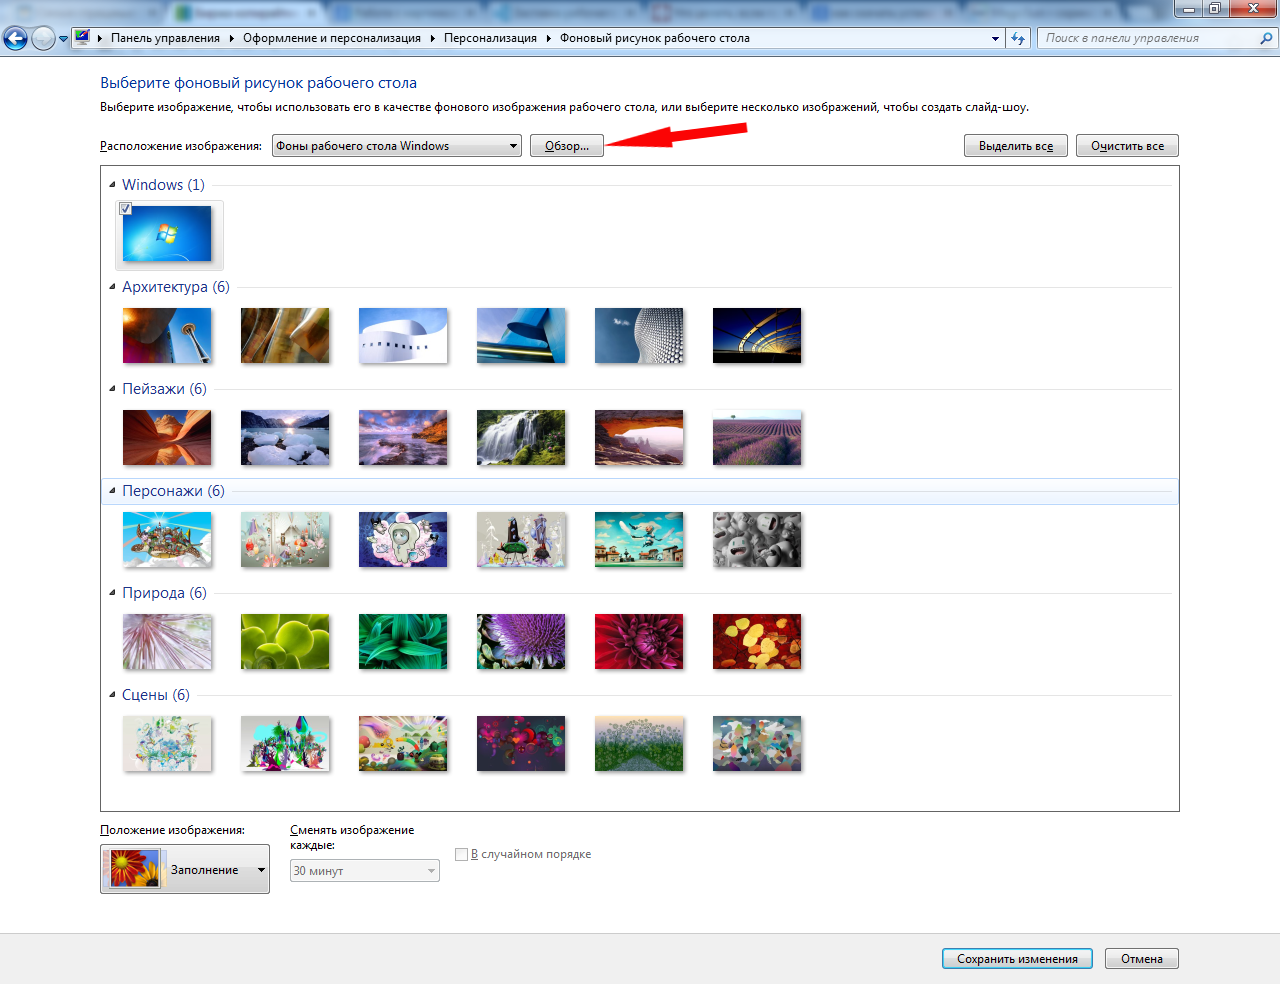
Here you are required to select one of the standard images or click the "Browse" button, marked in the screenshot with a red arrow. After these steps, you will be prompted to select the folder in which the saved drawings are located. After confirming your choice, you will see thumbnails of all images in the following window:
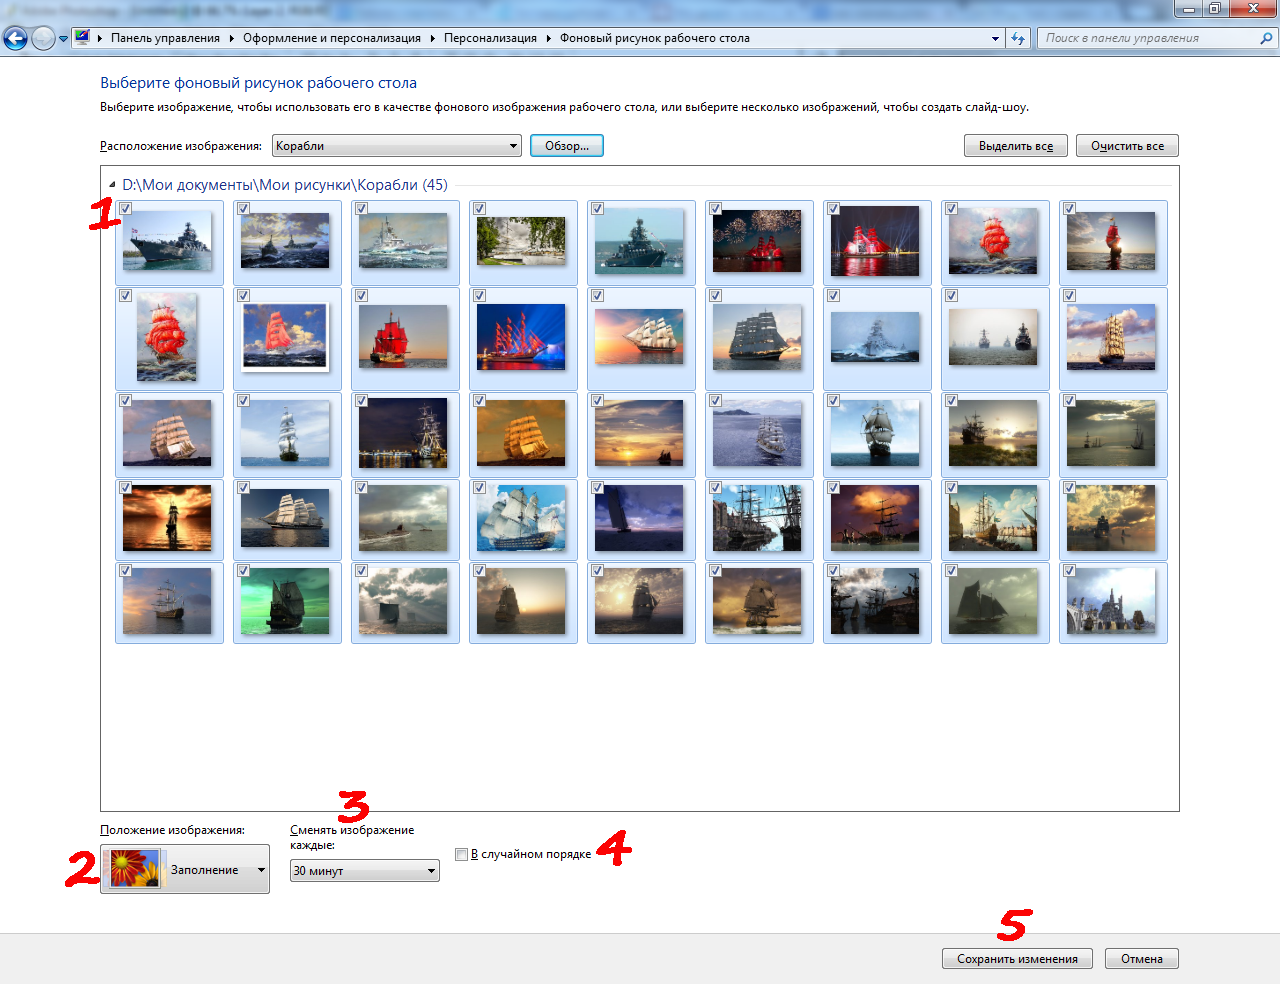
By following the marked points, you can:
- Select the desired pictures for the desktop with checkmarks.
- Choose how to display them on the screen.
- Select the period of time after which one picture will be replaced by another.
- Check the box "Random" if random display of frames is required.
- Save changes.
To make it easier to select slides in Windows 7, there are "Select All" and "Clear All" buttons located in the upper right part of this window. If you do not want to arrange a slide show, but just want to install one image on the desktop, item number 3, which is responsible for the time of changing the picture, will be inactive.
After saving the changes, you can enjoy the selected pictures or photos on your computer screen.
Changing the splash screen
Even a novice user knows that the screensaver is triggered after the computer has been idle for a certain time. The screen saver can display a plain black screen or a beautiful animation, so choosing something to your liking is not at all difficult.
Selecting one of the preset screensavers
To proceed to editing, you need to click on the corresponding icon marked with the number "3" in the first screenshot. After that, you will see the following settings window:

Here you can:
- Choose the appropriate screensaver option.
- Specify the interval after which this screen saver will run.
- Click the "Apply" button to save the screensaver.
The "Options" button is intended for additional display settings, but in most standard splash screens such settings do not exist. Using the Preview button, you can see how your chosen splash screen will be displayed in full screen, and not in miniature.
Create your own screensaver
As with setting wallpaper on the desktop, here the user can also create personal screensavers. For example, you can make your own screensaver from photos or any images. In this case, when the computer is idle, slides with marked pictures will be displayed on its screen.
To create such a screensaver, you need to select the “Photos” item in the “Screensaver” menu (marked with the number “1”), and then click on the “Options” button. You will see a window like this:
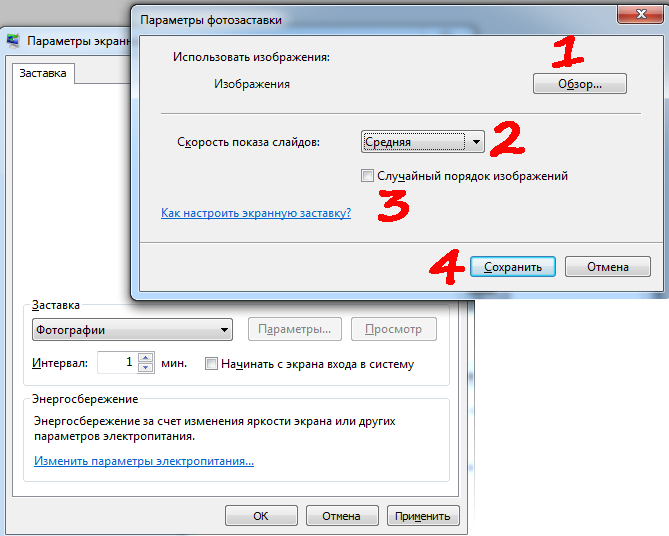
Here you can:
- Select the folder from which the pictures for the slides will be taken.
- Specify the speed of their change.
- Mark a random display, if necessary.
- Save changes.
After entering the necessary parameters, you need to click the "Apply" button in the main screen saver settings window for Windows 7.
Installing a new screensaver
The standard set of screensavers is rather meager and does not allow you to unfold your imagination, and storing a lot of photos on a disk is not always advisable. For a change, you can download a new screensaver and install it on your computer.
The screensaver can be found on the Internet, after which the downloaded files are copied to the address:
- C:WindowsSystem32 if you have a 32-bit system;
- C:WindowsSysWOW64 - for 64-bit system.
After copying, you can open the screensaver settings window, as described above, and find a new screensaver in the corresponding list.
How to put a screensaver on your desktop?
How to install a screensaver on your desktop
The expression to install a screensaver on your desktop can be understood in two ways!
Option number one:
download the screensaver and install the screensaver, for example, screensaver matrix ! Which is installed in the same way as a regular program.
Option number two:
You have a computer on which you simply need to install a screen saver on your desktop. Set the screen saver to automatically turn on after a certain amount of idle time when you are not working on it.
Click on the desktop, select personalization.
We get to the tab for changing the image and sound on the computer. We go to the lower right corner - the splash screen.
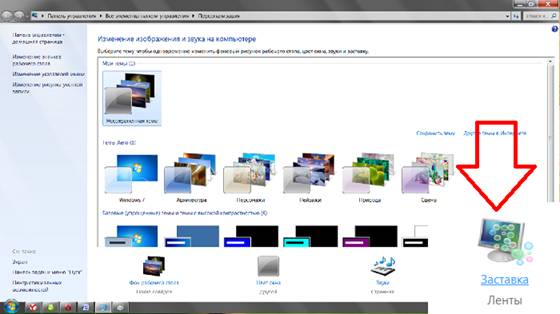
A new window comes out, in the drop-down menu there are already pre-installed screensavers in Windows.
Select the screensaver you want to install on your desktop. To see how it will look, click the preview button. The button - parameters, works only for screensavers in which you need to set a folder for viewing. These include the photo album screensaver and the photo screensaver. In them, you need to set in the parameters, the folder for the location of the photos.