We make an adapter 44pin IDE HOST to SATA HD.
Rice. 1 What did the user want?
In this case, the user wanted to connect external SATA devices to the IDE controller of the laptop (in a simple way: make an eSATA output from the laptop). And for this he needed a 44pin IDE HOST to SATA HD adapter.
The reasons for such an original solution are very simple - 44pin IDE screws for a laptop have not been sold for a long time - they have died out, and tying a new IDE screw at an exclusive price (several times smaller than a SATA screw of the same price range) to an old laptop is not always financially justified and convenient, since in this case (and for these specific user conditions) it is better to have a capacious external drive to transfer files and movies, and if necessary, connect it to a laptop via eSATA and boot a laptop from it ... And so we came to our TOR: the need to have an eSATA input on the laptop case.
But that's not the task of 44pin IDE HOST to SATA HD in nature. And there is only a reverse SATA HOST to 44pin IDE HD for connecting laptop 44pin IDE screws to a SATA desktop computer. Such an adapter is filmed in Fig. 1.

Rice. 2 What do we have in stock?
There is a universal adapter on the chip that, according to, allows you to connect IDE HOST to SATA HD or SATA HOST to IDE HD (depending on the SATA connector involved, more details in it).
On the chip, adapters are made by everyone who is not too lazy, and therefore they are called by each in their own way: RXD639, RXD-629, PATA2SATA2, AS308 and so on. And since everyone uses the same microcircuit, they are the same.

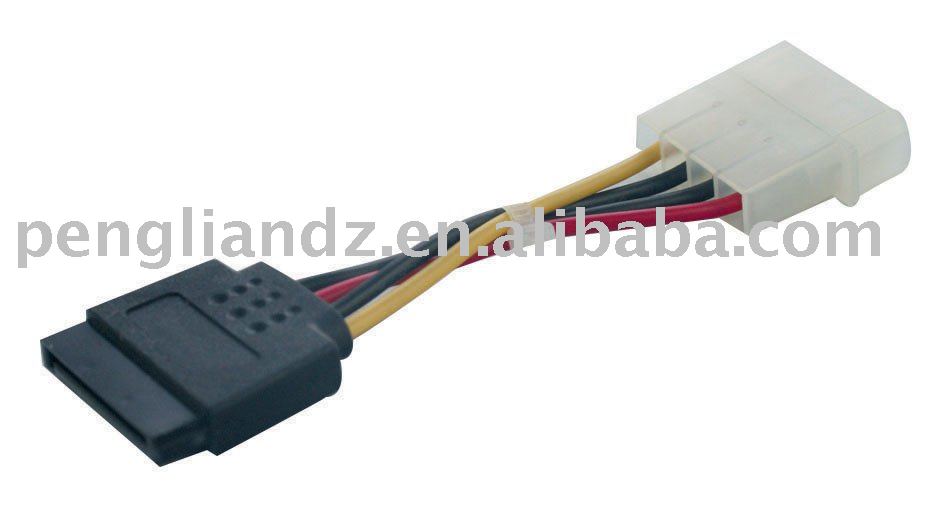
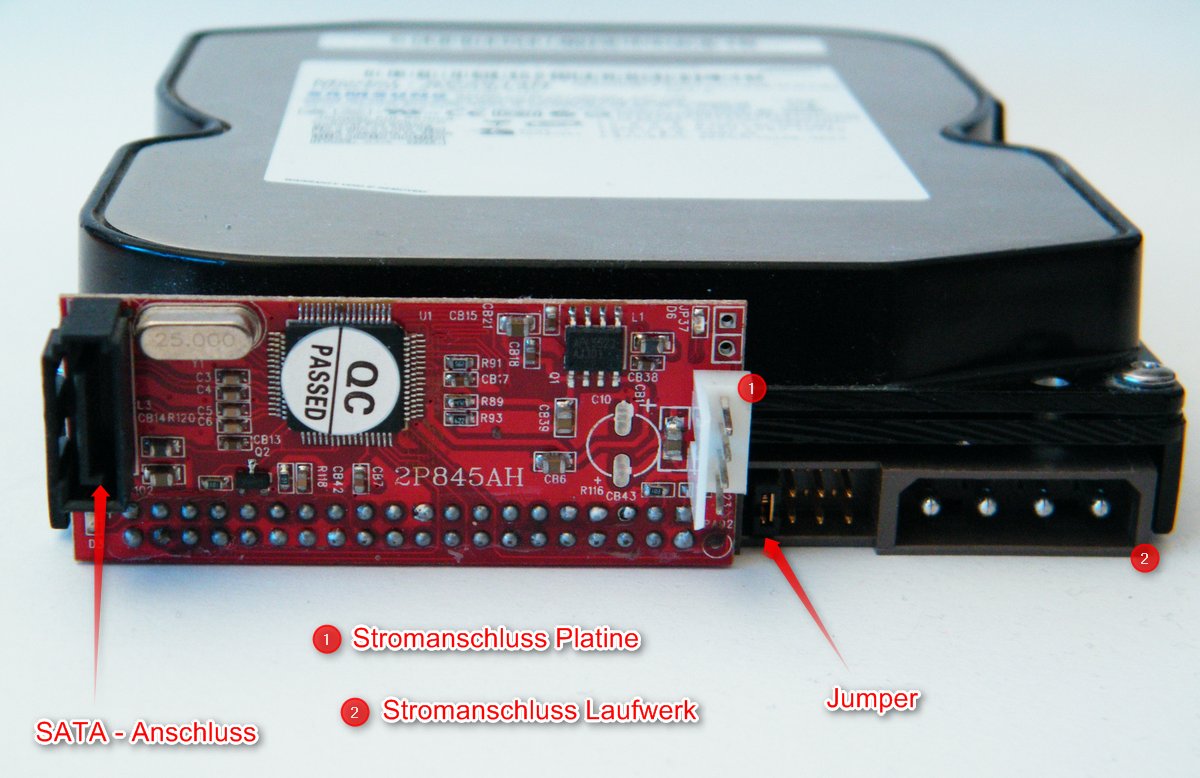
Rice. 3 And what prevents it from being used as is?
Using the adapter as it is is hindered by the fact that IDE HOST to SATA HD to 44pin adapters are not released (more precisely, at the time of writing this material, none were available on the Internet). And available only for 40pin (shown in Fig. 2 and Fig. 3). Figure 1 shows the return adapter SATA HOST to 44pin IDE HD (connect a laptop screw to a stationary device), which we don’t need, but if it suited us in terms of electrical parameters, it wouldn’t fit in the place of a regular laptop screw.

Rice. 4 We take a soldering iron and finish it!
Okay, let's look at the pinouts of IDE40 and IDE44, looking for an adapter between them. We notice where on the connector the key is in the form of a ledge and where the key is in the form of an unconnected pin 20. After studying, we proceed to the assembly.
We cut off the connector (44 pin) from a dead laptop screw with ordinary scissors and solder the mounting ears in turn from the cut connector (these are two strips along the edges). Those. we heat them with a soldering iron and slip a safety razor blade between the board and the ear, wait for it to cool down, take out the blade.
After unsoldering both ears, we press the textolite and all 44 pins of the connector peel off from the board along with the tracks. We remove the remnants of the exfoliated tracks from the connector with a soldering iron and bend all the odd pins of the connector, while leaving all the even ones as they were.
From any IDE40 cable we cut 8 pieces of wire with 4 cores and about 5 cm each. Next, we tin the segments from both ends and solder everything through one to the odd pins of the connector (to the bent ones). We bend all the even wires with tweezers and solder them to the even pins of the connector. We check visually for a short circuit and fill it with hot glue. We take a tester and call all the ends for both integrity and short circuit (to adjacent pins).
If there are no short circuits and everything is soldered correctly, then we bend all the even ends of the cable and according to solder them to the even ends of the adapter. Then we turn the adapter over and solder all the odd ends. Solder +5V power supply. Visually check for short circuit and fill with hot glue.
To check, I took the USBIDE44 adapter and checked the USBIDE44 = IDE44SATA = SATAHDD system through it. For those who do not know what the USBIDE44 adapter looks like, I will clarify, in Figure 4 it is located at the top.

Rice. 5 View from the underside.
Well, after all the checks, it’s generally simple - we buy an eSATA kit for the back of the computer, saw off one of the two eSATA ports, shorten the wire to the required length. We buy a class A USB connector in the store and supply it with + 5V power and ground from an adapter to power an external screw (so as not to occupy the laptop's USB).
After that, we carefully saw holes in the laptop case, put an adapter instead of a screw and glue two connectors (power and eSATA) with hot glue - that's all.
Well, the estimate:
Adapter USBIDE44 = $10 (only for testing - not installed in a laptop).
Adapter RXD-629 IDESATA = $3.
eSATA kit = $3.
To be continued....
Restrictions.
The device is designed AS IS and the author is not responsible for any apparent (or implicit) damage caused by repetition.
That is, you do all the experiments at your own peril and risk.
If you have any questions or suggestions, please email me at the bottom of the page.
If you found something interesting or useful for yourself on my site and want to see new interesting projects on this site, as well as support, improvements to existing projects, then everyone can support this project, partially cover hosting fees, development and rework costs projects.
| Copyright 2007-2012 QuickWitted | Mail grani DOG mindrunway RU |
Hello! I got an old laptop, I decided to give it a new life. What came out of it, what “nuances” arose.
They gave me "for spare parts" old comrades Acer laptop Travelmate 290. “The old one still doesn’t work.” The “breakdown” was that someone had already gotten to me to “spare parts” - missing HDD and operative. Threw others, borrowed for a while - it works. Somehow it was a pity to start up the old man for scrap.
I understood that the idea of restoring an old laptop to a Pentium M was a pointless business. But, somehow, the hand did not rise, and the laptop looks like it was just standing there and the dust was blown off. I was very surprised by the perfect condition.
So, it's decided, I'll do it! I have in stock IDE drive was not, I looked at the prices of the local "hucksters" for details. Yeah... - 20 euros for a used 60Gb, this is the cheapest I found, for a used disk 10 years (minimum) ago. I decided to look at the adapters, the Chinese comrades have everything for everything, it has long been known. Found. Paid. By the way, it came quickly - in 10 days. They threw it right into the box. Yellow envelope. Inside - 
I planned to “screw” it to a laptop with a Kingdian 60Gb SSD. Inserted on the withdrawn fee. Nothing appeared in the BIOS ... But, while I was waiting, I studied the topic a little.
So, nuance number 1 - there is a jumper on the adapter board 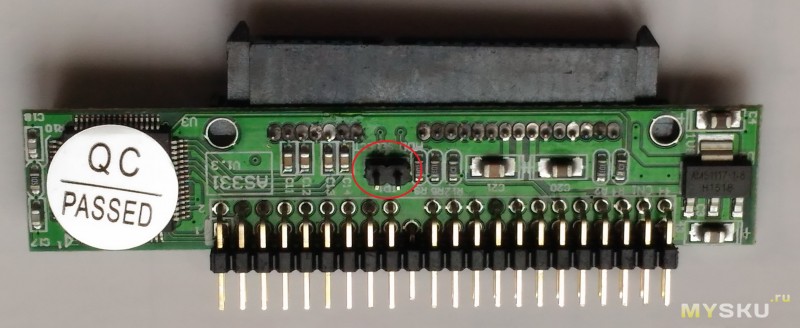
Initially it is worth it. We remove, turn on - yes, everything is ok, even the name and volume are displayed correctly.
Began to collect - nuance number 2 
I also expected this, which is why the SSD was chosen. It can be taken apart and 

Everything fits, and there is still room left :-)
Initially, the canonical Windows system xp. There were no problems with its installation. The BIOS was flashed to the latest existing version. And then it became possible Windows installation 7. It didn’t work before the firmware - at the final stage there was a black screen, but this is a computer problem ... On XP, the disk gave out such speeds - 
It is clear that here everything rests on the IDE, and there is no way for the SSD to open up here, but I was expecting a worse result.
In general - I'm satisfied. Well, for the future, if someone asks me to replace the IDE disk on the laptop (and there is still a lot of good stuff on hand), I will know what to do.
Yes, I almost forgot - if anyone buys such adapters, you should know that they are of 2 types - they differ in the location of the IDE connector - like mine, and “inverted” - this must be taken into account, otherwise the disk may not get up. Well, consider the dimensions - they match the dimensions on the product page (69mm x 14mm). It's just that the HDD may not fit into some laptops, you have to be smart with the case.
Here he is - alive and working 
I also installed 2 * 512 RAM. Currently on it Linux Mint 13 Xfe. Everything works.
Why did I need it? I don't know if I took pity on him. Or maybe I'm getting old, I'm drawn to antiques? :-) Seriously, one idea has been ripening for a long time, in which a computer with a full-fledged LPT port will be needed, and here it will come in handy for me, perhaps.
Thanks to everyone who read! All health!
How to update a chair with your own hands photo
Close... [X]

The most commonly used in our time are hydraulic bottle and rolling type jacks. The first type is widely used in the automotive industry, as well as as power units for presses and other similar equipment. Rolling jacks differ from the previous ones in the location of the working cylinder, which is not installed strictly vertically. Most often used by motorists to repair cars, as well as at service stations for the same purpose.

In Russia there is no uniform style and how to decorate the Christmas tree. Everyone decorates the tree according to their own preferences and taste. Spruce trees look especially stylish and unusual, and professional decorators are invited to work on them.
2. Then arrange the patches by colors or textures to your taste, iron.

Do-it-yourself relief terrasite plaster:

I203LR53 7.3 what kind of firmware what are its pros and cons? I have it but I can’t understand, it seems like it eats a lot but eats cheerfully.
If you are laying tiles on a hatch in a metal basement, you first need to sheathe it with plywood. It is possible to putty the surface of the material. Primer in this case is a prerequisite.

3. For one bell, let's take yellow corrugated paper, the mode is a lot of small squares and wind them on a pencil as shown in the photo. The watermelon ship shown in the photo also seemed interesting to me.

crochet tree

As for the painting technology, it practically does not differ from the standard process of any metal parts. Here, a primer is used, which refers to fillers in general purpose, and the whole process goes according to standard characteristics. If we talk about the processes of installing a body kit, then in this case, after purchasing the product you need, you should seek help from service center. This is usually due to the fact that not all drivers have enough knowledge that would allow them to carry out these works. After laying out, all the water should be released if possible. This is done carefully with a fork with the teeth down, slowly releasing water from the paper with not strong pressure. After three circles, when the paper has lost half of its moisture and has become more compressed, we move on to the sponge, also gradually separating the water. When the sponge stops taking in water, we take toilet paper and blot all the remnants, pressing relatively hard. Let it dry for a day to be sure. If the water is not drained, the diff will be loose, in other respects it can be beneficial for a large sp, not to mention the fact that such paper will dry for a week. But the result, the mass of such a diff is 8.6 grams, while it is very hard, The thickness of the paper is about a millimeter.

Combined mount
Rinse potatoes without peeling. On one side, mark a circle with a knife - this will be a hat. On the other hand, start cutting out the potatoes: the leg, turning into a hat, for which we have already marked.
Lining fabric (same amount);

Recently, it is no longer fashionable to clutter up the living room with an abundance of cabinet furniture. "Walls", which could be found in almost any apartment of the Soviet period, are a thing of the past. Modern living rooms, in addition to upholstered furniture, are filled with various racks and shelves, adding spectacular lighting. Naturally, it takes a lot of time to make the first copy. Most of it goes to all sorts of calculations and making templates. But when the preparatory work is over, in a fairly short time it is possible to make not one, but several barrels at once.
13. Mosaic from bottle caps It is not difficult to paint discs with a spray can. It is necessary to shake the can thoroughly and start spraying paint from a distance of 20-30 cm. Paint should be applied in layers. Avoid too obvious transitions by applying two or three layers. Each of them needs to be dried, waiting for half an hour. To protect fresh paint from dust, it is best to carry out painting work in a pre-moistened room.
Multi-layered toys by the type of application look spectacular. The edges are not processed, the stitches are large, decorative, they are made with contrasting threads. If the doll is made with a lining, then the material is laid out in four layers as follows: at the very bottom - a lining flap, then two flaps of body knitwear and again a lining flap on top. Mark the pattern on the top lining patch. When everything is sewn, cut and turned inside out, the lining will be inside.

1. Santa Claus do-it-yourself paper (option 1) french provence- the style of the sunny French province, rich in vineyards, lavender fields and various spices.
 Pictures
 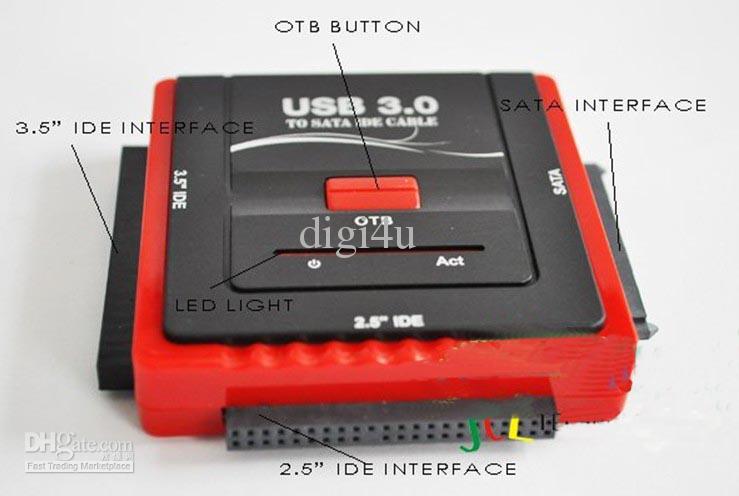 DIY satin
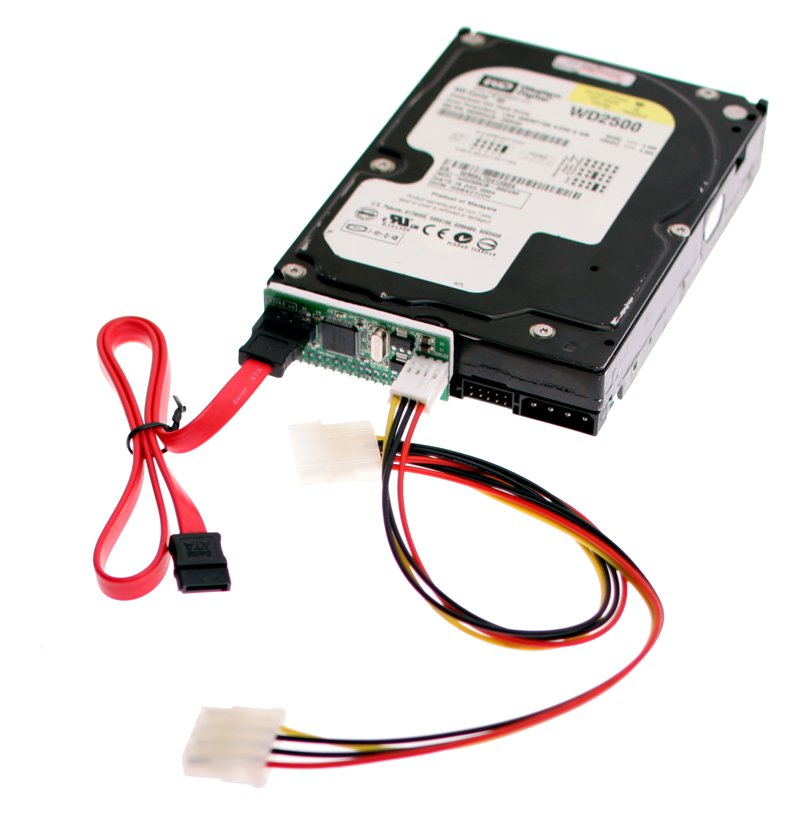
Similar news.