
 If your camera supports RAW photo and you want to know how it is better than standard jpeg, then this article is written for you.
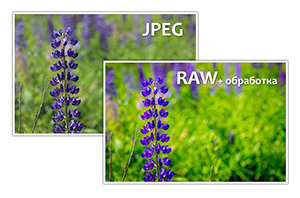
The main feature of the RAW format is that it records much more information about the picture than jpeg. And full information allows you to refine the picture, change the exposure, darken overexposure and brighten dark areas. And turn even the most ordinary picture into a masterpiece.
Grayscale values are also expressed as a percentage of black ink coverage. This mode uses one of two color values to represent pixels in an image. Images in bitmap mode are called 1-bit bitmaps because of their depth.
This mode creates 8-bit image files with 256 colors. If a color in the original image does not appear in the table, the software chooses the closest color to it or uses anti-aliasing to simulate the color from the available colors. Although the color palette is limited, Indexed Color mode reduces file size while maintaining sufficient image quality for certain products such as multimedia presentations and web pages. Modification options are limited in this mode.
To process the RAW format, two programs are mainly used: Adobe Photoshop and Adobe Lightroom. Newer versions of Photoshop have a built-in application Camera Raw processing RAW format. the most powerful program specially designed for sorting and processing entire albums of RAW photos.

What is Photoshop?
This mode, which is especially suitable for specialized printing, uses 256 gray levels per image layer. The following rules apply to converting images in layered mode.
- Layers are not supported and are therefore flattened.
- The color layers of the original image are converted into live tonal layers.
A little vocabulary before we start. What is the purpose of image processing and image compositing? Once this work is done; what we call pre-processing, we then move on to the actual processing, which is to present the remaining information in the most appropriate way for what we want to do.
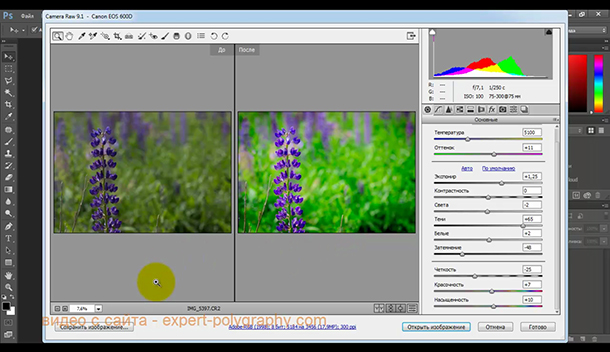
In general, the editing window is almost the same. At the end of the article in video lesson You will be able to see how to process RAW photos using Adobe Photoshop.
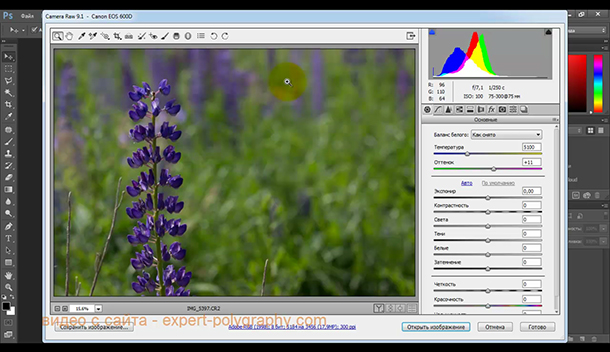
We drag our RAW image into the Adobe Photoshop window. The Camera Raw add-on launches.
However, in the astro image, the amount of light recorded is very low, but instead the noise increases rapidly with exposure time, so there is almost as much noise in the deep sky image as the signal. Image compilation is the use of information from multiple images of the same object to create a single final image.
There are two main reasons for using this process. For example, instead of doing a 20-minute pose on a nebula, you can do 10 2-minute poses and “add” them numerically. Incidentally, this also reduces the noise that increases with exposure time.
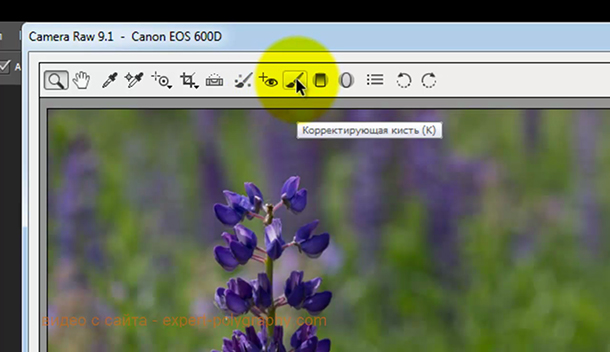
At the top of the window there are buttons such as: zoom, drag, crop. Adjustment brush, allows you to make corrections in certain areas of the photo.
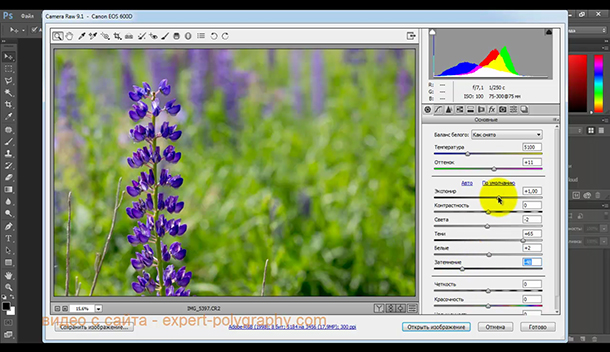
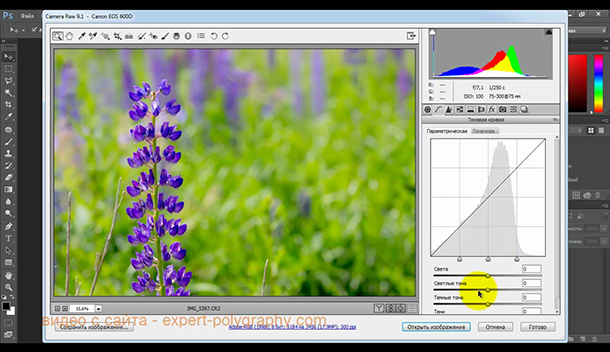
The main adjustment window is displayed on the right. Here you can adjust the exposure, temperature, color, and brighten or darken the various tones of the photo. It is this panel that brings the photo to life. Properly selected settings allow you to "see" the details that are lost in a regular photograph taken in JPEG format.
At the end of the pose, we "discharge" each pixel and we count the electrons stored in each pixel. The more electrons there are, the brighter the pixel is, so in theory a pixel has 0 electrons as long as it's in darkness, and then it gains electrons every time it hits a photon.
Editing photos in Lightroom
In practice, it's not that easy! This is called thermal noise. More importantly, the pose is long, it evolves over time, and of course it's worse if it's hot. Lower so that the top end reduces some of that noise. So even at rest there are electrons in pixels!
At the top, there is a histogram of the image, and below it is additional information about the image.
The next window is called Tone Curve.
The value of this current must also be removed; by chance, for a given sensor, exposure time is constant. Therefore, a different correction will be required for each sensitivity used. These areas can also be "mapped" once and for all for a given sensor.
They can be removed with processing, but it's better to have a clean sensor. All of these may indicate that your sensor is good for debris; it's nothing, it's just for astrophotography, the recorded light levels are so weak that the slightest defect is perfectly visible and that it works at the limit of the material's capabilities.
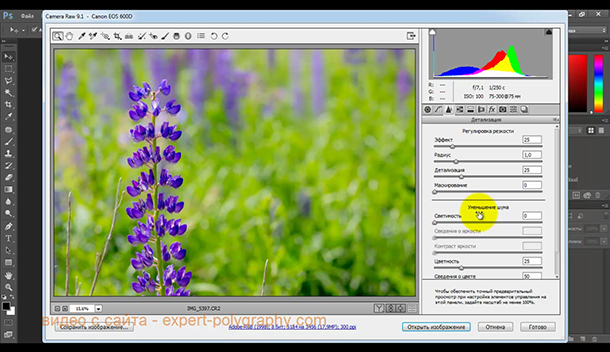
The next tab "Details" allows you to get rid of digital noise in the photo.

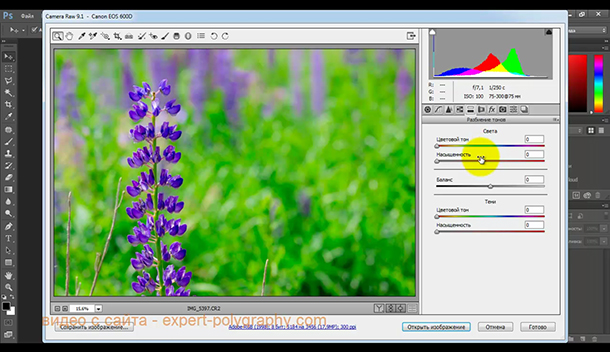
The next tab allows you to set the color tone for the shadows and highlights of the photo.
Since we haven't seen what compositing is yet, we'll take the example for a single image. If we wanted to compose, we would simply have to do the same on every image. For image processing we need. This is not a problem, anyway the color correction program is designed for "normal" shots and does not understand stellar radiation! So we wouldn't have the right colors.
It is more than desirable to do "dark" before or after shooting, and especially under the same conditions. To record only the bias current, it is enough to make a very short pose with a cap on the lens, thus one does not record either light or thermal noise.
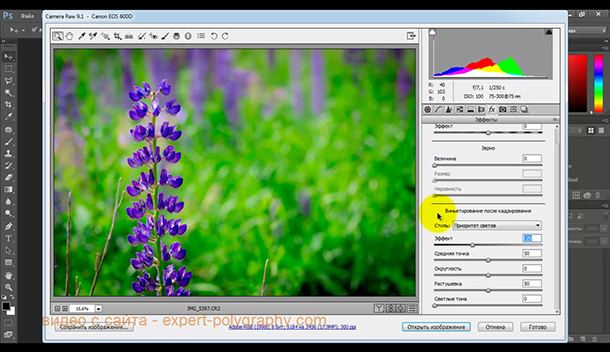
The Post-Crop Vignetting effect lets you darken or lighten the edges of a photo to draw more attention to the center.
This is the hardest thing to do, is to take a plan shot evenly lit to get a "grey" image that will reveal differences in sensor sensitivity and dust. The flat field must be made with the same optical combination as the photograph being processed.
Make a map of defective pixels. In the case of compositing, we make several images of objects, but also some dark ones that are also compositing, this is also true for the displacement and flat field images, which are also composites. Now we have an image free of its displacement, and the same for darkness.
Let's press the Y button below the picture and see how it was and how it has become. If the result suits, click save or open it in Photoshop for further refinement.
The finished result looks like this:
![]()
It's finished for cleaning, and then if we don't combine, we recompose 3 layers, applying a correction factor to get the final image in color, then we can start the actual treatment. Representing the advantages and limitations of what is also called a "negative" digital or raw sensor.
In most cases, there are two types of file recording formats. These are sensor signals recorded as is. In fact, this format is more interesting because it is more flexible, allowing more freedom in treatment, but it is not without limitations: it is heavier, more resource intensive and requires "post-processing", also called demosaicing or simply development.
Next video lesson you will see how to edit raw photos in adobe photoshop:
Processing RAW photos in Lightroom 6
A small sketch on the topic of processing RAW format in photoshop. I know that it’s better to take pictures without processing at all, but at home this is not always realistic, unfortunately.
Since I am used to this program and do not want to change it, I decided to take a closer look at its subroutine for RAW.
So the original photo
No, unless you have the intention, let alone the need to pull the quality of your images. Not unless you master a computer tool or want to learn new imaging software. Not for some professionals who have to shoot at very high speeds, whose images have no artistic dimension and sometimes have to be immediately sent to the editorial department. Yes, if you have a DSLR to see a high-end CD, you are comfortable with the basics of digital processing, and you are concerned about the quality of your images, you should logically turn to this solution. Like in filming, we never work negatively, but this is the original that we use to create endless images with all the options imaginable.
Let's start running our flash file, and click the File>Open tab> a window with images appears, select RAW files and click open
In FS, such a window will appear in the program 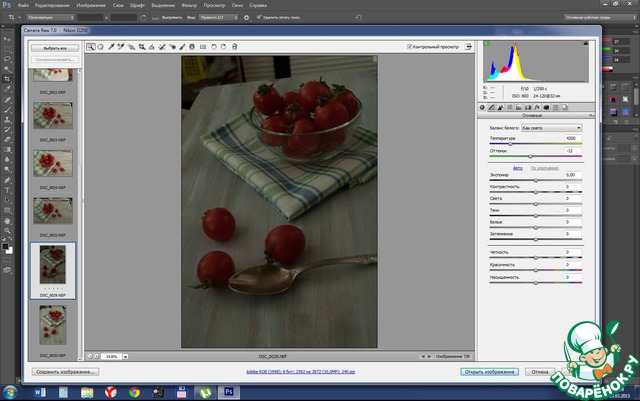
On the left is a menu with selected photos.
Top icons for editing (crop, horizon, etc.)
On the left is a lot in the car circle, the first tab there is the main photo settings. Here you can tighten the light by playing with the runners. You can even set a different hue for the entire photo. 
Adjustments and changes that can be made to these files later are always reversible, and the compression algorithm doesn't actually destroy your image every time you save it. Please note that the slightest operation, be it crop or even rotation, will degrade the image during recording. However, one must acknowledge its mastery in terms of compression for a good end result.
In order not to get lost in technical explanations, there is nothing like two concrete examples. All together to make a beautiful postcard, in the evening or early morning when the light is the most beautiful, beautiful scenery and sky with enough clouds to add material. Often when we see the result, we say "it doesn't", in other words, the image doesn't restore what you saw. Normally, the sky is burned, there are no more clouds, giving way to a desaturated sky or all white. If you haven't set your camera's white balance beforehand, your photos will appear yellowish, sometimes green if there are neon and soft colors. You are making a landscape. . The first step is to set up your mailbox.
Then you can partially or completely remove the noise in the photo, it all depends on their number.
In the red circle in the next photo, the tab where the settings are located is marked. The sliders are divided into two parts, those on the bottom and are responsible for removing noise. We adjust until we get more or less suitable results. 
Watch out for automatic modes! Therefore, it is recommended to remain in the classic modes: manual, priority opening or priority speed. This format is heavier, your memory card will fill up, of course, much faster. Here are common problems at the beginning.
Imaging and Treatment
Your operating system may not recognize this format and therefore may not generate thumbnails. If you delete them, you will lose the settings associated with the respective images.
- They actually contain the settings you have applied to your images.
- They are very lightweight because they are only text files.
In this photo, the vase turned out to be littered in order to align the photo as we need. Click on the tool in the upper panel with the corner pattern. and set the horizon on the photo at the angle we need. The program itself will set the framing according to it.
Here is what appeared after the horizon was set. 
The quality of our smartphone lenses has been constantly improving, in full compliance with Moore's law: the complexity of microprocessors doubles every year. As a result, photography apps multiply just as fast to edit those photos directly from the camera. But some apps are too pro, others are too simplistic, others are finally designed for a niche audience. So to better spot us in the middle of this weaving sentence, here are the top 10 best free apps to retouch your photos.
You will be able to impress your loved ones with photos worthy of professionals or on your next to see yours! All of these options may seem too complicated at first, but you still have the option of "auto-enhancement" to keep things simple. First of all, it has a built-in photo app, which, unlike others, is not useless. This adds an interesting subtlety: the ability to separate the point of focus from the most open point, which gives you more control over the image you take.
The cropping frame can be edited in size but the angle of inclination will remain the same.
Save changes button at the bottom left. Press a window appears 
The first line is the folder where you want to save the image.
2 line name
3 select the file extension in the drop-down list.
4 set the quality if there is such an opportunity. Click save.
So here's what I ended up with 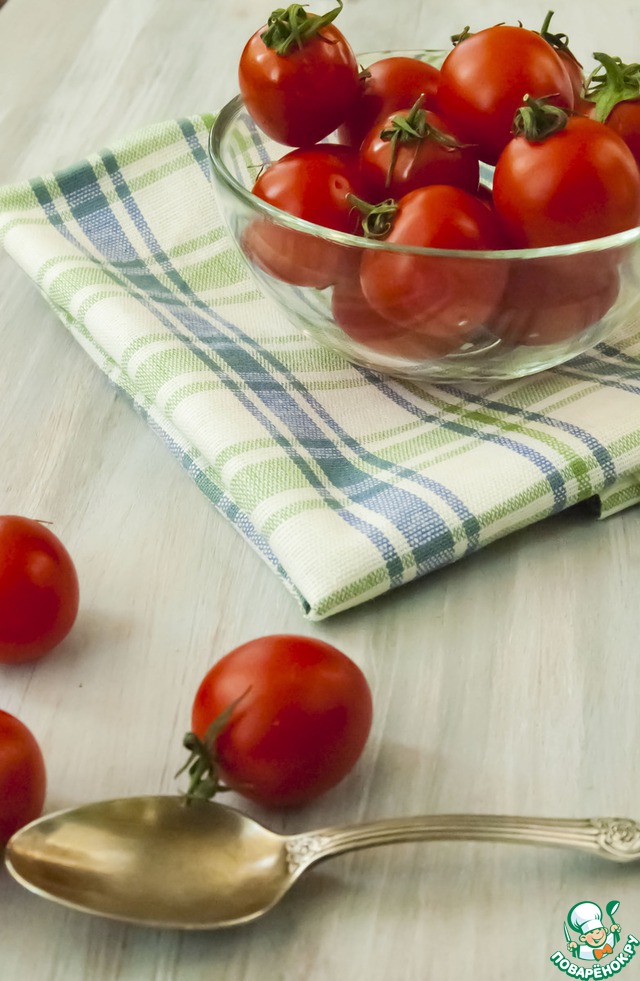
Filters are well chosen by different; each of your photos can be easily resized for a guaranteed effect! It can be a little tricky, it will take a little time to accommodate the many options available. But for creative minds and persistence, the app is perfect for retouching your shots! A very complete application, but rather specialized in portraits. Its options - filters, brightness adjustment, contrast and detail level - will allow you to mask the little imperfections you find or beautify your images.
And here is the same picture but I edited it in jepeg format, this is what I was able to get. There is more noise here. Not sure if it will be visible in thumbnails. 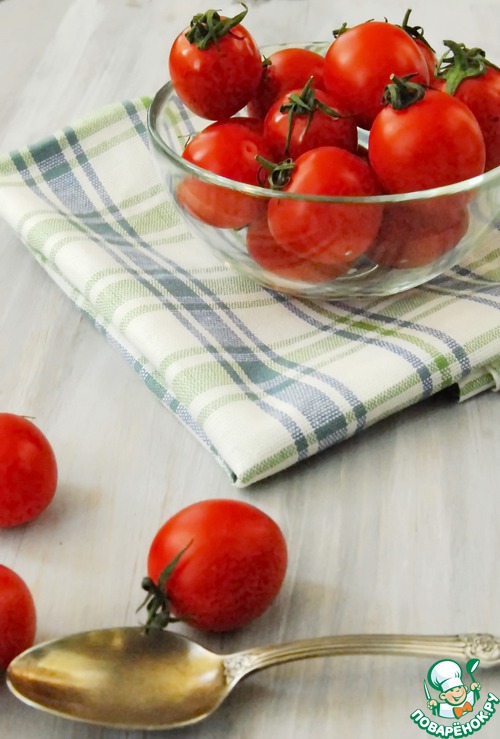
And he also does FS on top of the original RAW image in the same folder additional file with the same name in the XMP extension. if you delete it, you can reopen the file in its original form.
I hope that the information will be useful to those who already work with Photoshop and want to try shooting in RAW format.