Automatic updating is an important feature of any operating system. Thanks to it, the computer receives important updates on time, making the system more stable and secure. In Windows 7, the feature is enabled by default. This means that if there is a connection with the Microsoft servers, the update service checks for fresh packages, downloads them and installs them. Usually, all processes proceed virtually unnoticed by the user, but when there are constant offers to upgrade to 10, this is already too much.
Theoretically disable automatic download not worth updating. It is useful, because it closes security gaps, optimizes the operation of the OS, adds new features to it (regarding the “tens”). There is also a list of reasons why the auto-update service should be disabled:
- The user does not like that the Internet speed drops during the update and / or the PC cannot be turned off for a long time.
- Expensive or limited wireless Internet on the computer.
- Problems after running the updated OS.
- Failures during the installation of update packages.
- There is not enough space on the system volume to increase the volume of Windows 7, which grows with each update.
Kinds
Nevertheless, before disabling the Windows 7 update, consider whether it is really necessary. In addition to deactivating the service, it can be switched to the following modes of operation.
- Fully automatic - operations proceed without user intervention, only notifying the latter of the completion of the installation of packages.
- Search and download of fresh fixes on a schedule, installation of packages is carried out by the user.
- Automatic check to notify the user when updates are available.
- Self-update is disabled. Everything is done manually.
The parameters are selected by the Update Center component.
Shutdown methods
The settings of any Windows are stored in its registry. You can get access to the key responsible for the Update Center settings in several simple and a couple of more complex ways. Let's consider them all.
Changing Update Center settings
Let's start by setting up the service for ourselves. To access the configuration interface, you need to open the Update Center in one of the following ways.
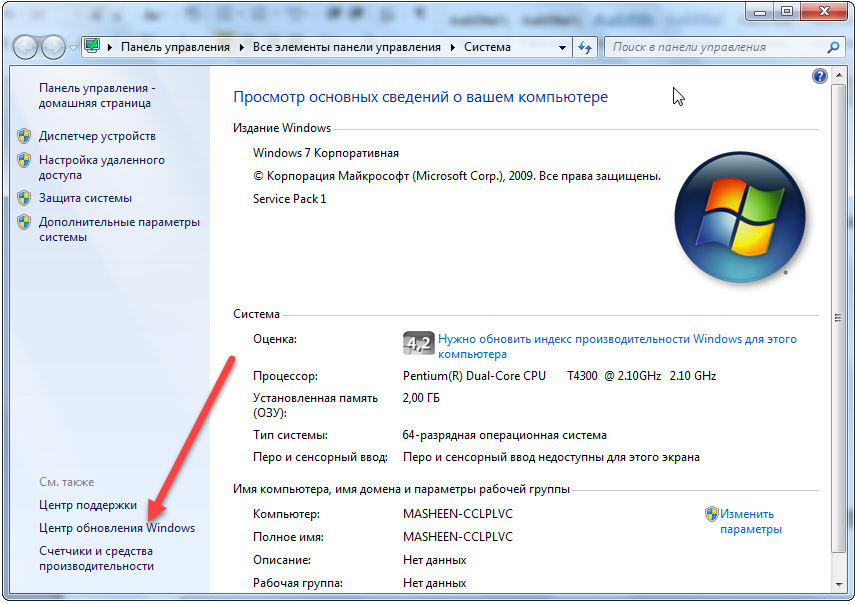
System
- Across context menu"My Computer" call its "Properties".
- In the left vertical menu, click on the corresponding link located at the bottom of the window.
- We go to the "Control Panel".
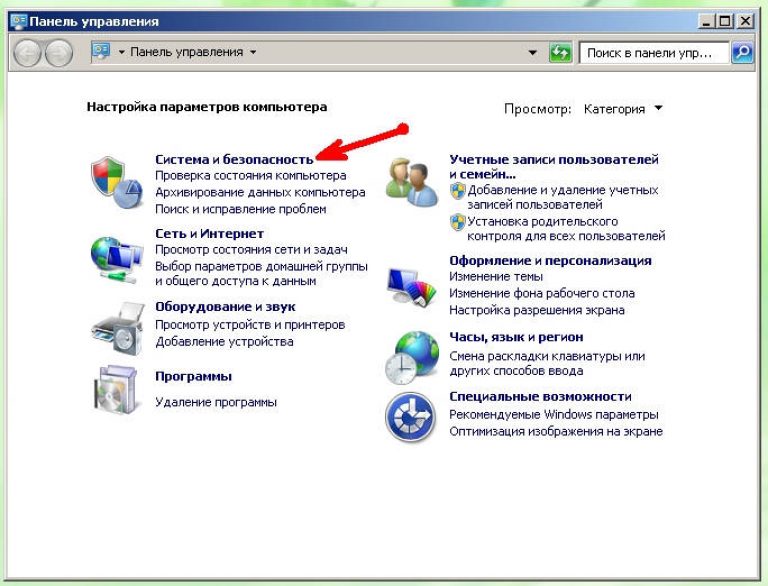
- Open the "System, security" section.

- We call the element of the same name.

If the control panel elements are rendered as icons instead of categories, the link to the element will be displayed already in the main window.
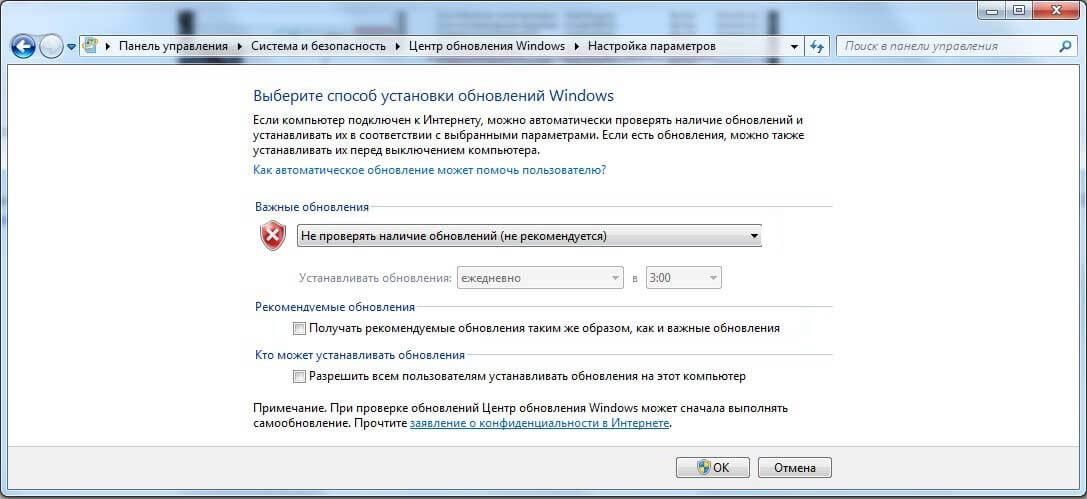
- So, after hitting the desired window, click "Settings".

- We move to the "Important updates" section and select the appropriate option from the drop-down list.
Only stopping the service will help completely turn off receiving updates on a Windows 7 computer.
Disable the service
Management of services in the "seven" occurs through:
- direct editing of registry keys, which is very inconvenient;
- third-party programs for setting up the OS (we will skip this option);
- MMC console snap-ins;
- System configurations;
- command line;
- group policy editor (present in Win 7 maximum, corporate).
Removing a service from startup
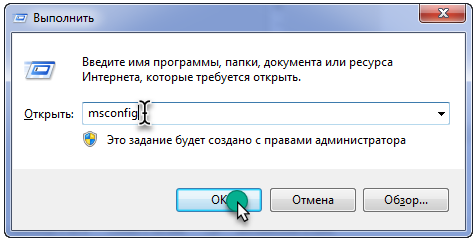
Disabling updates is most quickly done through the system configurator.
- We execute "msconfig" in the command interpreter window, which will open after pressing the Win + R keys or clicking on the "Run" button in Start.
- Go to the "Services" tab.
- Finding the Center windows updates” (maybe Windows Update) and remove the checkbox next to it.

- We save the new settings.
Until the end of the current session, the service will work, properly performing the tasks assigned to it. To apply the new configuration, Windows 7 must be rebooted.
Let's use the MMC console snap-in
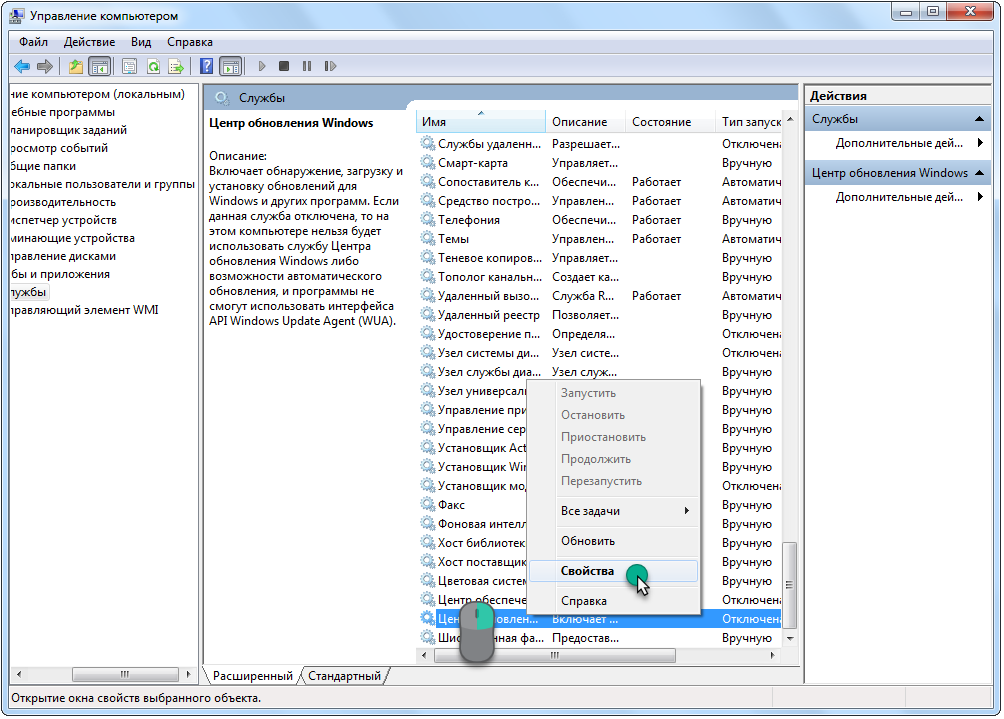
The system console snap-in of the same name provides access to the management of all services on a PC. It launches like this.
- Open the context menu of the "My Computer" directory.
- We call the "Control" command.

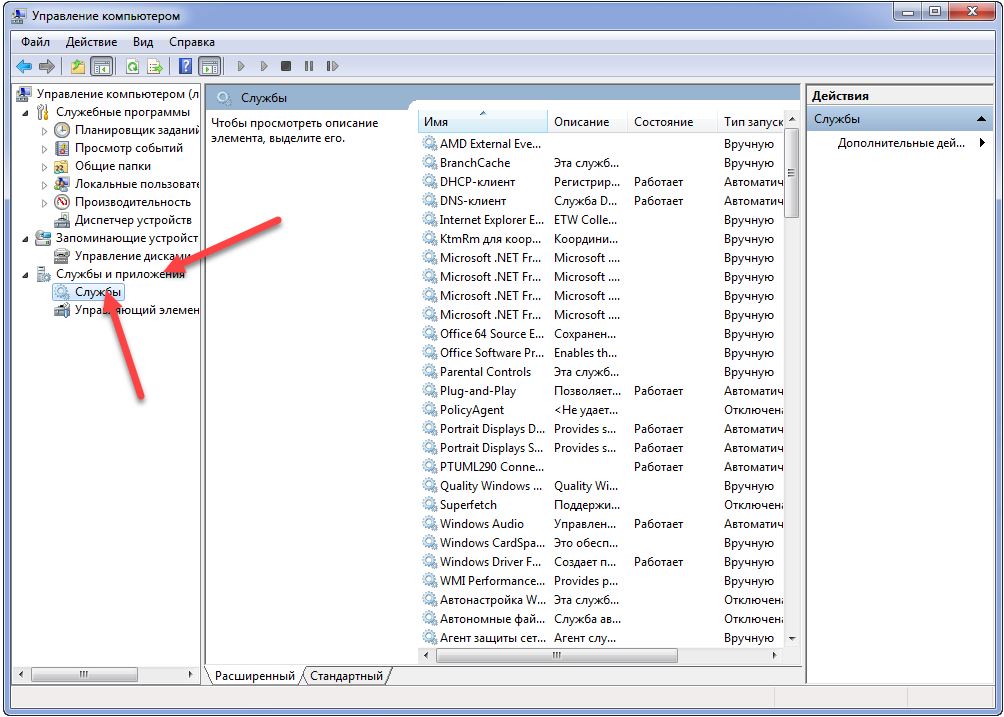
- In the left vertical menu, expand the "Services and Applications" item.
- Next, click on the "Services" link.
More simple option calling the same window will launch the "services.msc" command through the "Run" dialog.
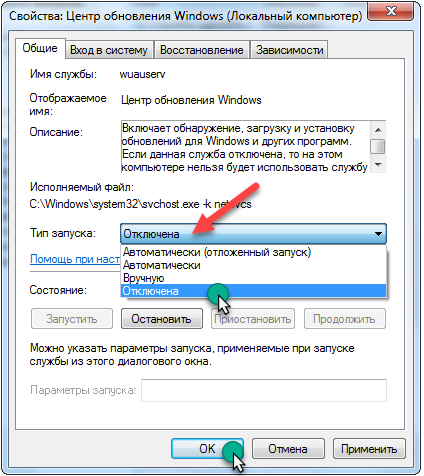
- We scroll through the list of services to the very end and open the "Properties" of the Windows Update service.
- In the "Startup type" drop-down list, select "Disabled" instead of "Auto" in order to say goodbye to automatic updates forever.
- If you need to disable the service now, be sure to click "Stop".
- Save the new settings with the "Apply" button and close all windows.
The PC does not need to be rebooted to apply the settings.
Group Policy Editor
Another MMC snap-in called the Group Local Policy Editor will help you configure any system setting.
In the home edition of the "seven" it is not available!
- The tool is launched by running the "gpedit.msc" command through the "Run" window.

- In the "PC Configuration" subsection, expand the "Administrative Templates" branch.

- Open Windows Components and look for Update Center.
- In the right part of the window we find the parameter, the name of which begins with "Setting auto-update".
- We call its settings.
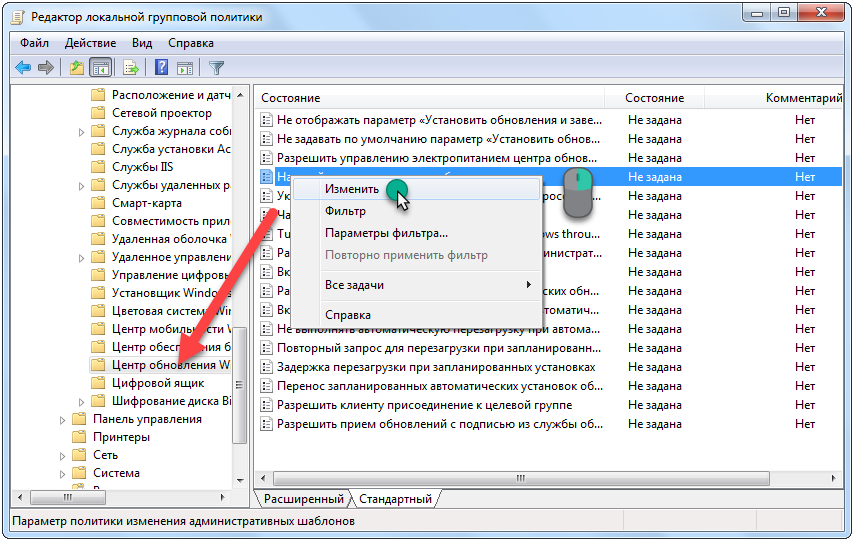
- Move the checkbox to the "Disable" position and click "OK" to close the window and save the changes.

Let's use the command line
Through the command line, all the same operations are performed as using the graphical interface, and even more, but in text mode. The main thing is to know their syntax and parameters.
The "cmd" command is responsible for calling the command line.
- Open a command interpreter and execute it.
- In the black window, enter the text command "sc config wuauserv start= disabled" - sets the service start type to "Disabled" - and press "Enter".

The service is stopped with the "sc stop wuauserv" command.

Registry Editor
The last way to remove the annoying installation of updates is to disable the service responsible for this directly - through the registry editor.
- It is launched with the "regedit" command.

- As in Explorer, go to the HKLM section.
- We follow the directory "Windows" on the path indicated in the screenshot.
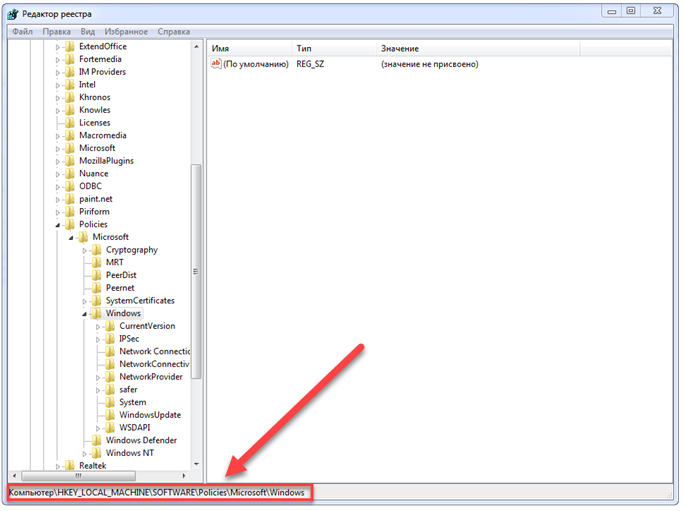
- Opening a directory
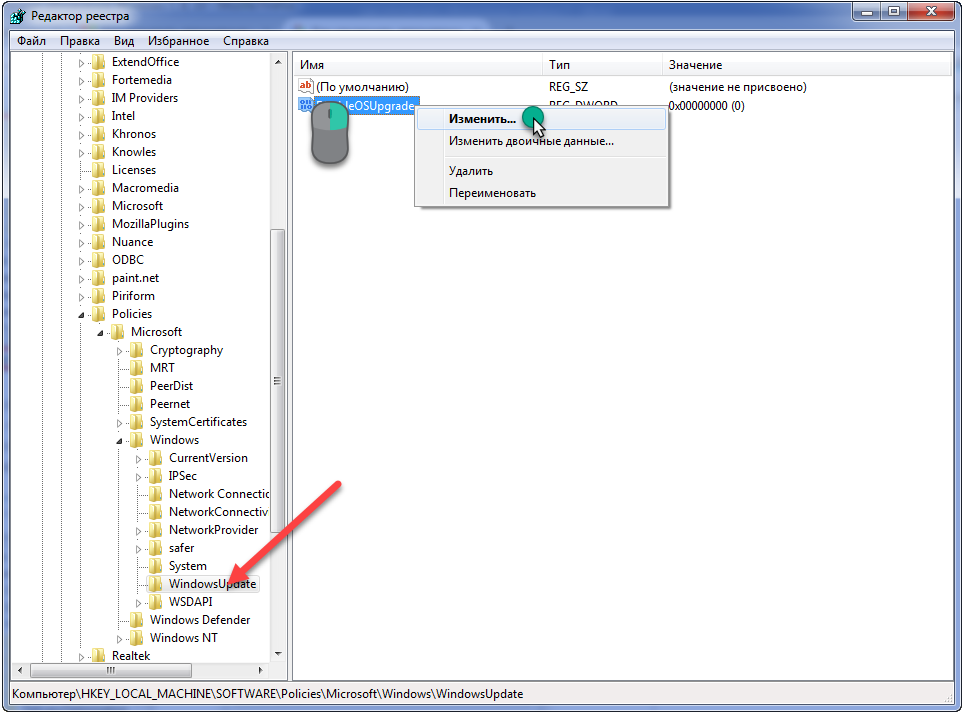
- Double-click on the "DisableOSUpgrade" parameter or call its editing dialog through the context menu.
- Enter the unit as the value and press "Enter".
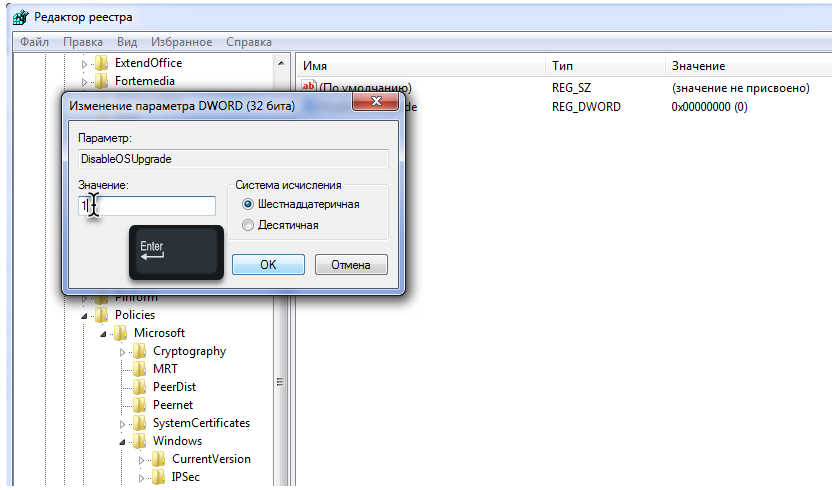
After restarting the computer, you will forget about the Update Center once and for all.
The service is enabled by changing the value of the key back to zero.
If the specified section or key does not exist, create them yourself via the context menu. Key type: "DWORD 32 bit Value".
However, keep in mind that security updates should still be installed manually at least periodically to keep the system in a stable state.
Everything changes over time. It seems that we ourselves know this very well, but when it comes to the operation of a computer, for some reason, many people completely forget about it. And it's not even that the device itself becomes obsolete over time. Often, users simply forget to enable update support for their dear Windows 7 OS. As a result, after working like this for several months, and if you are lucky for years, it starts to slow down, wither, and so on like that. Therefore, whether you want it or not, you still have to learn how to run the Windows 7 Update service on your PC.
Method #1: Launch from the taskbar
At any time while working on your computer, this service for Windows 7 can be started directly from the taskbar. In this case, we act like this:
- left-click the icon that hides the program shortcuts in the taskbar;
- find the shortcut "Support Center" and click on it with the right mouse button;
- in the menu that appears, click on the item "Open update center ...":

As a result, the service will offer to choose a method for installing updates for Windows 7. At this stage, you can make a number of settings:
- determine who is allowed to update the operating system;
- choose to receive a Windows notification;
- install support for recommended updates, etc.
However, what is really required of us is to include support for important updates. Note that the "Centre ..." service may offer several options for downloading and installing new files for Windows 7. However, in this case it is better to trust operating system update automatically. To do this, select the appropriate option in the "Important updates" section and click the OK button:

That's basically it!
Option #2: Launch from the Start Menu
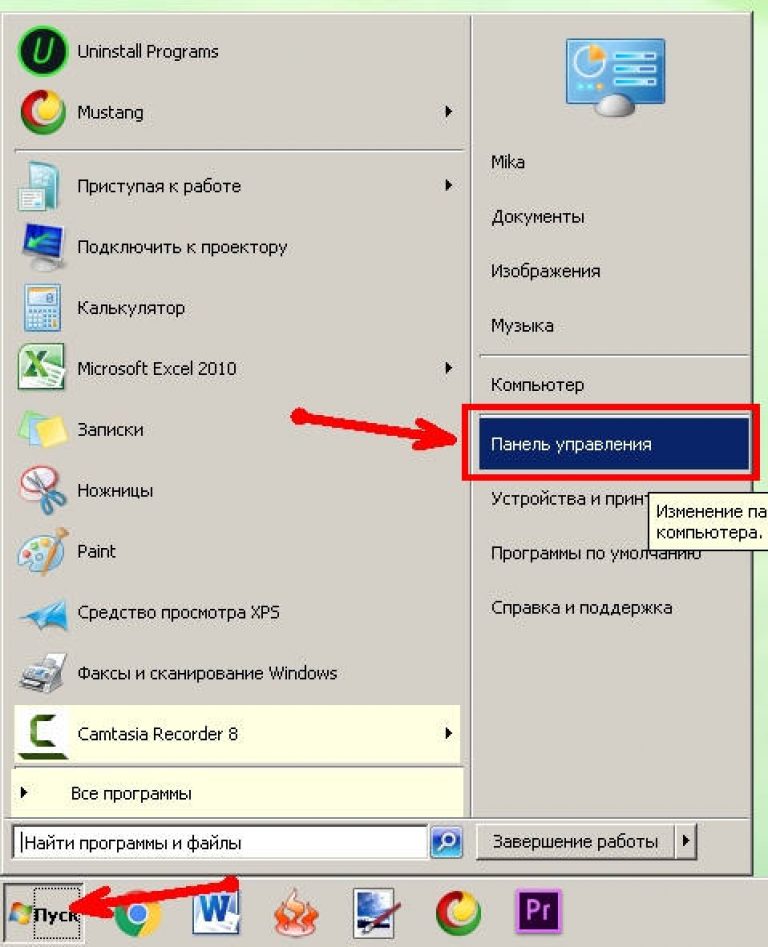
In order to get to the "Windows Update" and start the corresponding service, you can use the "Start" menu. To do this, press the "Start" button on the taskbar or a key on the keyboard. Next, select the item "Control Panel", and in it -:

As a result, the system center window will open. From this point on, we act in the same way as in method No. 1: open the "Settings" section, select the automatic launch of important updates and save the settings.
Method #3: Start via the Run utility
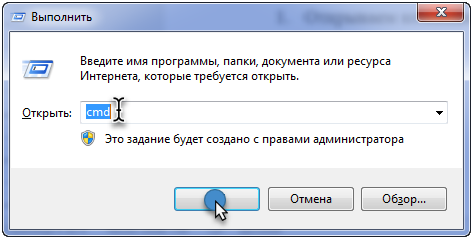
You can also start the process on a computer with OS Windows 7 from the Run program. You can open it with a simple combination of hot keys and R. After the utility has started, type in the cmd command for it and click OK:
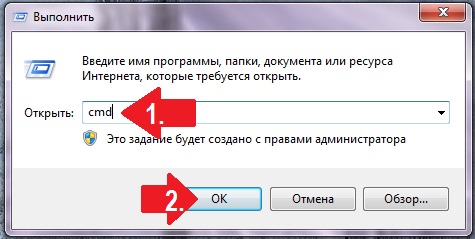
As a result, it will open, as you already correctly understood command line. We act like this:
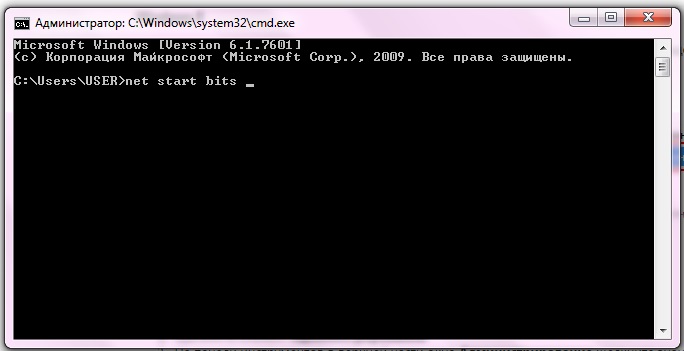
As a result, the service will start automatically.
Method number 4: Launch through the task manager
You can also load the service on Windows 7 using the wuapp command. To execute it, press Ctrl, Shift and Esc at the same time, go to the menu "File", select the item "New task" and enter the wuapp command to execute:
![]()
This will open Windows Update. Next, follow the steps from Method 1.
Method #5: Launching via Administrative Tools
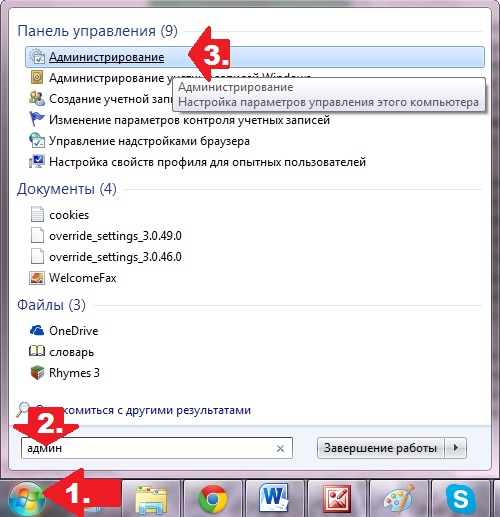
To start the service for OS Windows 7 using administration, open "Start", type the word "admin" in the search field and click the first item in the list that appears:
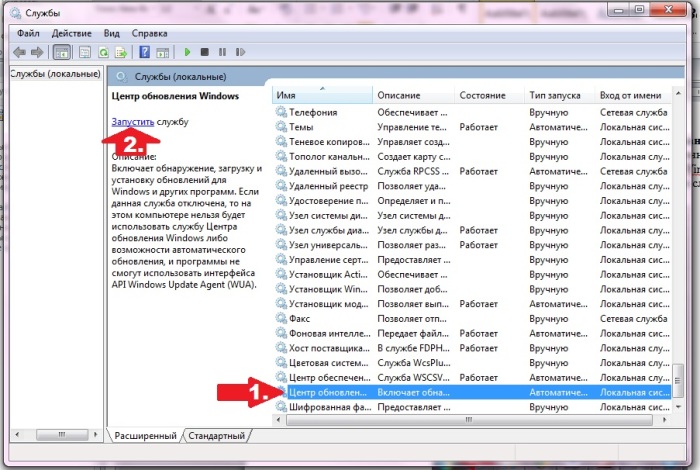
After that, in the "Administration" window, find and select the "Services" item. Then, in a new window, look for and click on the "Update Center ..." service and start it by clicking on the corresponding button on the screen:
#6: Set up from Action Center
In Windows 7, you can also run a service on your computer that will update the system through the Action Center. You can enter it through Start - Control Panel or straight from the taskbar. Whichever option we choose to enter, after the "Action Center" opens, in the "Security" section next to the "Update Center ..." item, click the "Change settings" button:
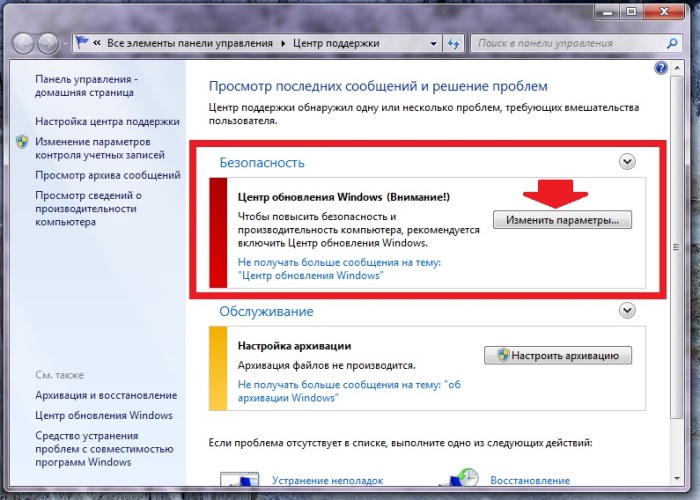
In the system window that appears, select the item "Install updates automatically ...":
![]()
As a result, we get a working Windows Service 7, which will update the system in a timely manner.
Option #7: Debugging a broken service
If the service is running but not running, proceed as follows:
- open the Run utility and type in the services.msc command for it;
- in the "Services" window, click "Update Center ..." and click the "Stop" tab;
- find the SoftwareDistribution folder through the search and rename it to SoftwareDistribution12;
- disable antivirus, boot optimizers and other programs;
- we return to the "Services" window and restart the service using the "Start" item;
- restart the computer.
You can be sure that one of the methods suggested to you will definitely work!
How to disable automatic update in Windows 7? Not always updating the operating system brings positive results. It also happens that after installing the latest update, problems with the video card or sound begin. In this case, it is better to wait until the new update has been fully tested on other machines, and only then decide whether you need it or not. In such cases, it is better to disable automatic updates. No matter how smart the computer is, the decisions should be yours.
About how, we have already considered. But after this video, there were many suggestions to show how to do the same in Windows 7. Many do not trust the new operating system and prefer to stay on the seven or eight.
And although my main system is such a sensational ten, but sometimes I boot up, both in the seven and in the eight. Fortunately, they are all present on my computer on separate disks. In fairness, I want to say that everything works much better in the seven. Even the sound is recorded better than in Windows 10.

And although Windows 7 has long established itself as a stable system, sometimes there are unexpected surprises in it. This usually happens after updates. It's no secret that many do not have licensed systems, so it's better to turn off automatic updates.
In order to disable automatic updates in Windows 7, you need to open the menu Start, and go to Control Panel.
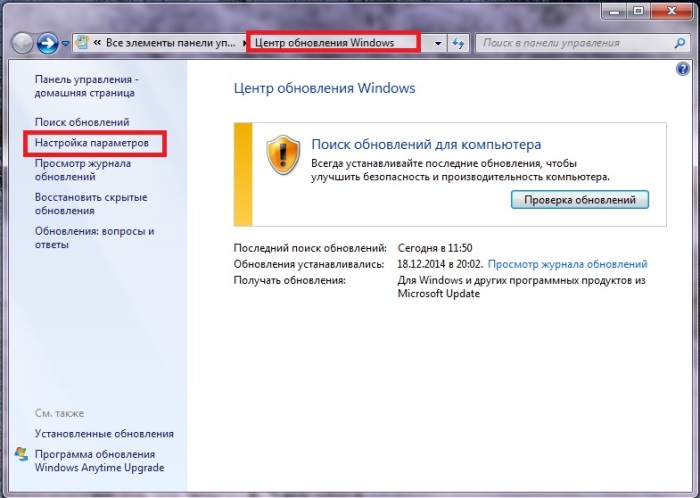
In the window Control panels click on the link System and security.
Find the block on the next page Update centreWindows and click on the link Enable or disable automatic updates.

In the block Important updates click on the little black triangle in the box on the right, and select an entry Do not check for updates (not recommended). Uncheck all the boxes below Receive recommended updates the same way, as well as important updates and Allow all users to install updates on this computer, and be sure to save your settings by clicking on the button OK.